
i3STUDIO Migration Guide - ENG
1a - Pre-requisites
1b - Supplementary prerequisites for ES-panels
2. Installation procedure
3. New features
4. Delayed installation of the new interface
5. FAQ
i3STUDIO will offer a completely new user experience and will keep your i3TOUCH fleet functioning smoothly while bringing an answer to your evolving needs.
With this guide, we will accompany you through the step-by-step process of installing i3STUDIO onto your i3TOUCH display.
In case you face any difficulties during the process, don’t hesitate to contact us.
1a - Pre-requisites
Before installing the new i3STUDIO firmware there are a few things that need to be checked:
Make a backup
Although all measures have been taken to make the updating process as fluent and user-friendly as possible, there is always a possibility something unexpected might happen during the process.
If you are storing any important work and files on your i3TOUCH panel we strongly advise you to backup all your work either on a USB stick or in the cloud before progressing with the update.Disconnect all external devices
For safety reasons it is best to disconnect all connected external devices such as laptops, external monitors, USB sticks, mouse, keyboard etc.Update all apps in the i3STORE.
In order to do so, please make sure your panel is connected to the internet and navigate to the apps tray and open the i3STORE application.
Once in the i3STORE make sure to click “update all” in the upper right corner,
wait for the process to finish and all apps are up to date.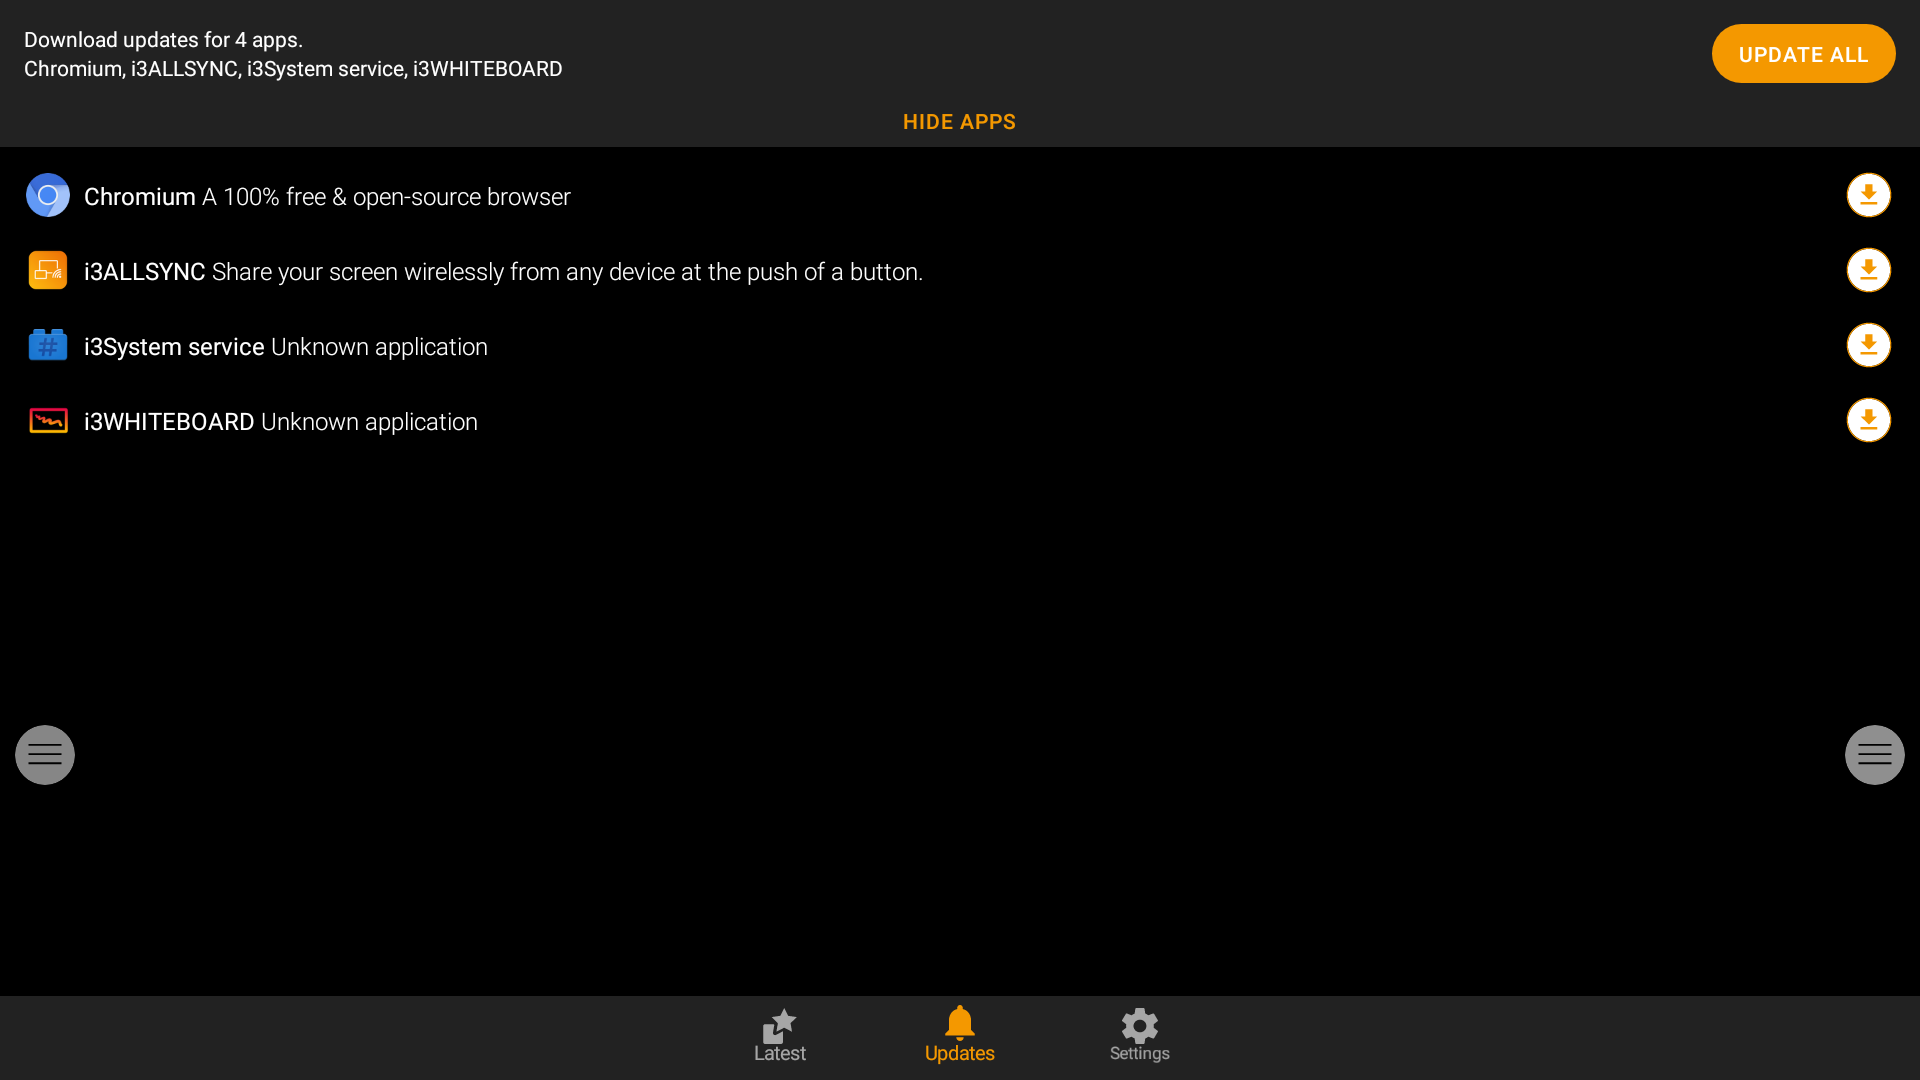
Execute a power cycle
In order to make sure all the installed updates are performing as needed it is strongly recommended to power cycle your panel. Turn off the panel completely by pushing and keeping hold of the power button and afterward turning the panel on again.
Pushing the power button for too short of a time will cause the display to go black enter the stand-by mode. This however is not a power cycle, it is necessary to turn the display off completely by pushing the power button for at least a few seconds in order for a popup message to appear.

Please make sure the default startup channel of your panel is set to “Android” before executing a firmware upgrade. If you don’t have the remote control of the display at your disposal, it will become impossible to alter the input source or access the android layer of the device after the upgrade.
You can alter the setting in the settings → Startup & shutdown menu (see image below)

1b - Supplementary prerequisites for ES-panels
Following steps only apply to users of the i3Touch ES series - panels, if you are using an EX or PX-version please skip instructions below and continue with section 2.
Unfortunately the low-level software architecture of the ES panel doesn’t allow for i3Studio firmware to be installed immediately. Luckily after investigating further a workaround was found to allow your ES panel to be able to run the latest version of the firmware!
In order to transition your ES panel we prepared an additional firmware (version 2.2.6) which needs to be installed on your ES panel before you will be able to upgrade to i3Studio.
Please follow the steps below.
Install additional upgrade
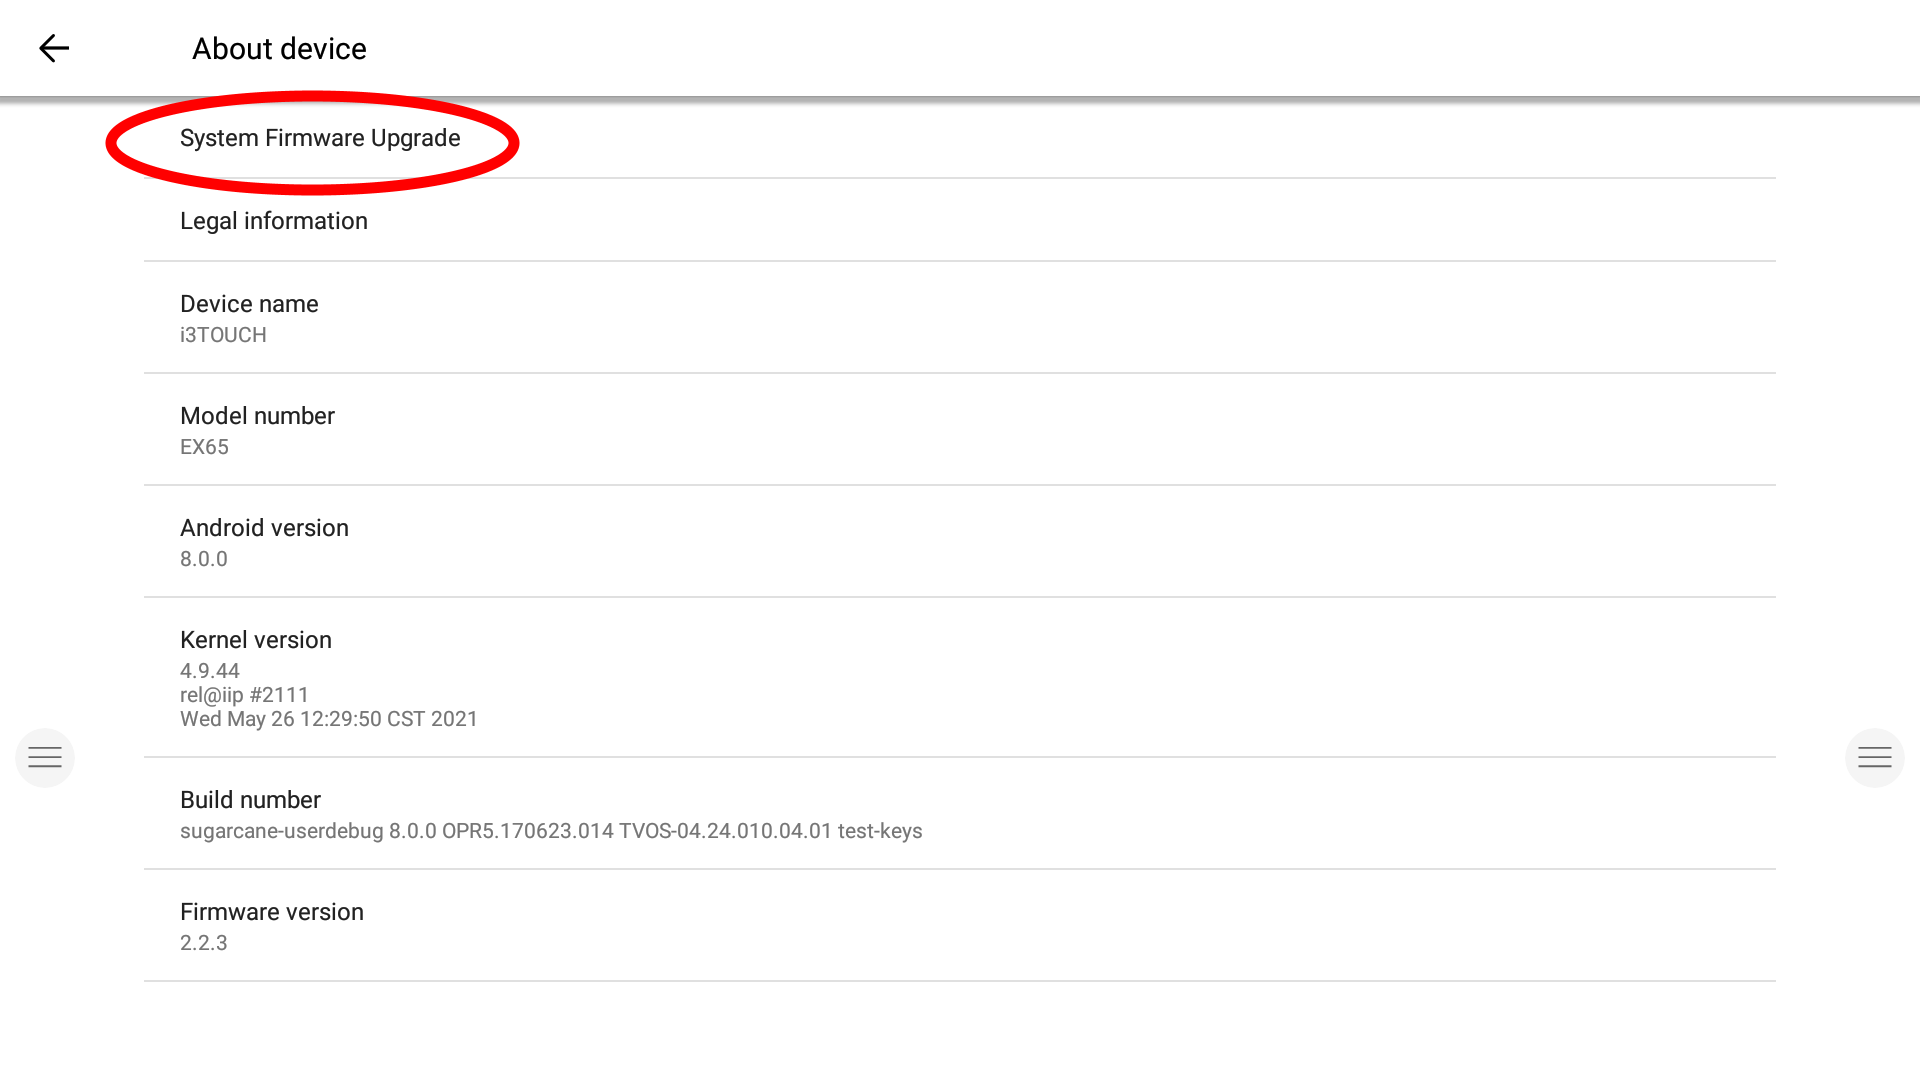
To install the additionally required upgrade navigate to the settings panel, and enter the “About device” menu. In this menu click “System Firmware Upgrade” on top
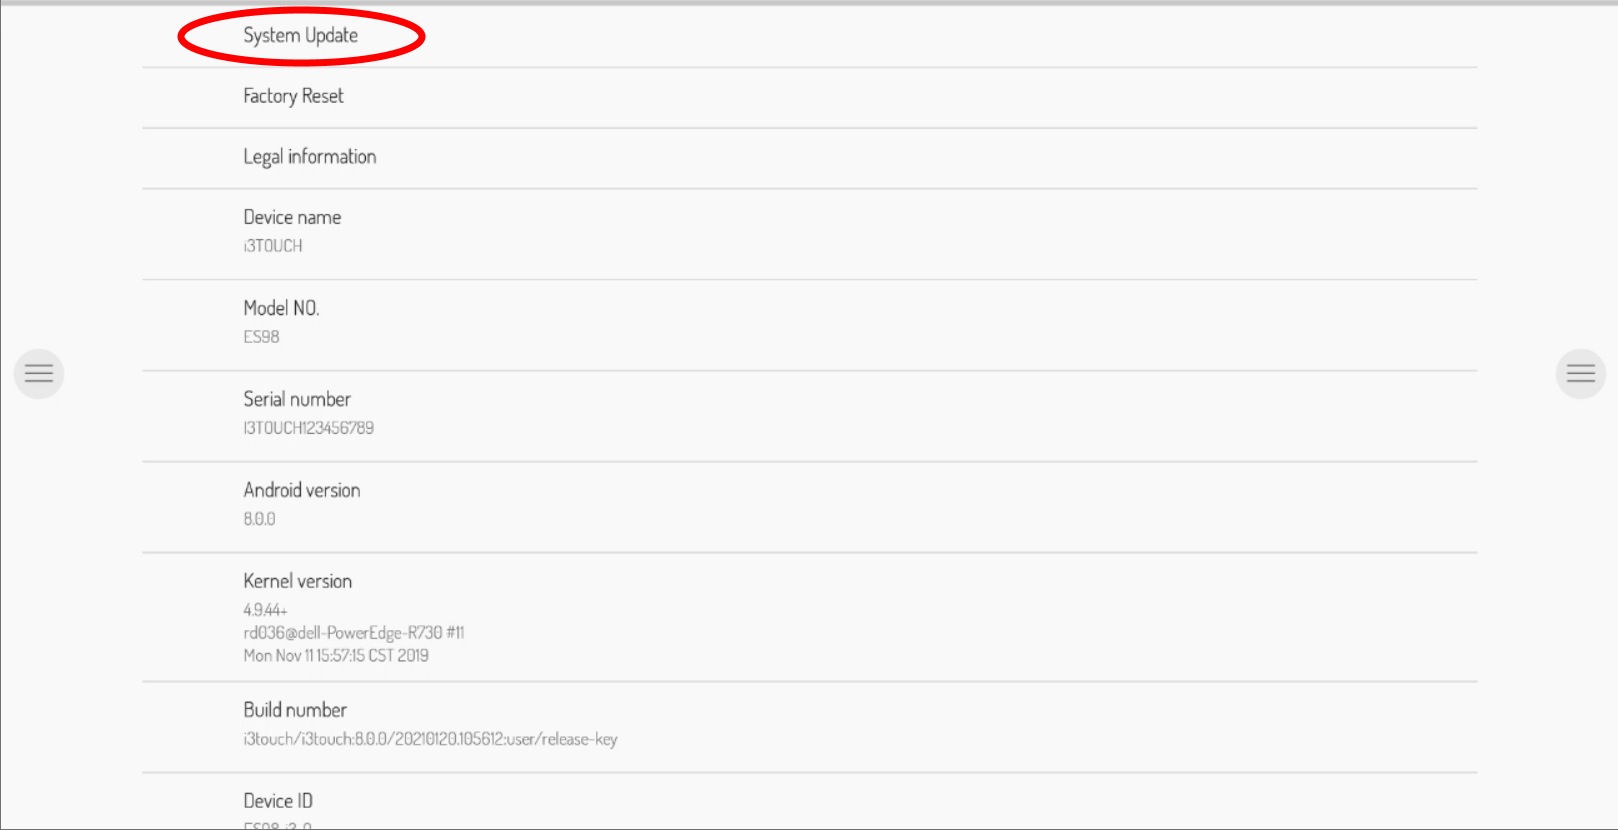
Depending on the firmware version currently installed on the panel the following step may look different.
The most important is to execute the update to upgrade to the mandatory intermediate firmware.
The version of this additional firmware is 2.2.6.
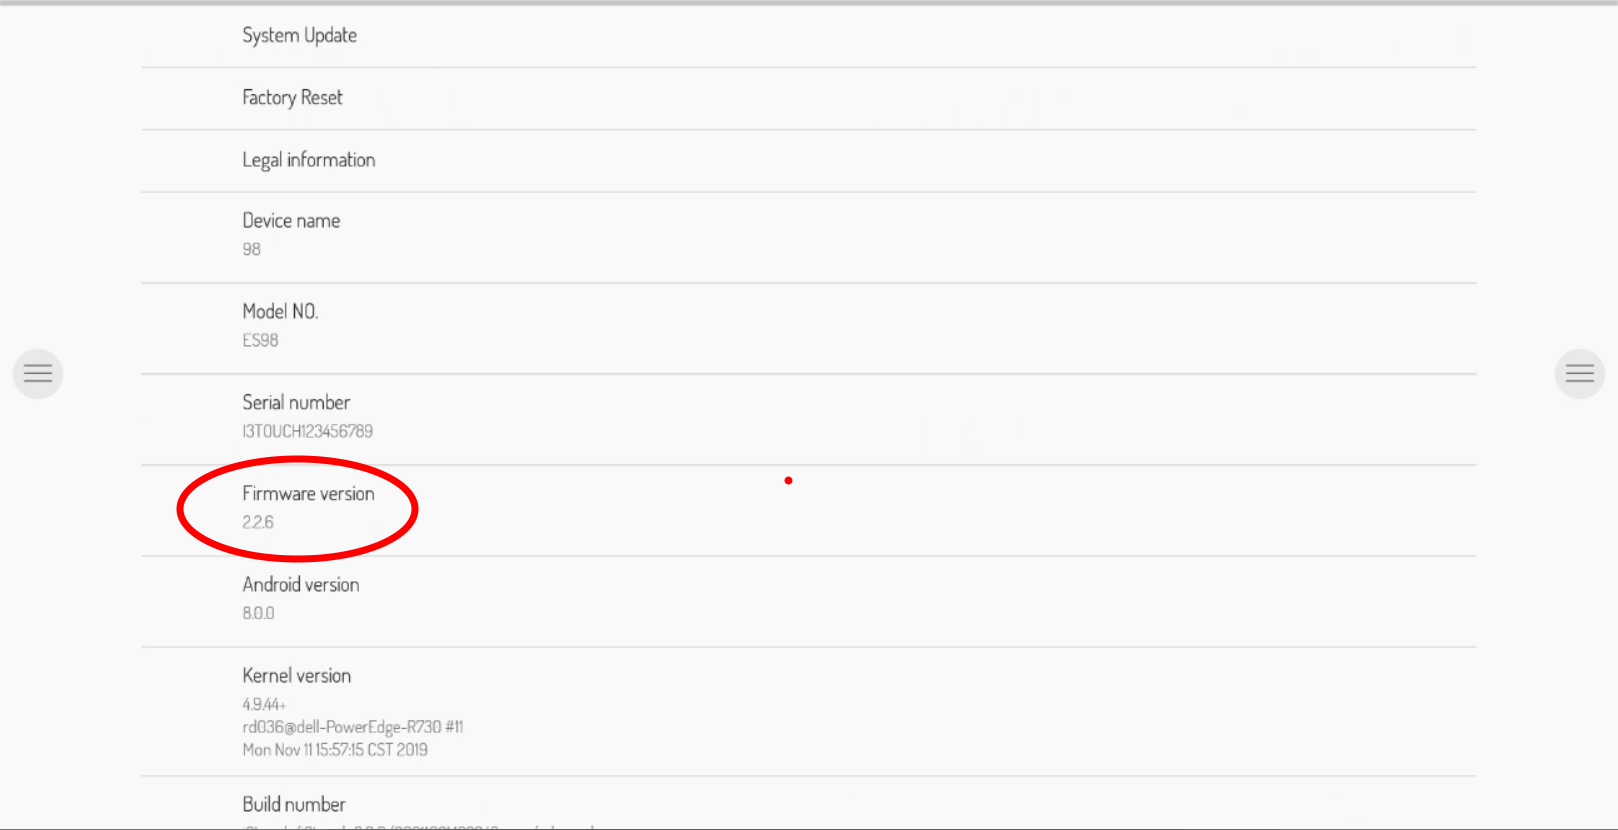
After the upgrade has been installed, we can check if we are running version 2.2.6 in the “About Device” menu. (through settings)
If the version is 2.2.6 we can proceed with the next section 2 - Installation procedure
2 - Installation procedure
Install upgrade
To install the upgrade navigate to the settings panel, and enter the “About device” settings menu.
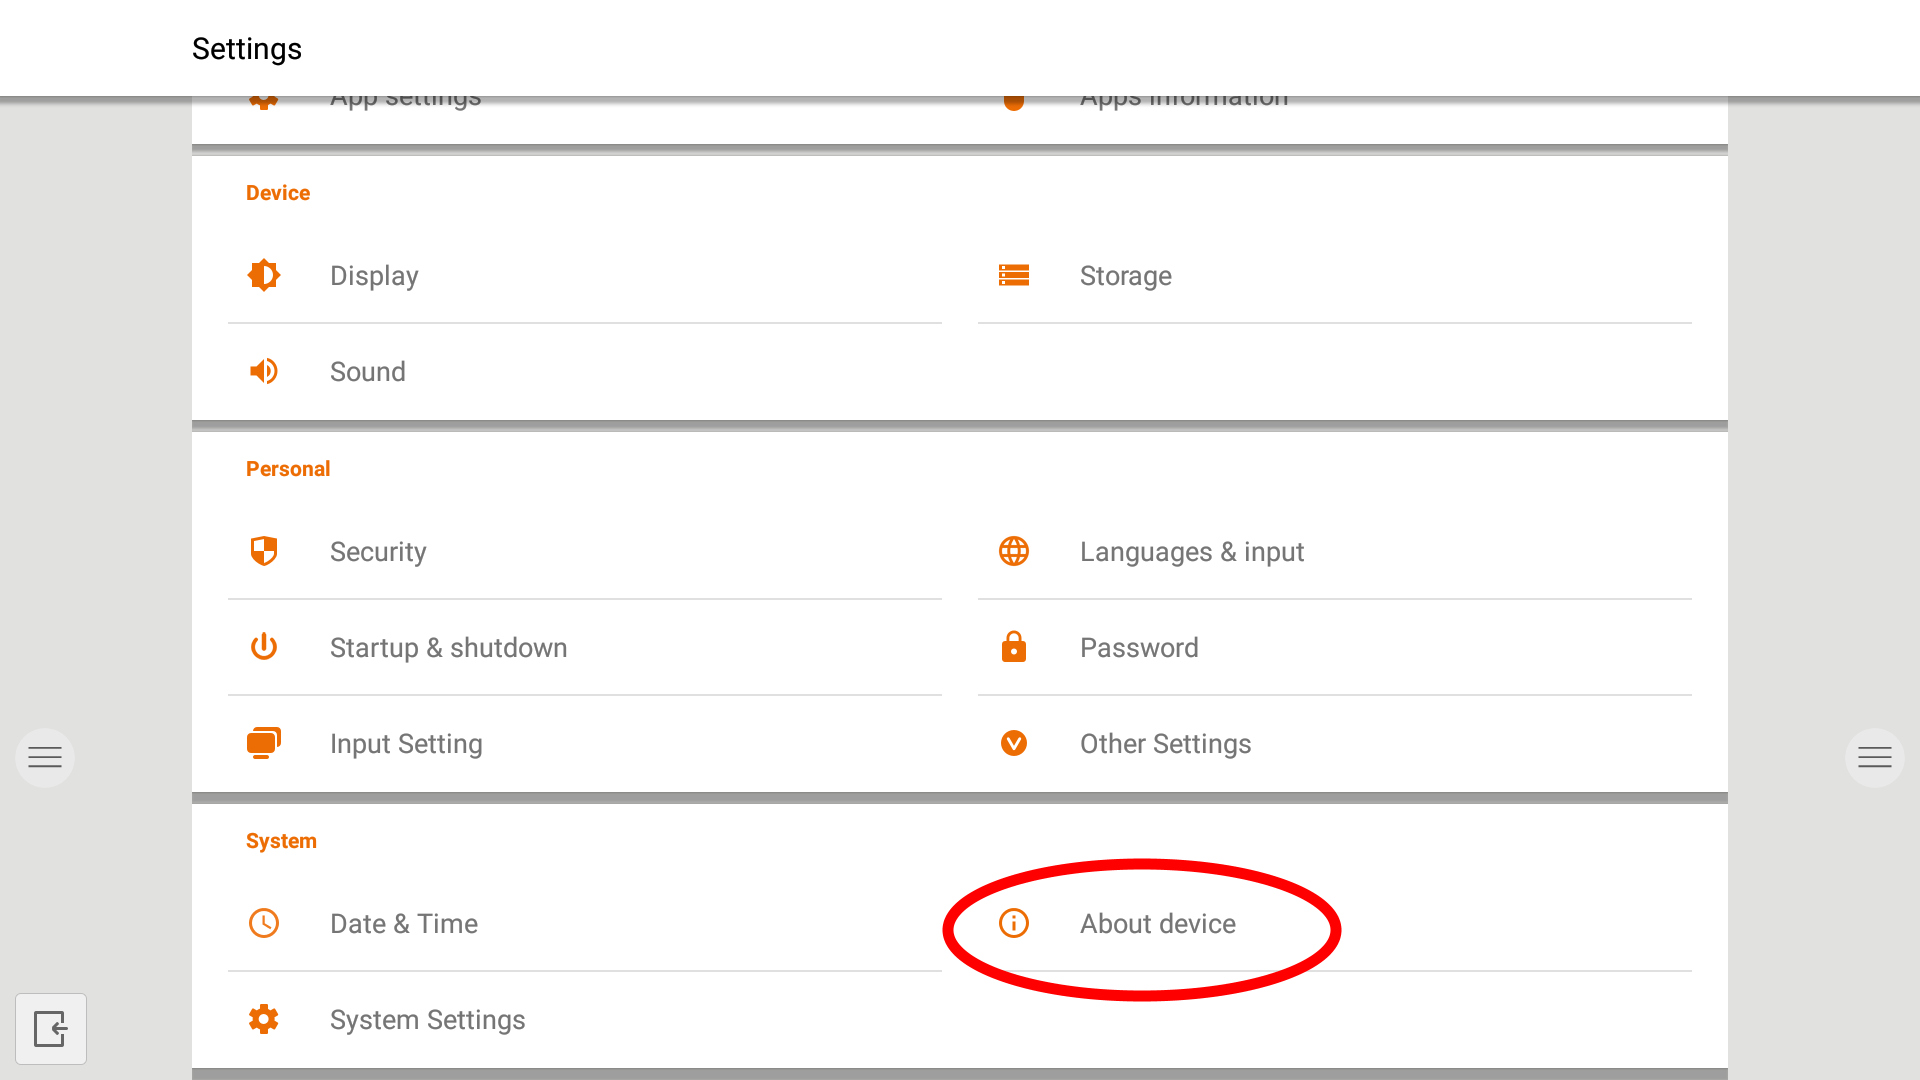
Once in this menu click “System Firmware Upgrade” to check for upgrades
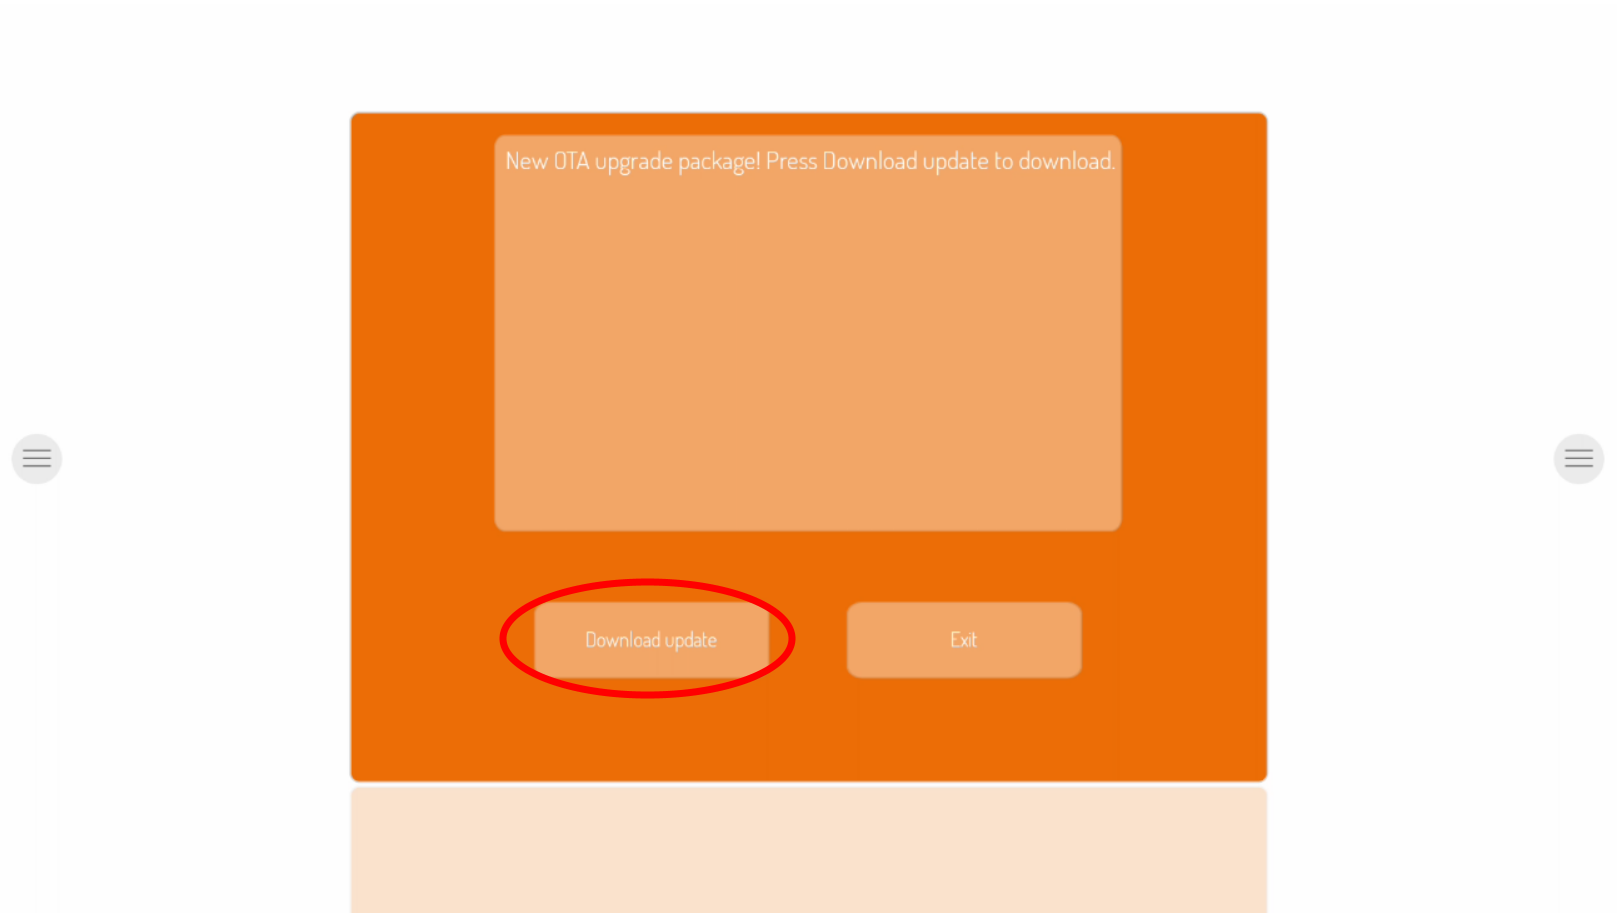
A new system firmware upgrade will present itself, click “Download” to download the new firmware, depending on your internet connection this might take between 5 and 60 minutes.
After the download is completed click “Install update” to install the new firmware, the device will now automatically reboot and install the new firmware, this should take about 5 to 10 minutes.
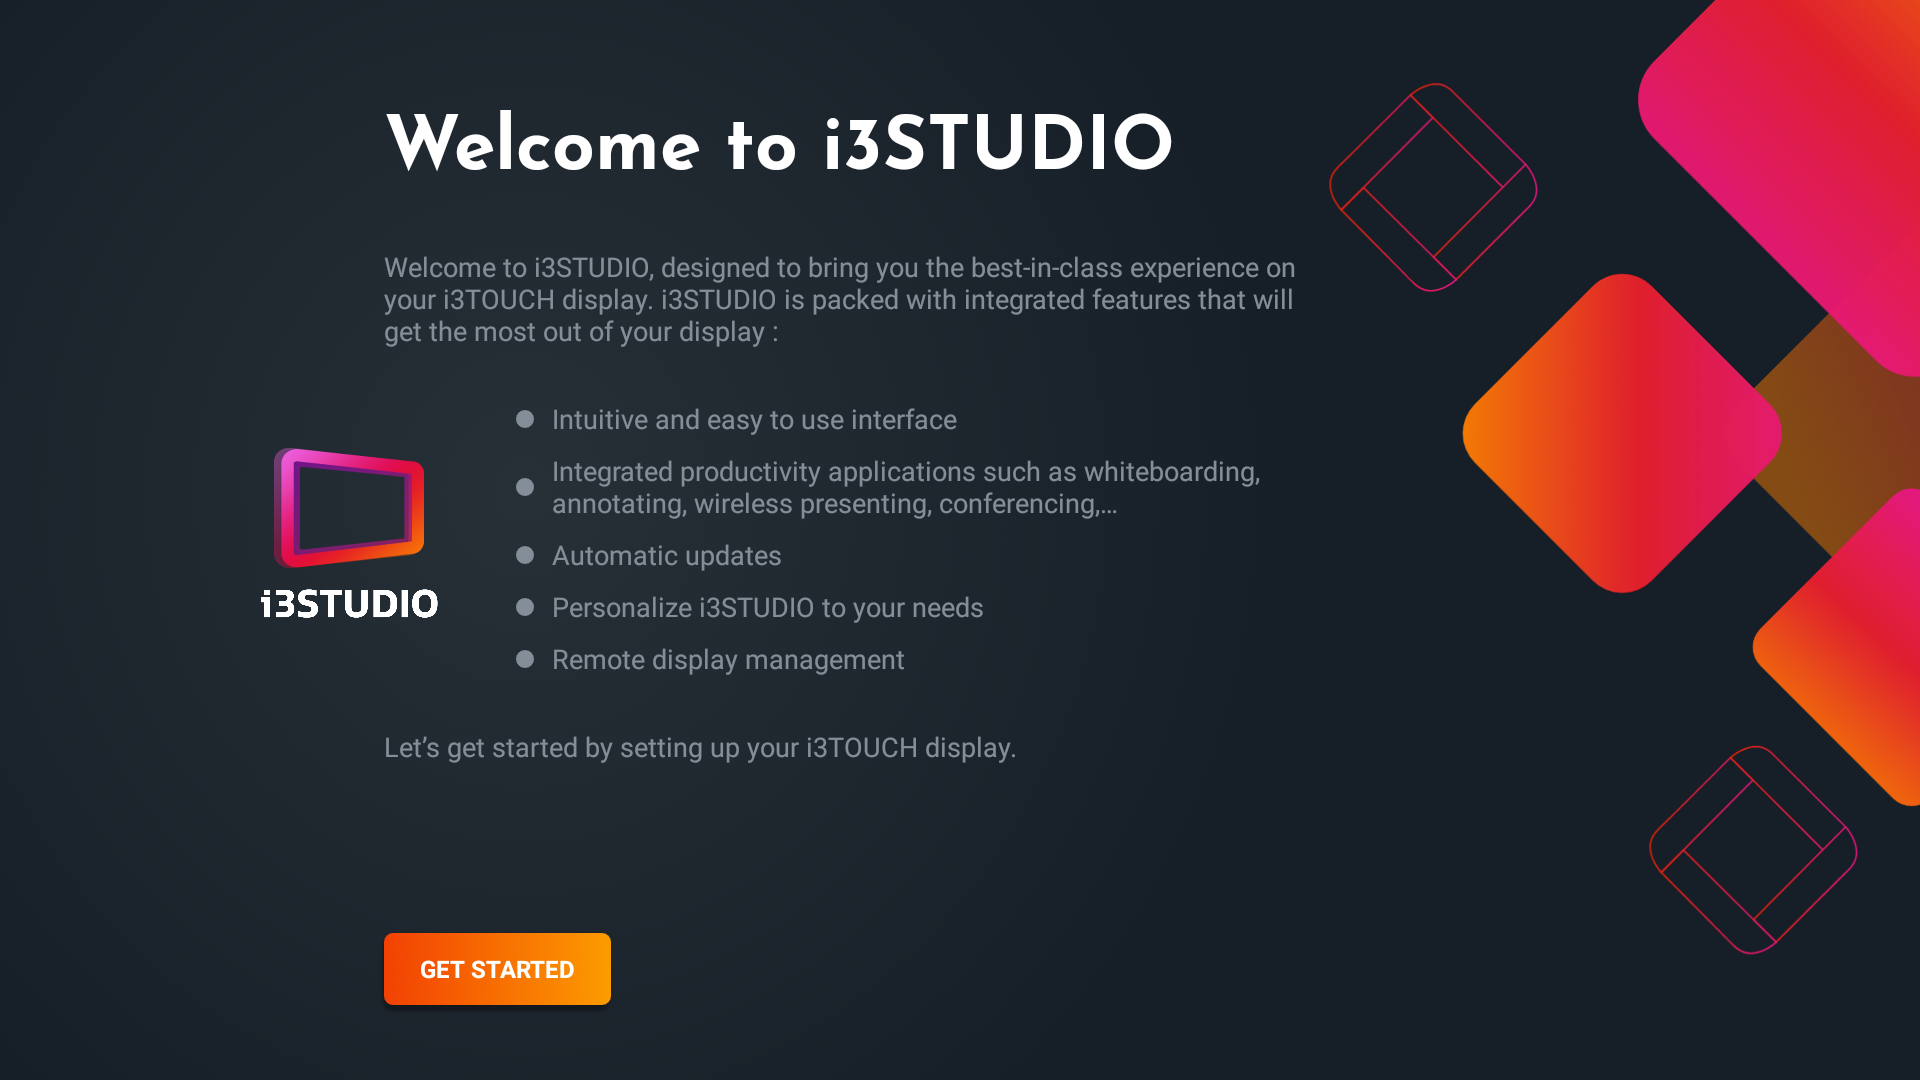
Configuration wizard
After installation, the device will launch into the i3STUDIO setup wizard.
This wizard will guide you through the process of configuring your display.
It only takes a minute, because most of your previous settings (such as WiFi, etc. ) will be retained from the previous installation.
Welcome
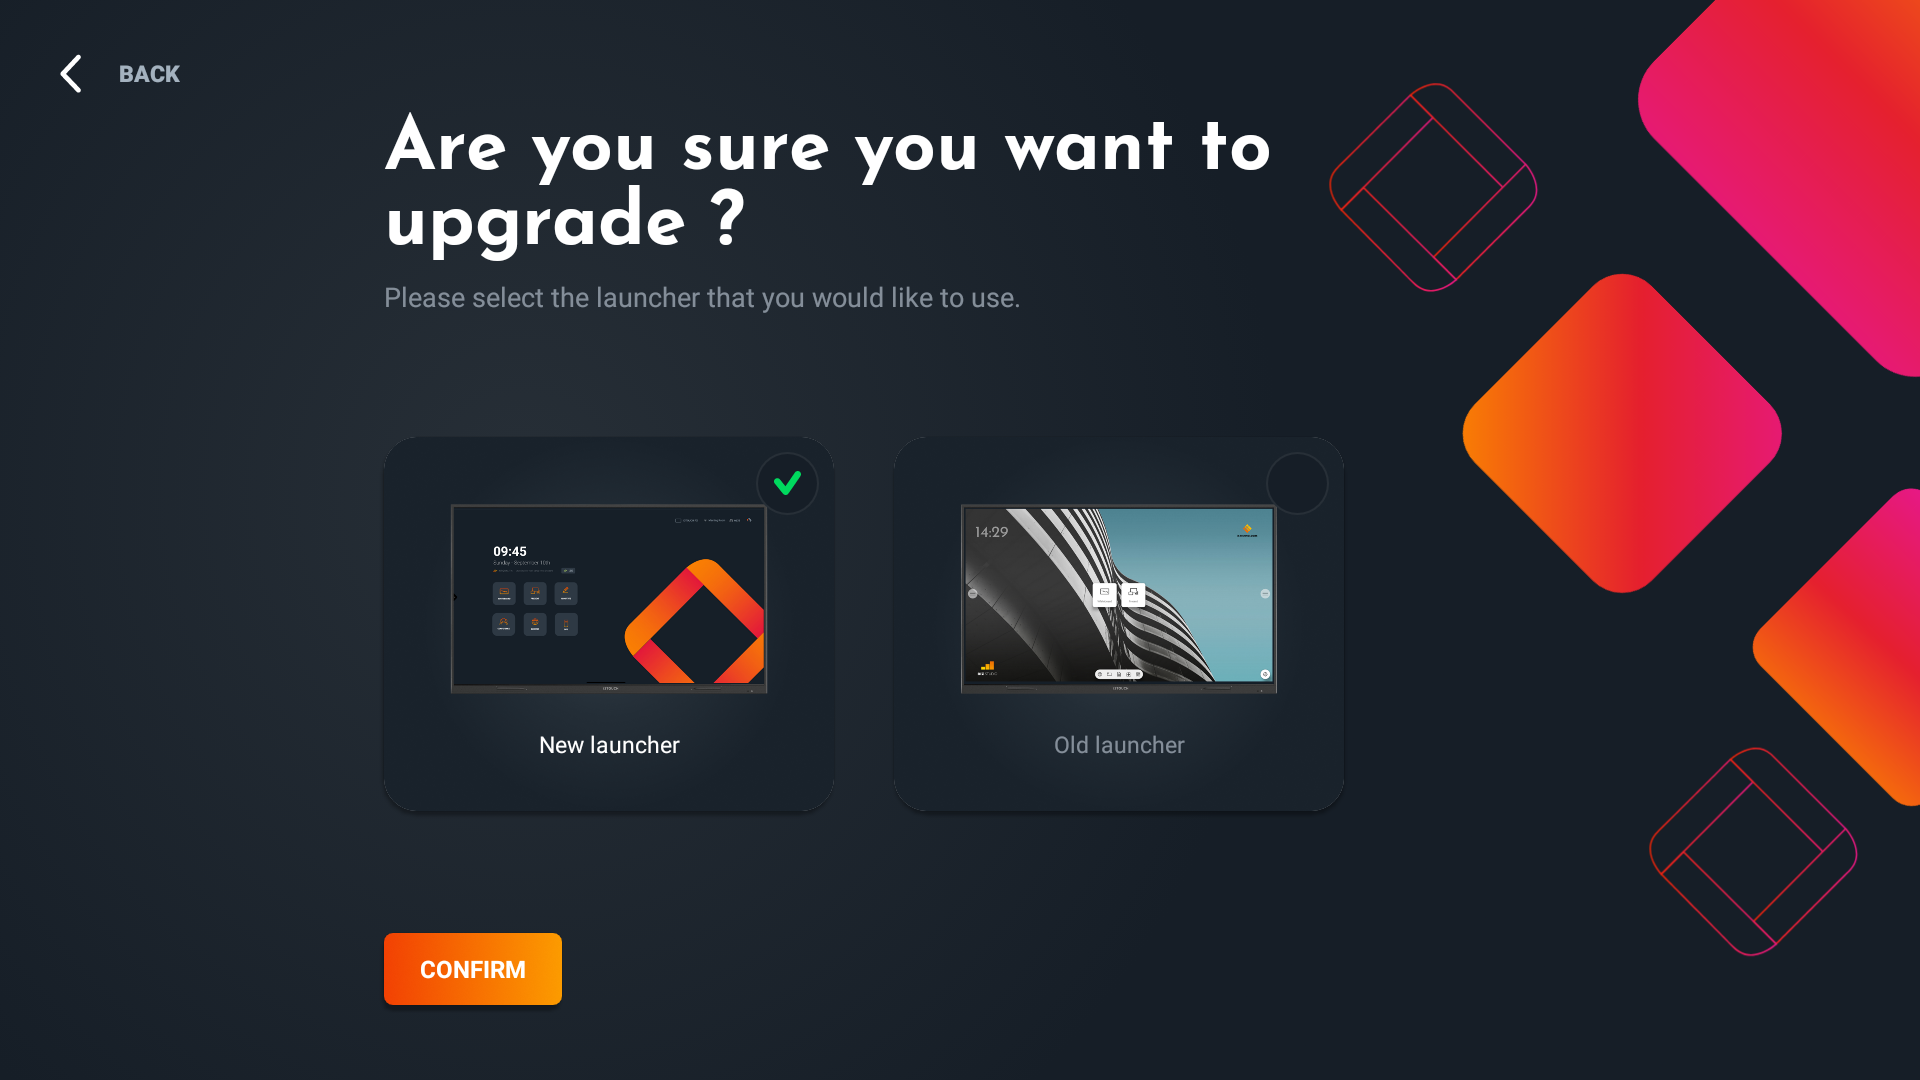
Choose your layout!
Backward compatibility and ease of use are important in any organization.
Whether you would like to use the new interface or remain with the old familiar one,
i3STUDIO supports both!
Please be aware that the choice for the new interface is permanent and (at this moment) can not be reverted to the old interface.
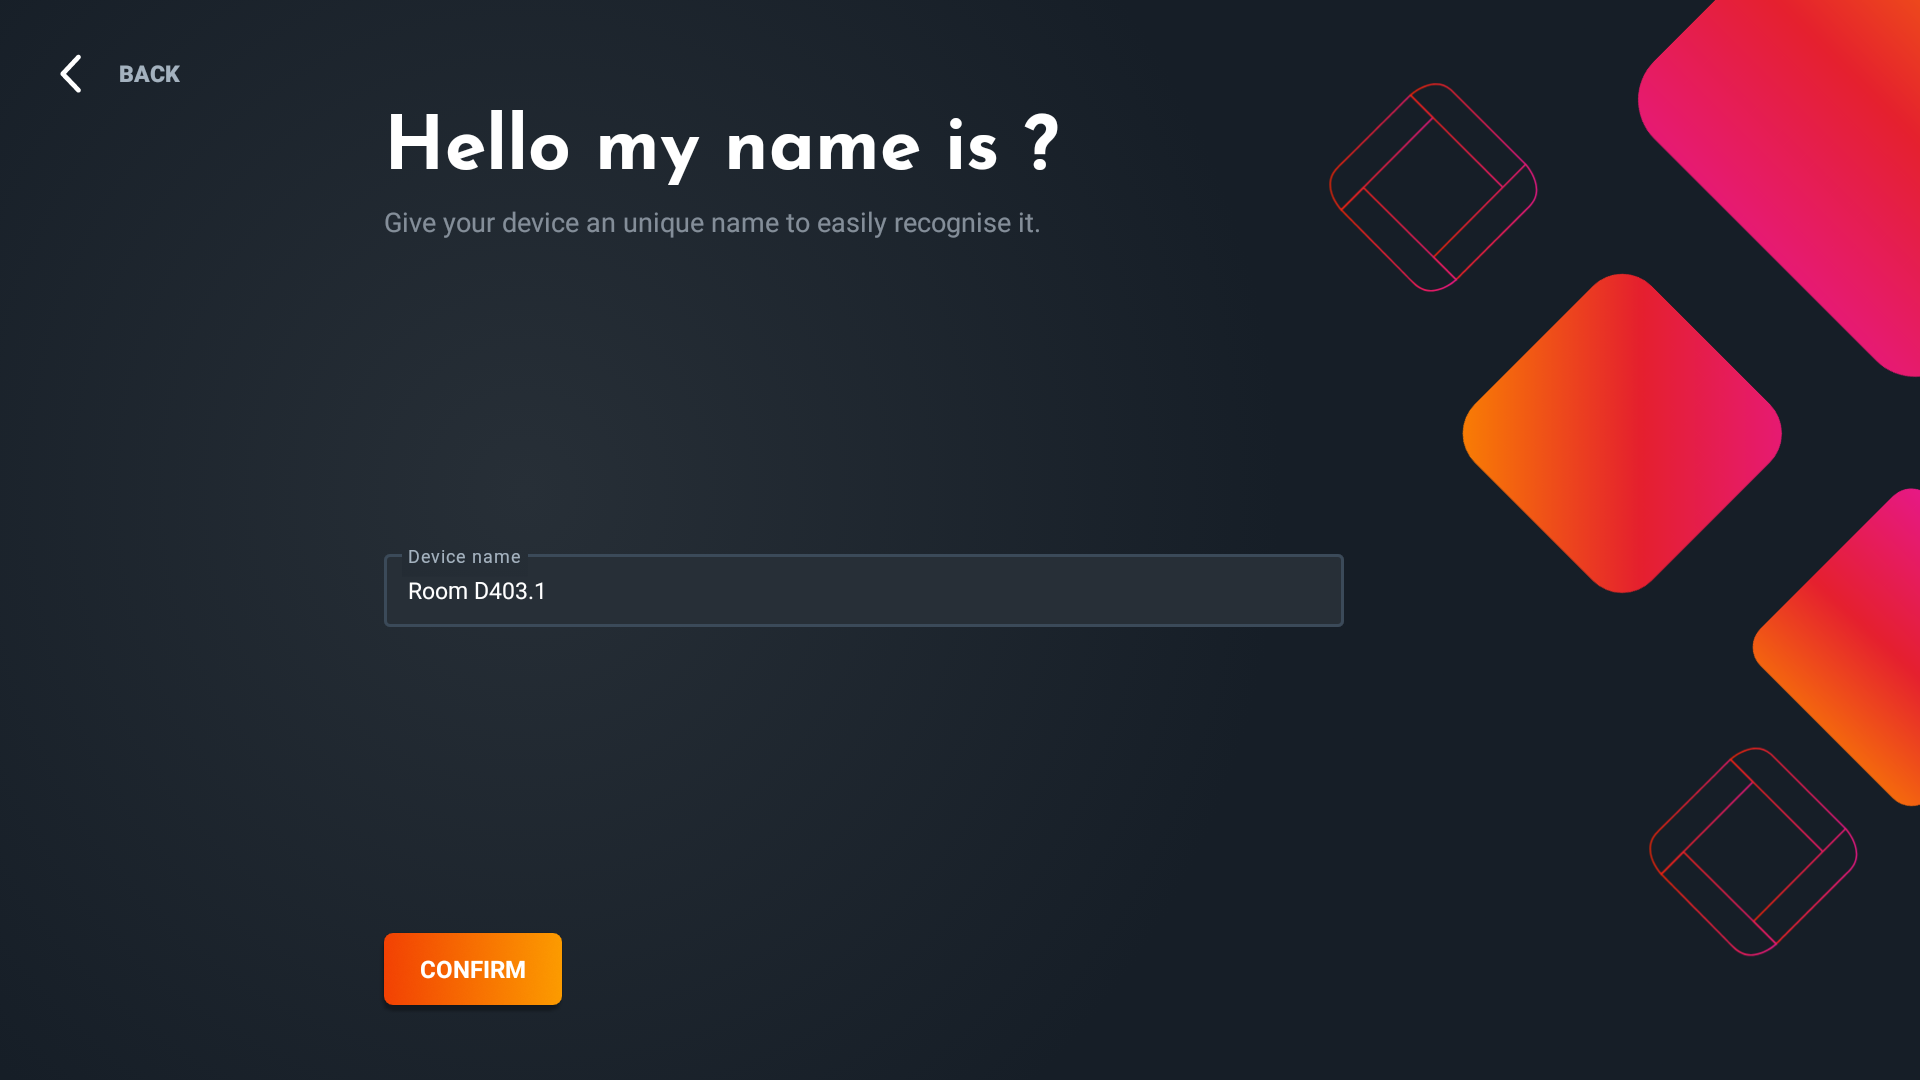
Name your device.
Choose a device name that is logical to your organization.
For example based on the location, the purpose of the display, the users….
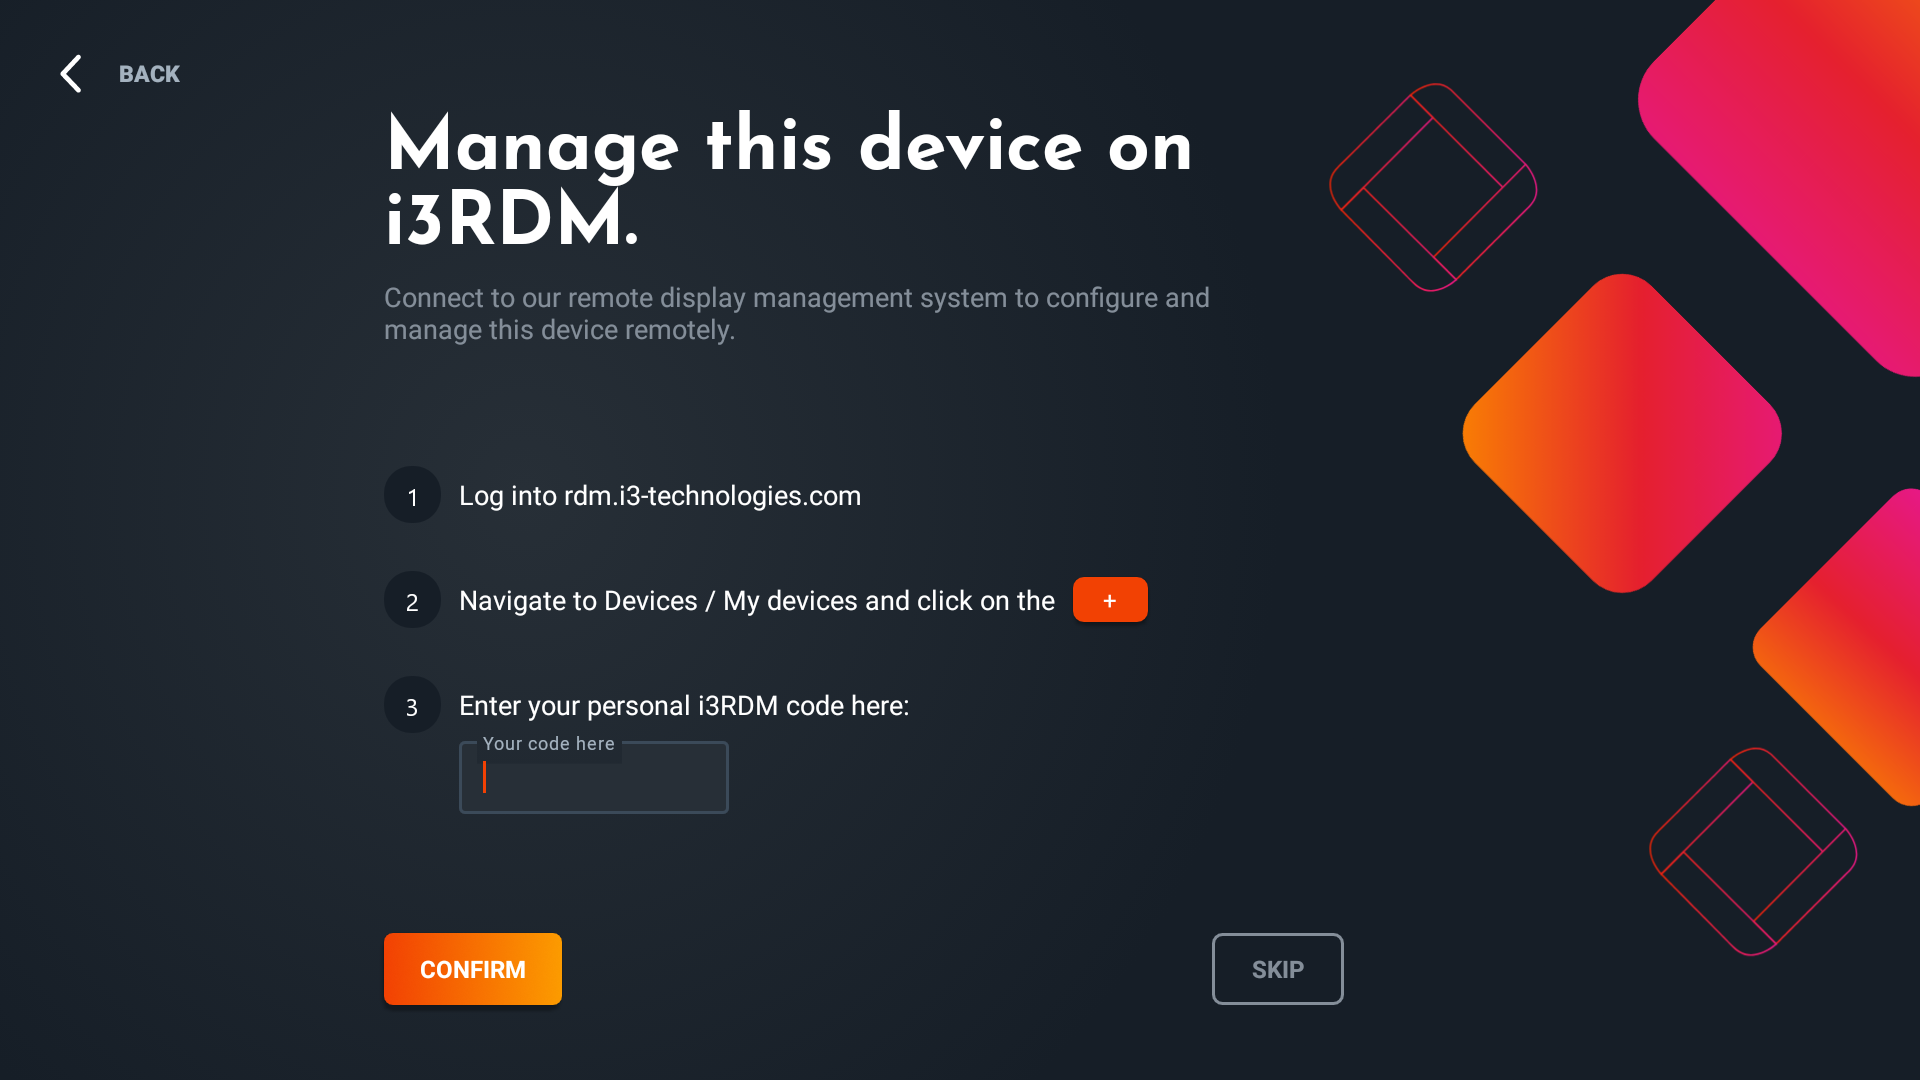
Setup Remote Display Management (RDM)
For users with multiple displays, we offer the possibility of remotely managing these displays with ease through our i3RDM software solution. Not yet using i3RDM? Just skip this part of the wizard.
Are you a user of i3RDM? Here you can easily set up the connection with the i3RDM server by passing in the unique code provided by the i3RDM Server.
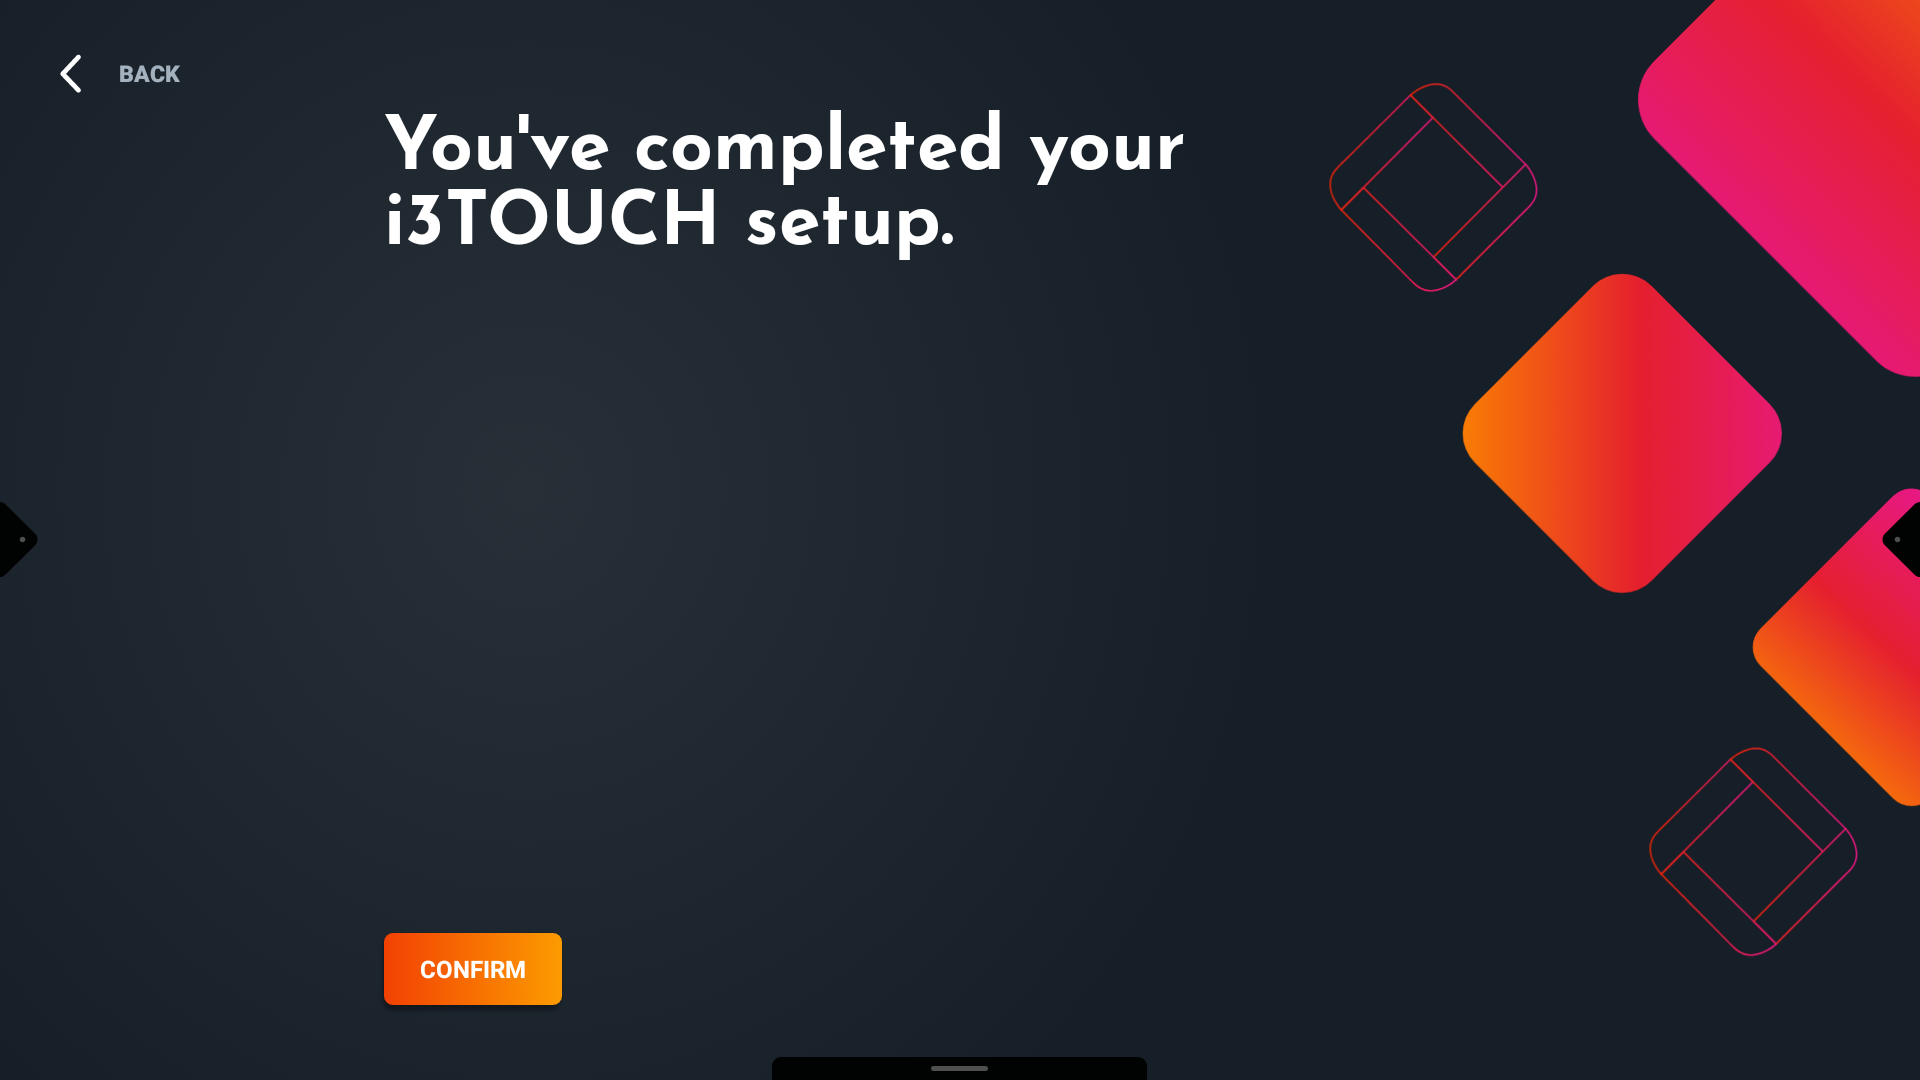
All Done!
You are ready to start using your display with the new i3STUDIO software, enjoy!
After installing i3Studio it is best to install all pending updates in the i3Store to make sure you are running the latest version of all the applications.
3 - New Features
i3STUDIO brings a whole new software architecture to our I3Touch panels.
This new and improved solution will immediately bring the following benefits to all users:
Over-the-air updates, make sure your i3TOUCH is always running on the latest software
Aligned UI and workflow across devices.
The intuitive user interface makes all your applications available in a few touches, increasing productivity.
Thanks to our notification system you can be informed pro-actively about the new updates or changes.
A customizable configuration makes it easier to fit the panel to your needs.
Annotating, presenting, whiteboarding (with our new and improved app), and video conferencing are only one touch away.
Future-proof! The new architecture will allow for many more features to be released in the future.
(such as split-screen, sticky notes, improved remote management, ….)
for more details around these new features or specific apps please refer to the user manuals.
4 - Delayed installation of the new interface
For users who installed the upgrade but initially chose to stay on the old interface,
we offer the option of migrating to the new interface at will.
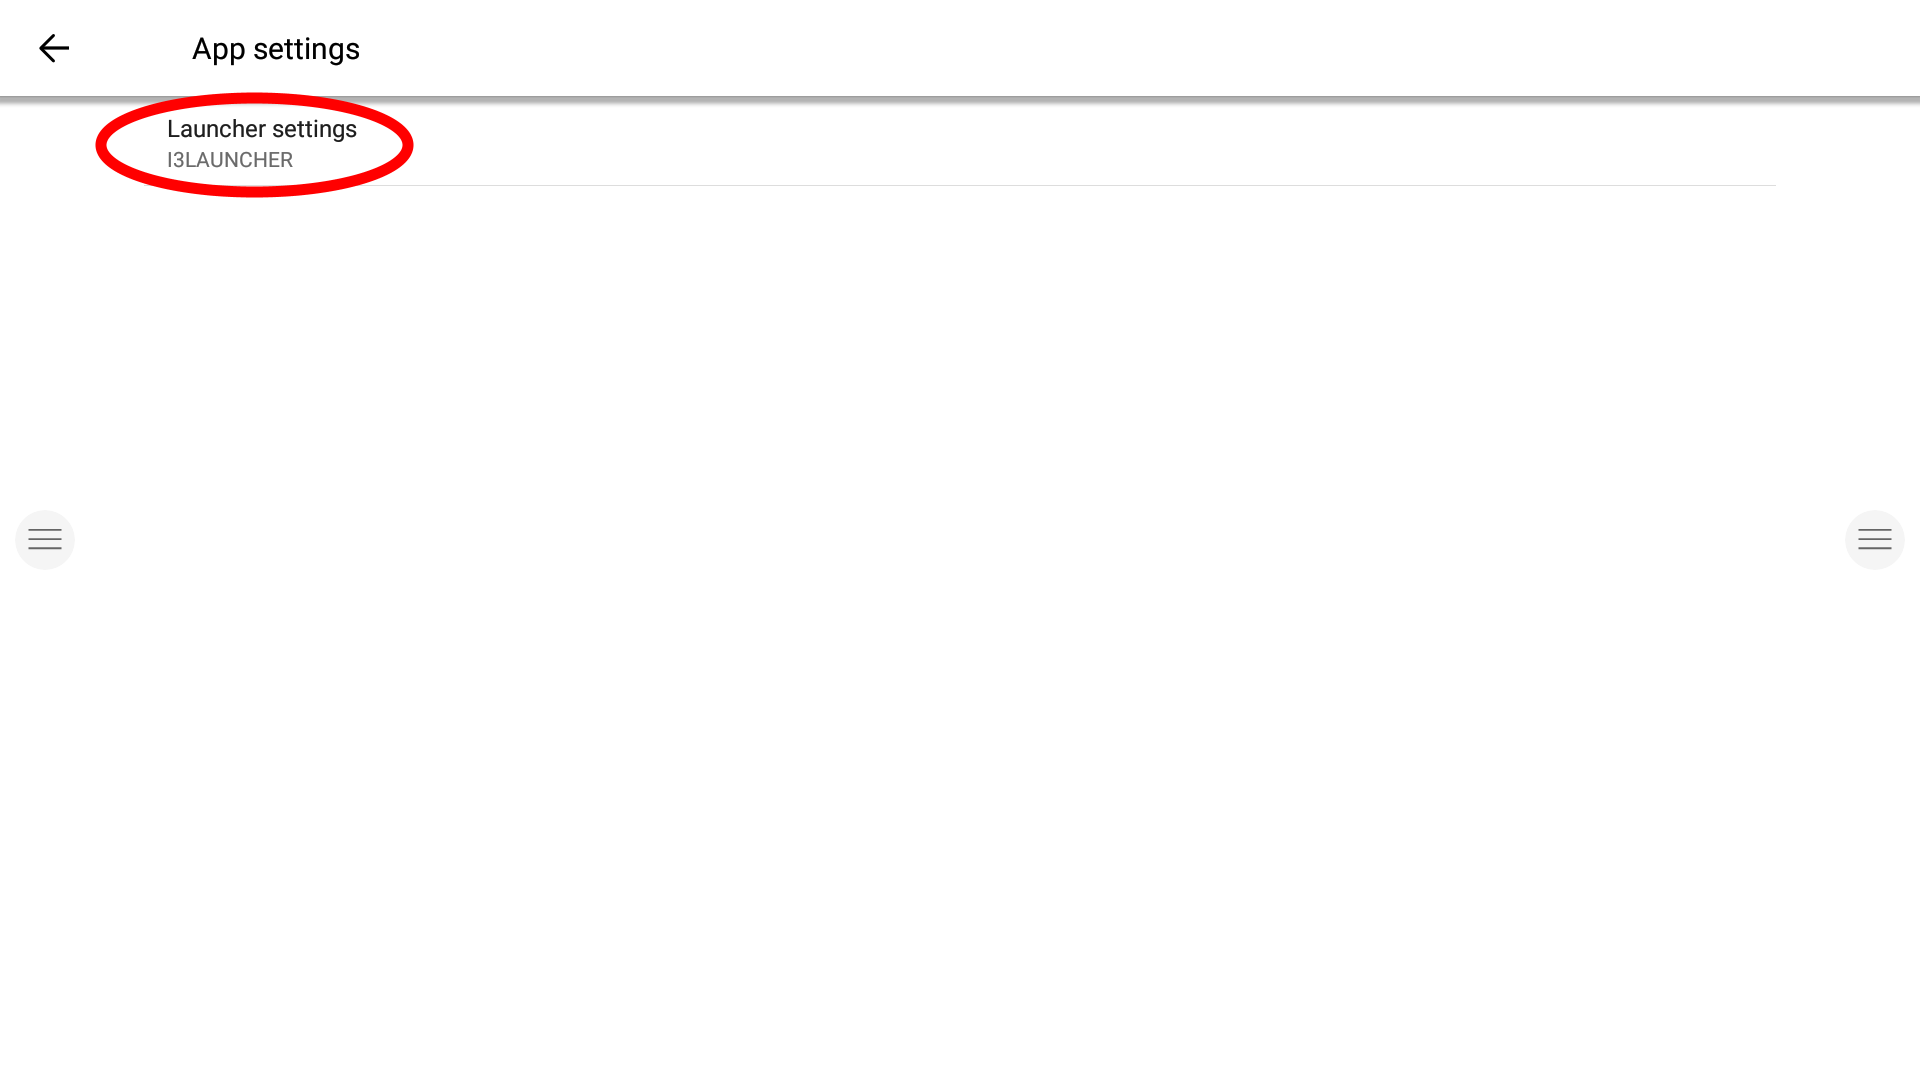
In order to do so, navigate to the settings panel and enter the “App settings” menu.
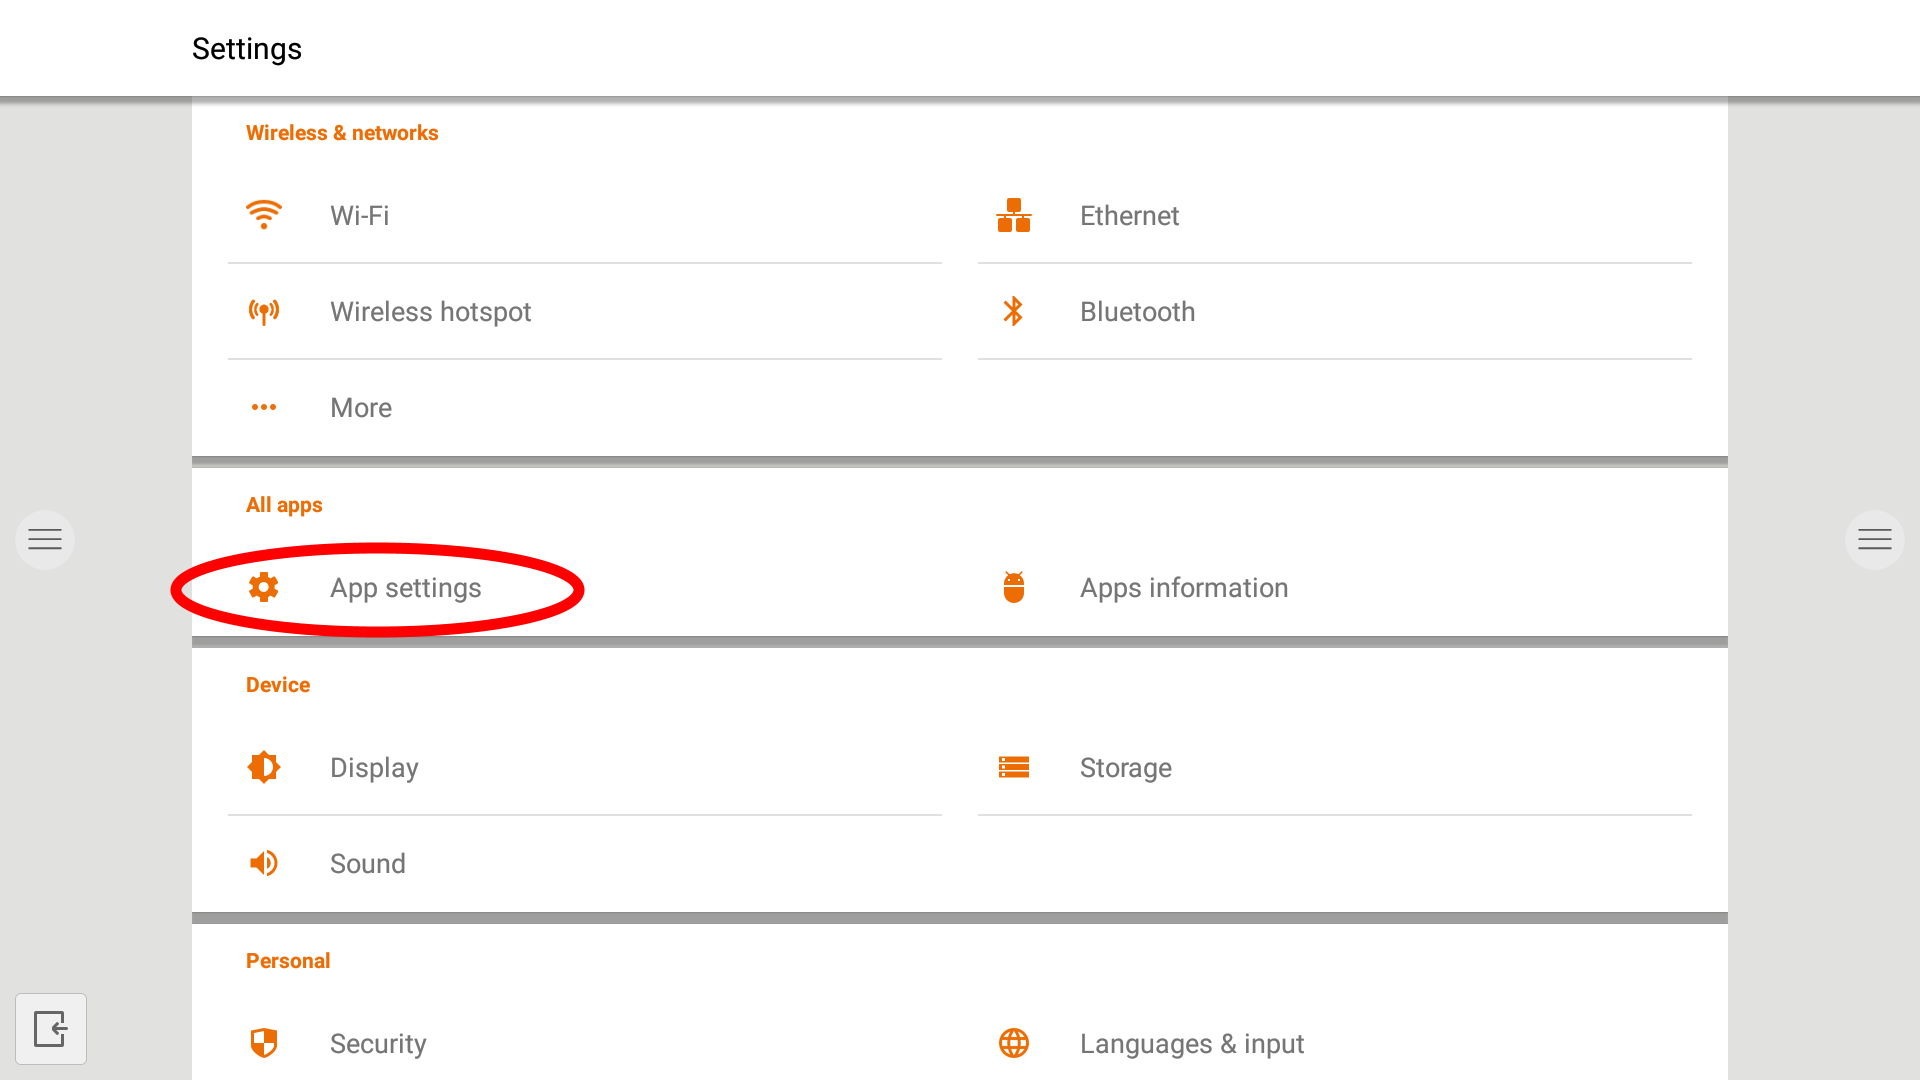
In the app, settings enter the “Launcher Settings” menu.
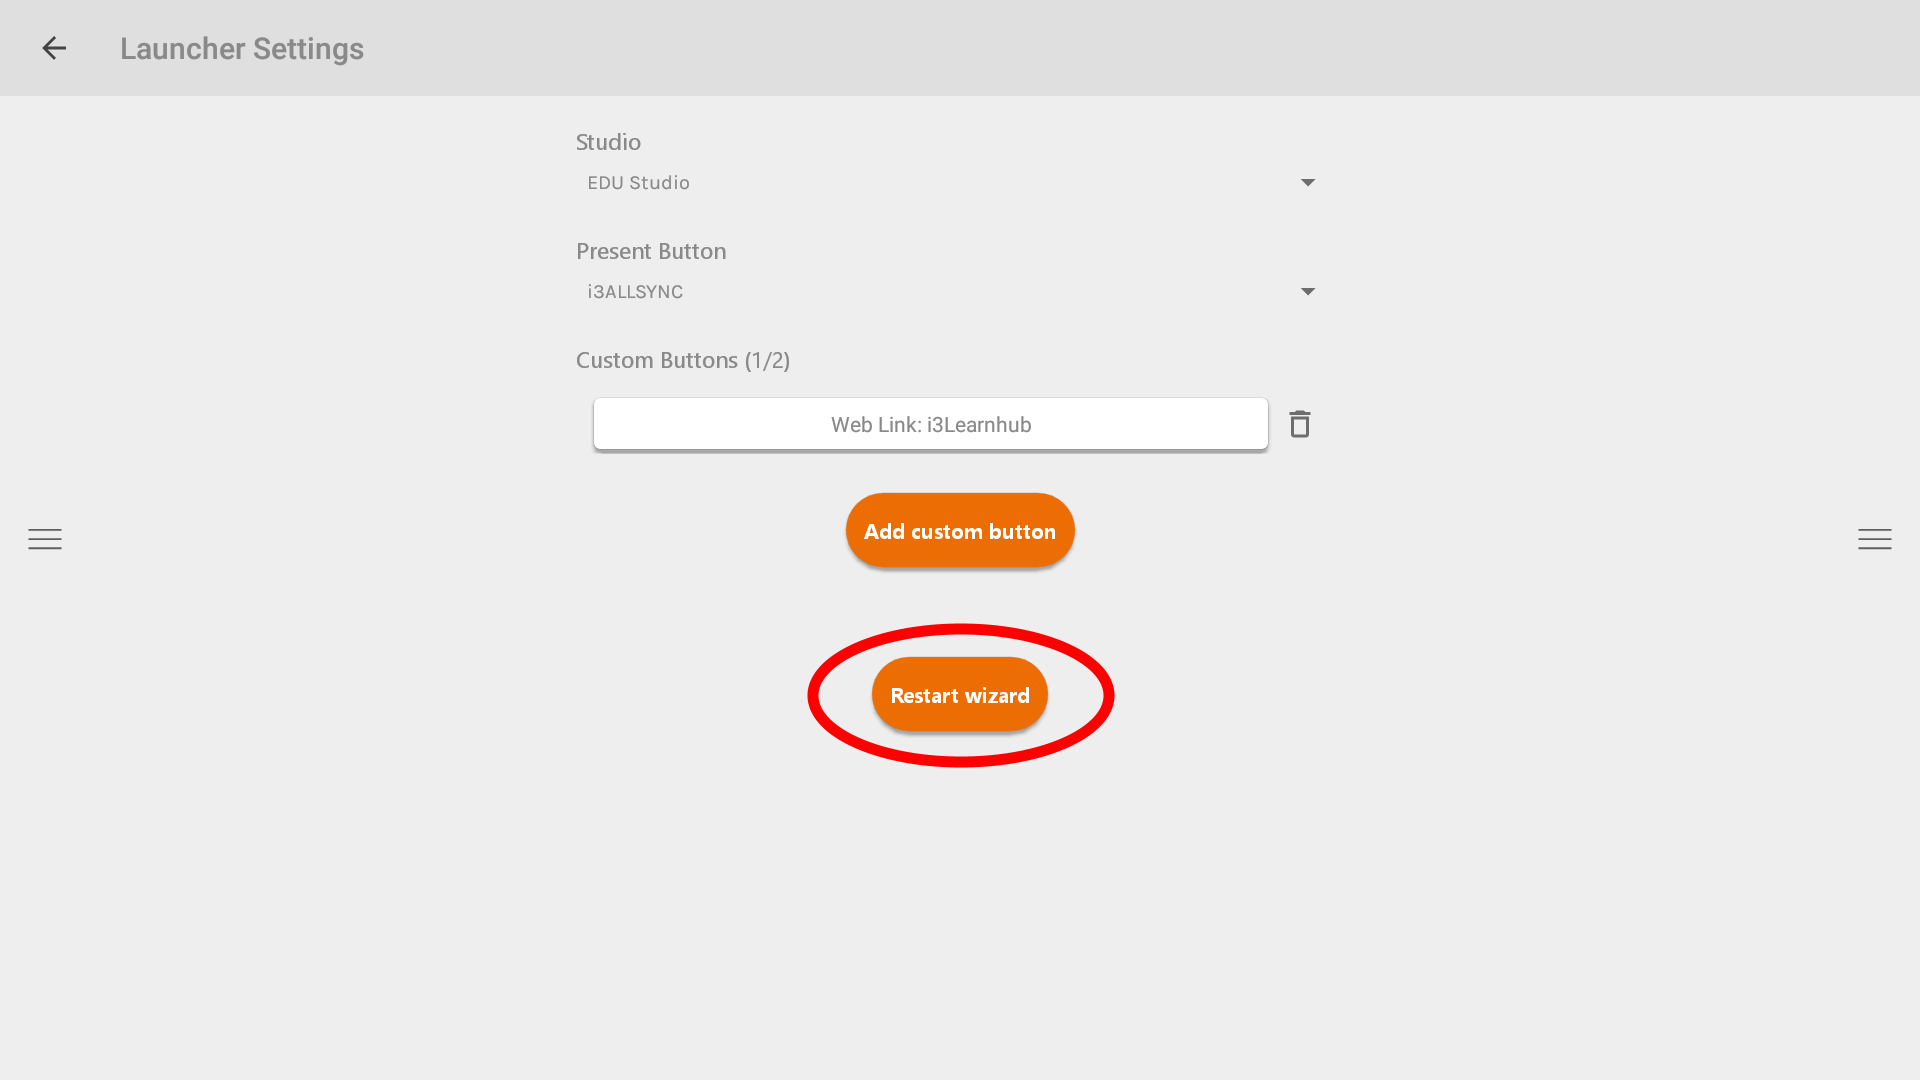
Once in the launcher app settings menu, trigger the i3STUDIO setup wizard to upgrade your user interface to the new i3STUDIO interface.
5 - Frequently Asked Questions
Is it possible to revert from the i3STUDIO to the previous user interface?
i3STUDIO is the latest version of our user interface, in which i3Technologies will develop all of its new features, apps, updates, etc. We strongly recommend our users to switch to the new user interface, but do offer the option to remain using the old interface to be able to make the transition to the new interface at the most suitable time.