
What's new in i3WHITEBOARD 1.18.0?
Overview of what’s new in i3WHITEBOARD 1.18.0
With i3WHITEBOARD 1.18.0, we focussed on the user experience for both novices and experienced users.
As selecting and transforming objects on the canvas are at the core of this update, many improvements were made here to allow for a more intuitive user experience. You can now customize within i3WHITEBOARD how you prefer to use the pen(s) and/ or finger activity. A new locking feature gives you more control over which objects you want to interact with on the canvas, and which you wish to stay in the background.
We can’t wait for you to try out the new features and see the difference for yourself!
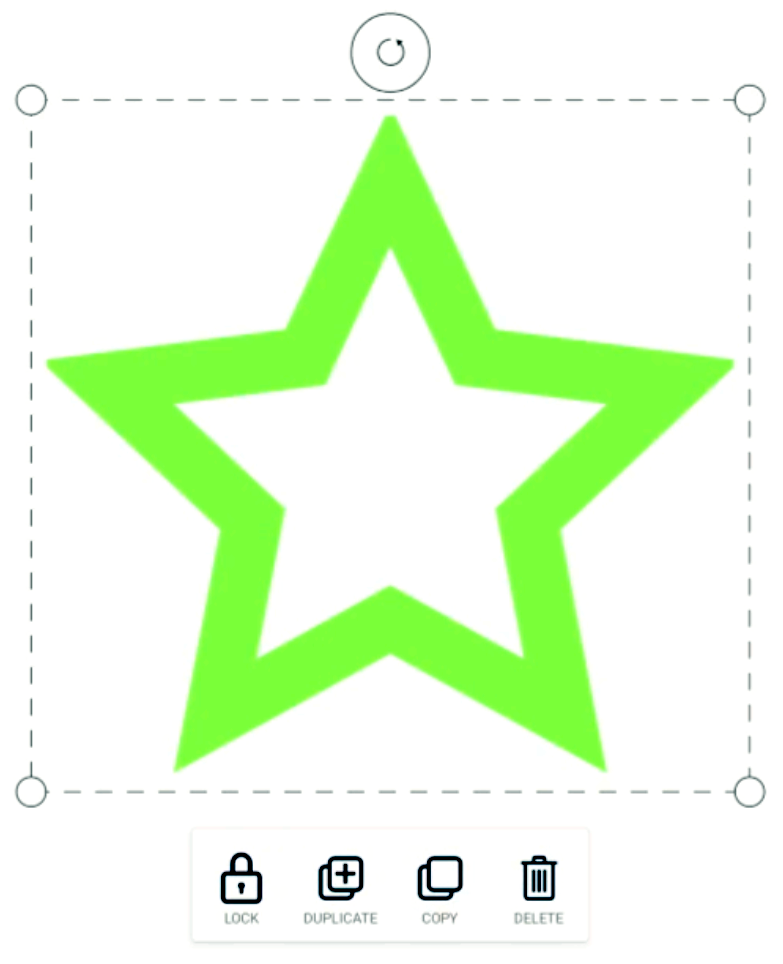
Improve transforming with the new bounding box

The bounding box of selected objects was redesigned to make scaling and rotating objects easier. The new bounding box allows you to scale from all four corners and the buttons will remain outside of the bounding box so that even the smallest objects can still be scaled!
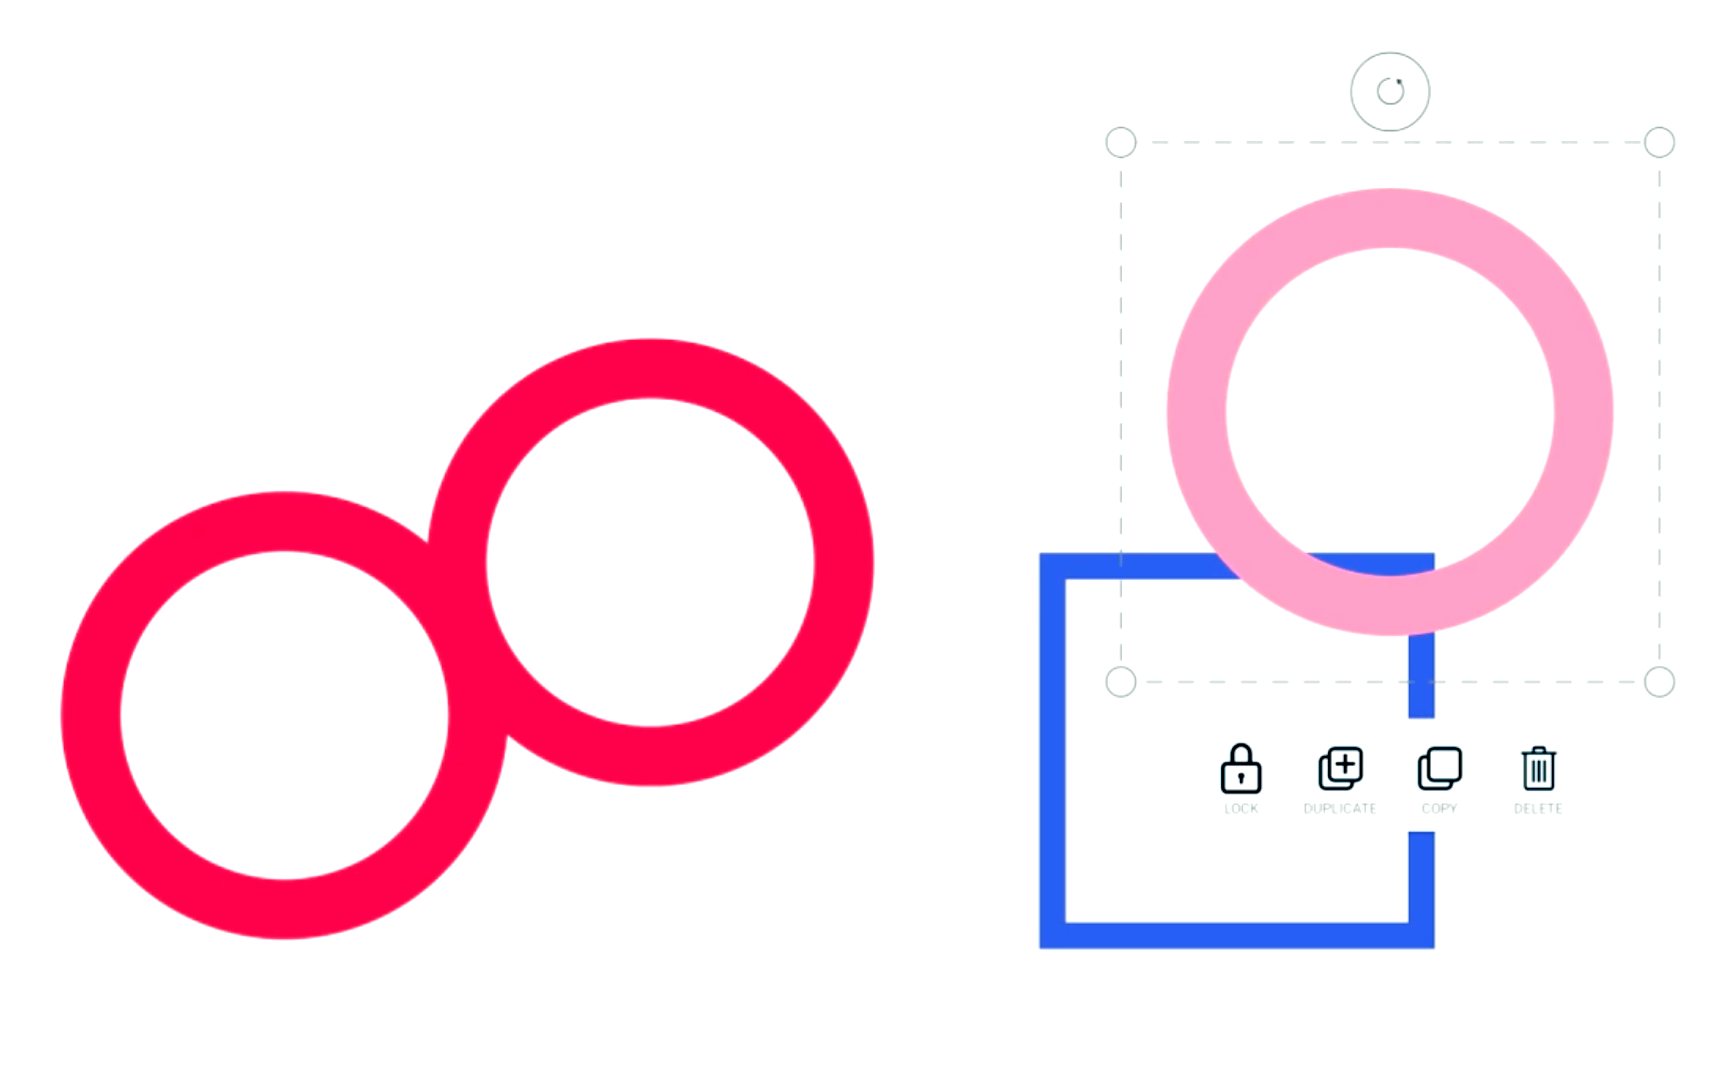
https://www.youtube.com/watch?v=dE-kx1taGB4Introducing the Actions menu
Selected objects will see the introduction of a new dedicated menu, called the Actions menu. Here, we display basic actions that you can perform on the object, that have nothing to do with the object’s features.
For now, you can perform the following actions, but more will follow soon:
Lock and unlock
Duplicate
Copy-paste
Delete
Locking and unlocking objects on the canvas
A new feature in the new Actions menus is the option to lock objects on the canvas. Locked objects can not be selected or deleted, nor can their features be changed until they are unlocked again. The action is easy to perform. Select one or more objects, hit the Lock icon in the Actions menu, and the object is locked. It’ll show you visually by adding a small Lock icon at the corner of the object when you try to select it:

When locking the object, you may also have noticed that the Actions menu informs you how to unlock it:

Long press the locked object, and you will see the action to unlock it:

You might also see a Paste icon next to it, if you previously copied an object.
Improving copy-pasting of objects
The copy-paste action was redesigned to be consistent with the locking action.

Just like the Locking action, the Actions menu will briefly show you how to paste an object once you copied it.
Long press anywhere on the canvas and a Paste icon will appear:

Select Paste and a copy of the object will be pasted on that position.
See the active tool in the Features menu
The Features menu now displays the tool that is currently active. Pretty handy if you want to avoid accidentally setting the features of the wrong tool.
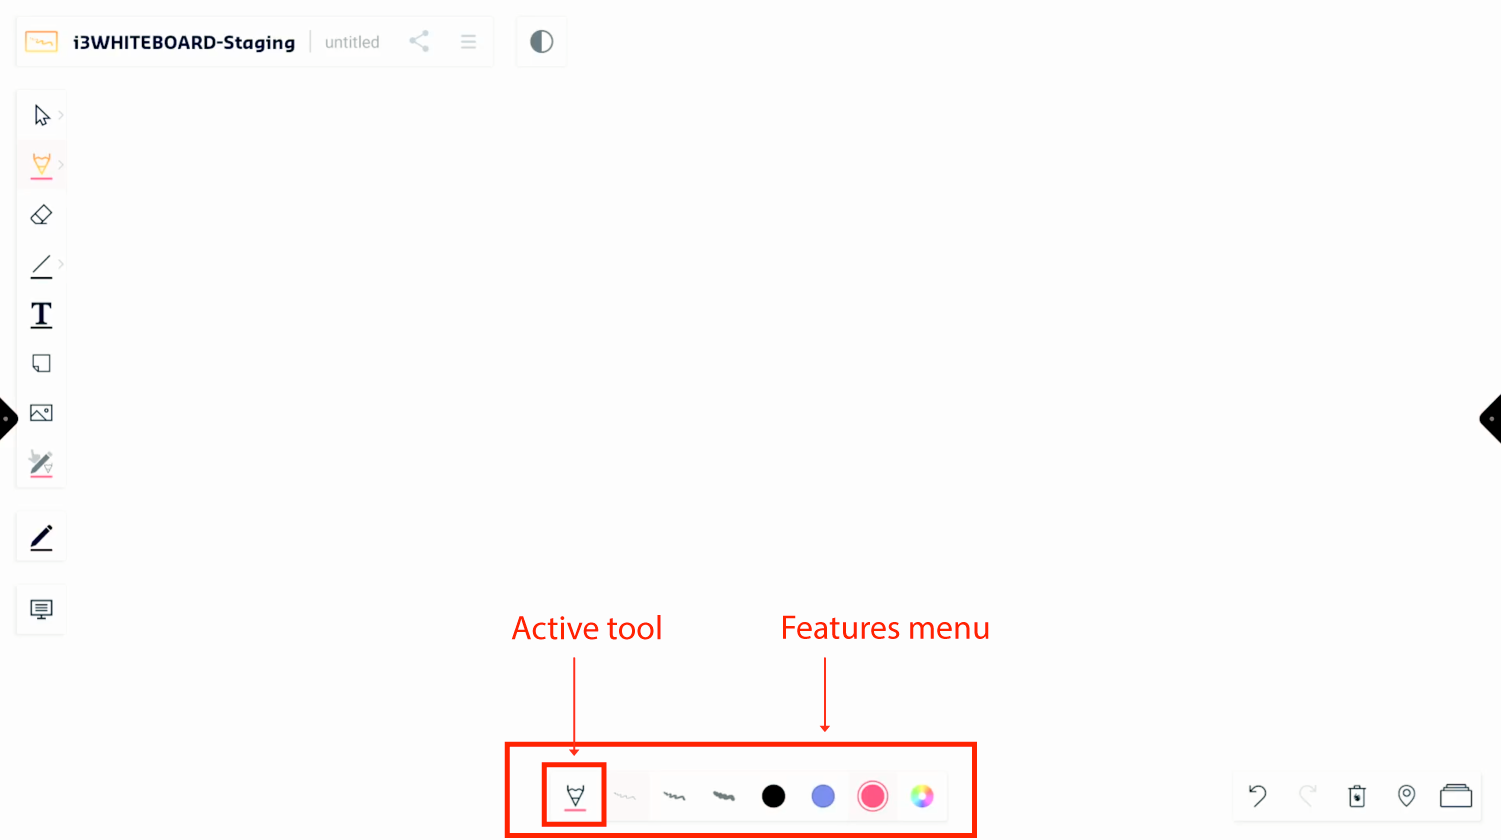
The Features menu now also collapses while you draw/ write on the canvas, to have as much space available as possible. Once collapsed, you’ll only see the active tool and the set color.

When selected, the Features menu will return to its' full size.
https://www.youtube.com/watch?v=Ii-2xWiYWhoCustomize pen and finger preferences
We now allow both novice and experienced users to become more productive, by introducing customization of pen and finger preferences in i3WHITEBOARD. This feature is dependent on your i3TOUCH display and the pen(s) that come with it. This feature can be configured in the Settings menu and is also available as a setting or remote configuration in i3RDM!
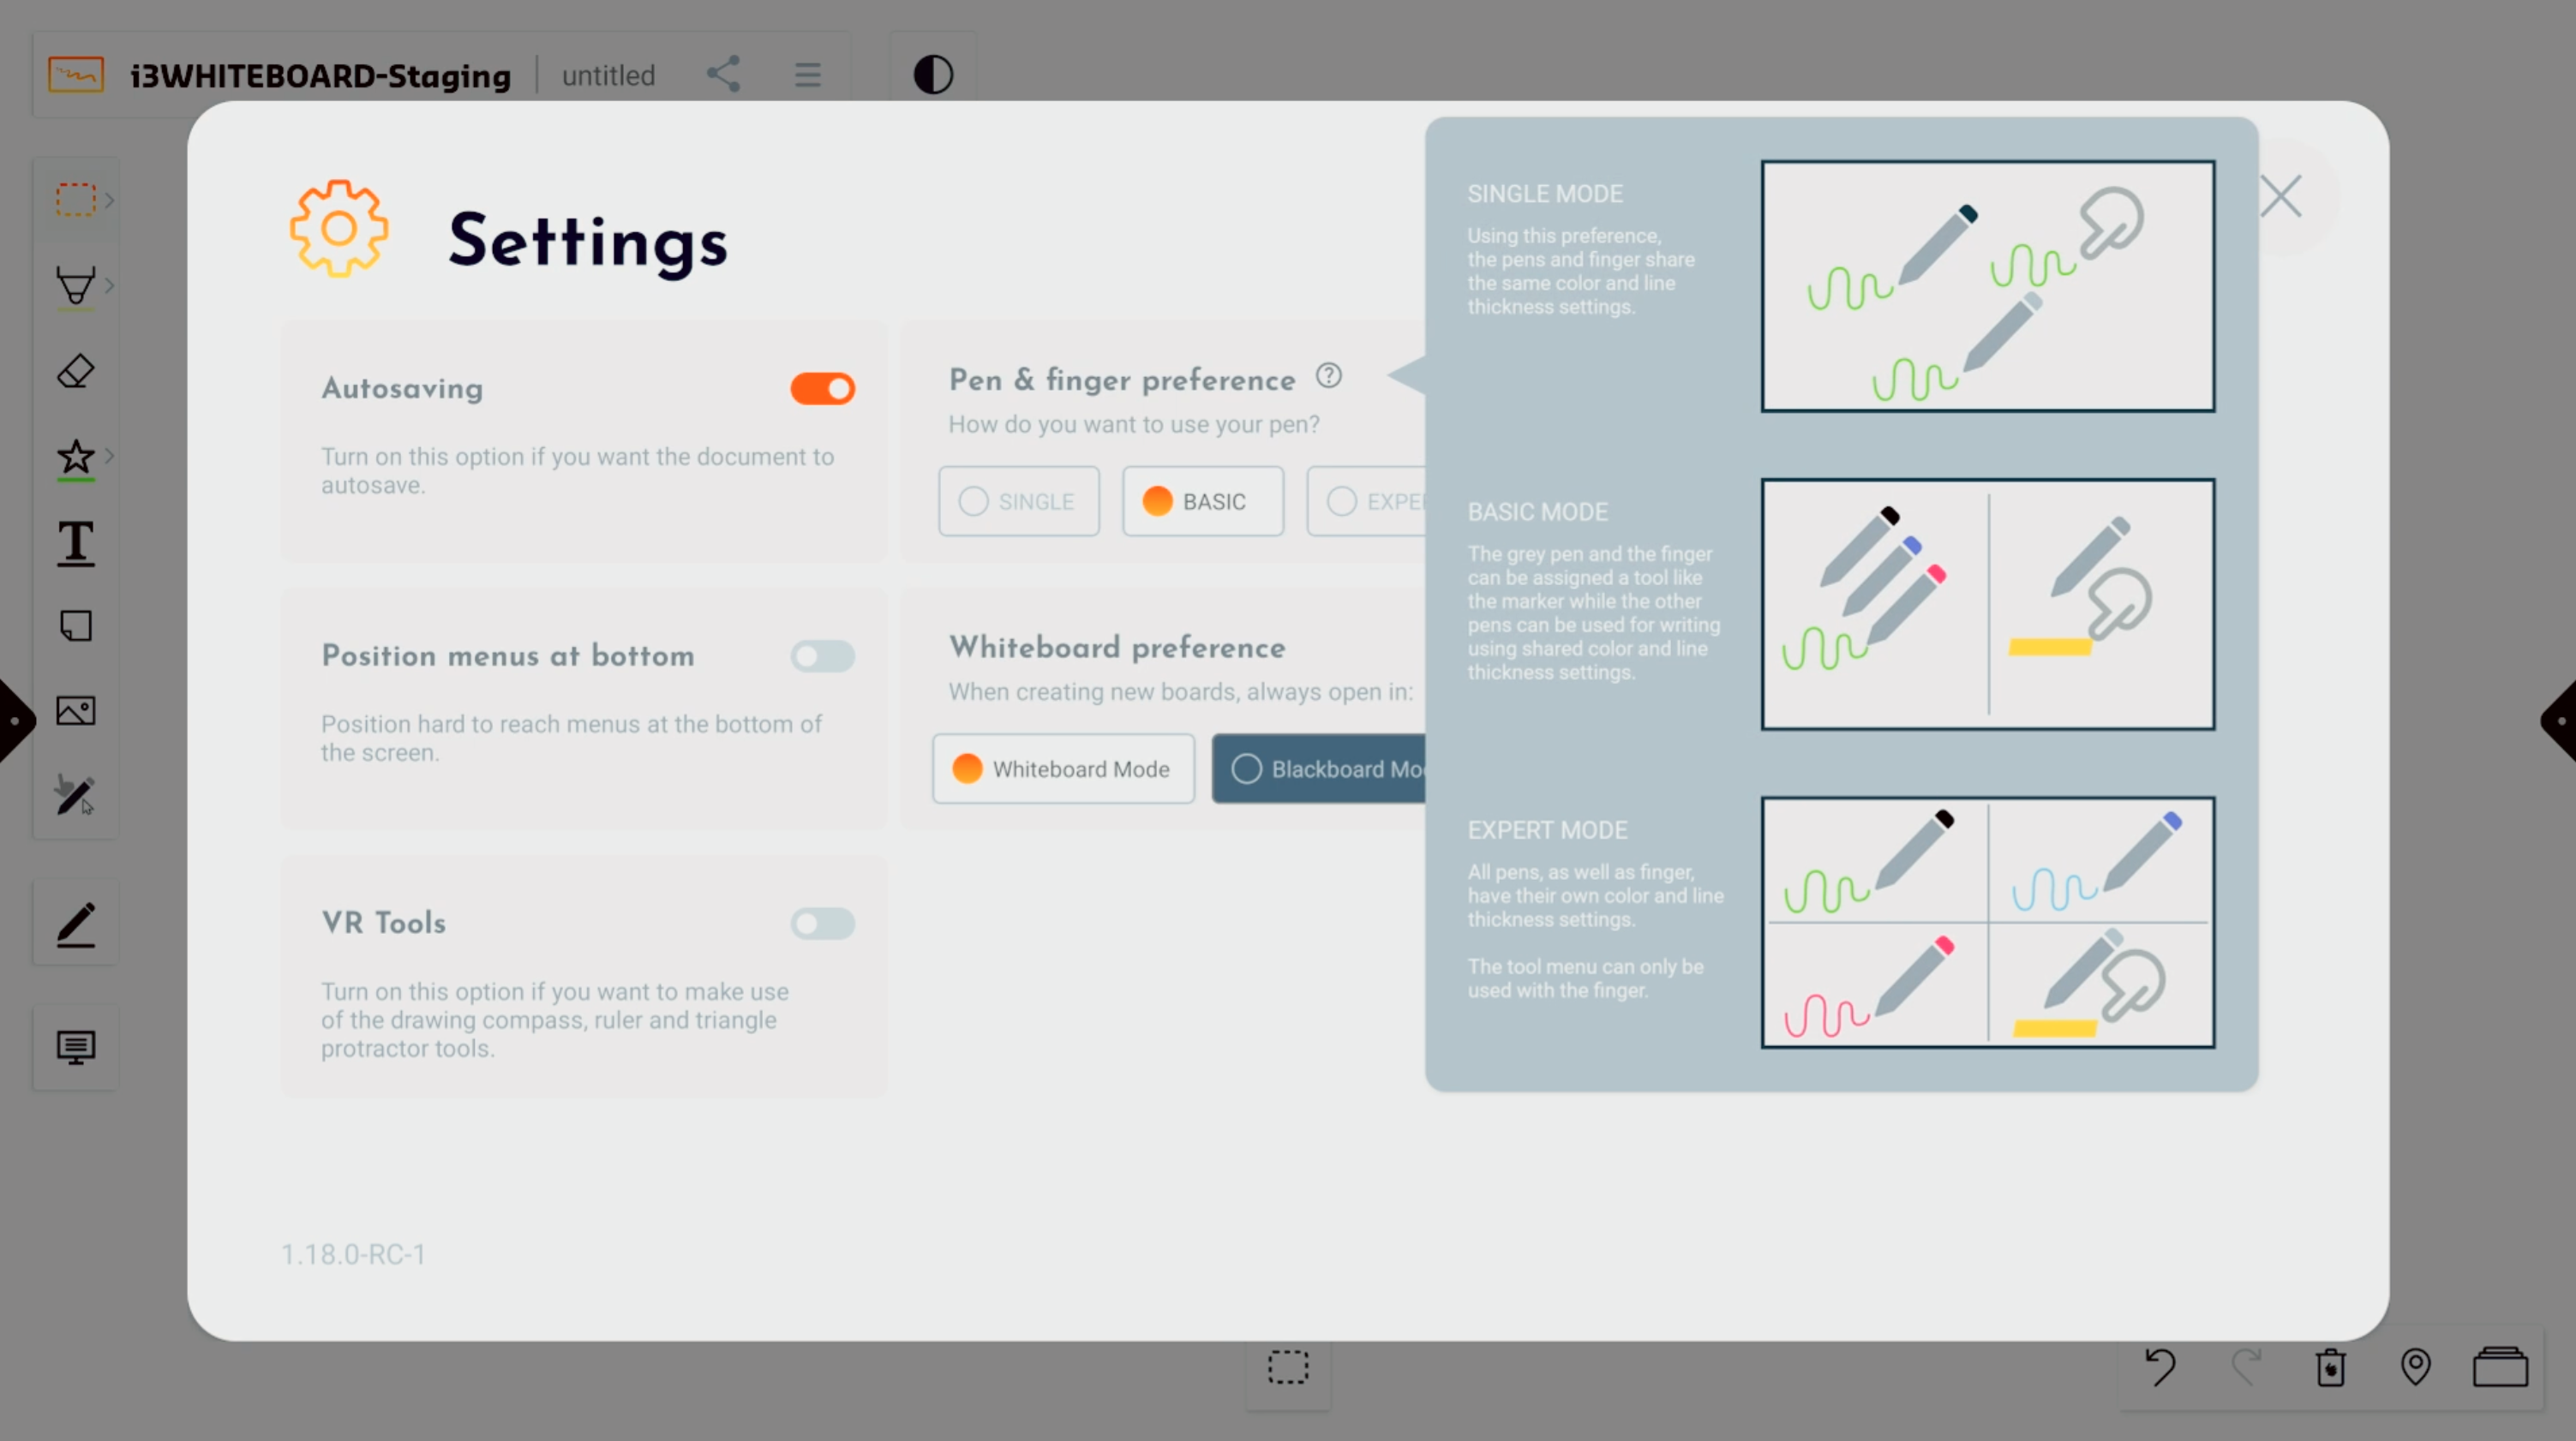
Single Mode
This very easy-to-use setting is the fastest way for novice users to get up and running in i3WHITEBOARD as both finger and pen are considered the same.
How does Single Mode work?
Go to Settings via the Main menu and locate the setting called “Pen & finger preference”.
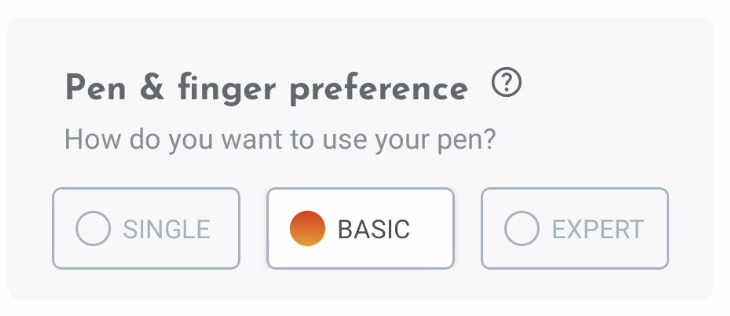
Select Single Mode if not already selected. With Single mode active, there will be no difference between finger and pen interaction. They will use the same tool, with the same features. Though very limited, it provides an interface that anyone can work with easily.
Basic Mode
Limited, yet flexible, Basic Mode brings back how some more experienced users were used to working with the finger as a highlighter or selection tool while using the pen for writing. New users might also appreciate this setting.
How does Basic Mode work?
Go to Settings via the Main menu and under “Pen & finger preference”, select Basic Mode if not already selected. The Pen tool becomes available under the Tool menu.
For i3TOUCH E-ONE and X-ONE displays
Basic Mode will allow you to set the front of the pen with the Pen tool. The back of the pen will do the same as the finger, allowing you to use a different tool.
For i3TOUCH X2 and X3 displays
Basic Mode will combine all pens, apart from the grey pen, into one. The grey pen acts as the finger, which can use a different tool.
For i3TOUCH ULTRA and P2 displays
Basic Mode will combine all pens while the finger can use a different tool.
Expert Mode
Expert Mode is the most advanced setting and has dedicated features for your finger and each pen that comes with the display.
How does Expert Mode work?
Go to Settings via the Main menu and under “Pen & finger preference”, select Expert Mode if not already selected. Each pen, available for your i3TOUCH display, and the finger will have their own color and line thickness features.
For i3TOUCH X2 and X3, the grey pen will always act the same way as the finger.