What's new in i3WHITEBOARD 1.20.0?
Overview of what’s new in i3WHITEBOARD 1.20.0
i3WHITEBOARD 1.20.0 comes again with exciting new features. Let’s see what we’ve been up to!
Dual screen mode allows two users to work in i3WHITEBOARD
https://youtu.be/nqpnPCynFas?si=BoWiHmg6T0fubKnKWe added the feature to split the i3WHITEBOARD canvas in two equal parts, allowing two user to interact simultaneously with the canvas but using their own tools and colors. This feature can be called right from within the i3WHITEBOARD interface.
Press the Dual screen toggle at the top of the screen.

A line will appear in the middle, dividing not only the screen, but also the canvas into two separate canvases. Both Tool menu and Features menu will be available in their own section and can be assigned separately. For instance, the user on the left can draw with a yellow pencil while the user on the right can be drawing blue square shapes.

As this feature is intended to keep users focused on elementary tasks, the interface is purposefully limited and only the standard tools are available in Dual screen mode.
To exit Dual screen mode, simply toggle the same button, which now shows an icon for Single screen mode.

Both canvases will be merged into one canvas.
Easily convert your writings to an editable text field
https://youtu.be/jUIdbl98Qvg?si=BkiXOdoH98AFZ4N8With the help of Machine Learning (a branch of artificial intelligence (AI) and computer science that focuses on the use of data and algorithms), we can now give you the option to convert your handwriting into text fields, which can later still be edited. Simply write something on the canvas, using the pen or your finger. Draw a box selection field around the word or sentence that you wish to convert.
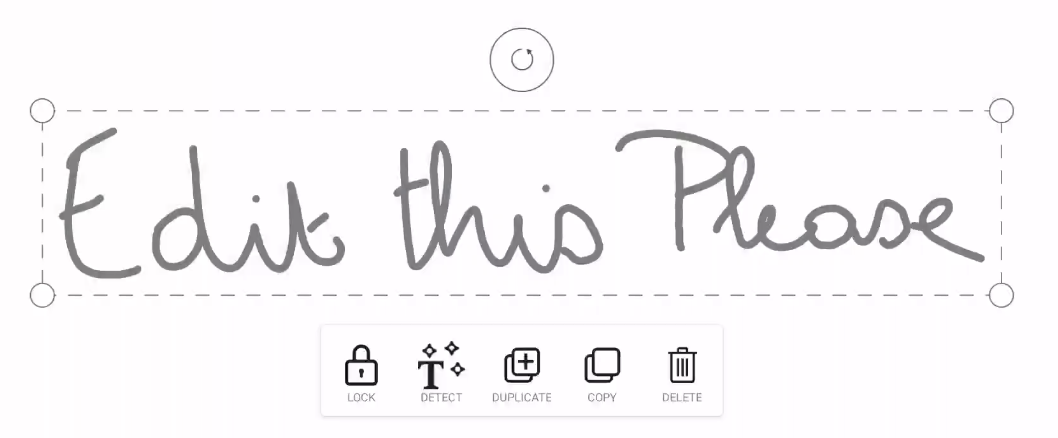
In the Actions menu, select the new button called “Detect”. The Suggestions menu will appear to the right of the selection in which you will see one main suggestion and three alternative suggestions.
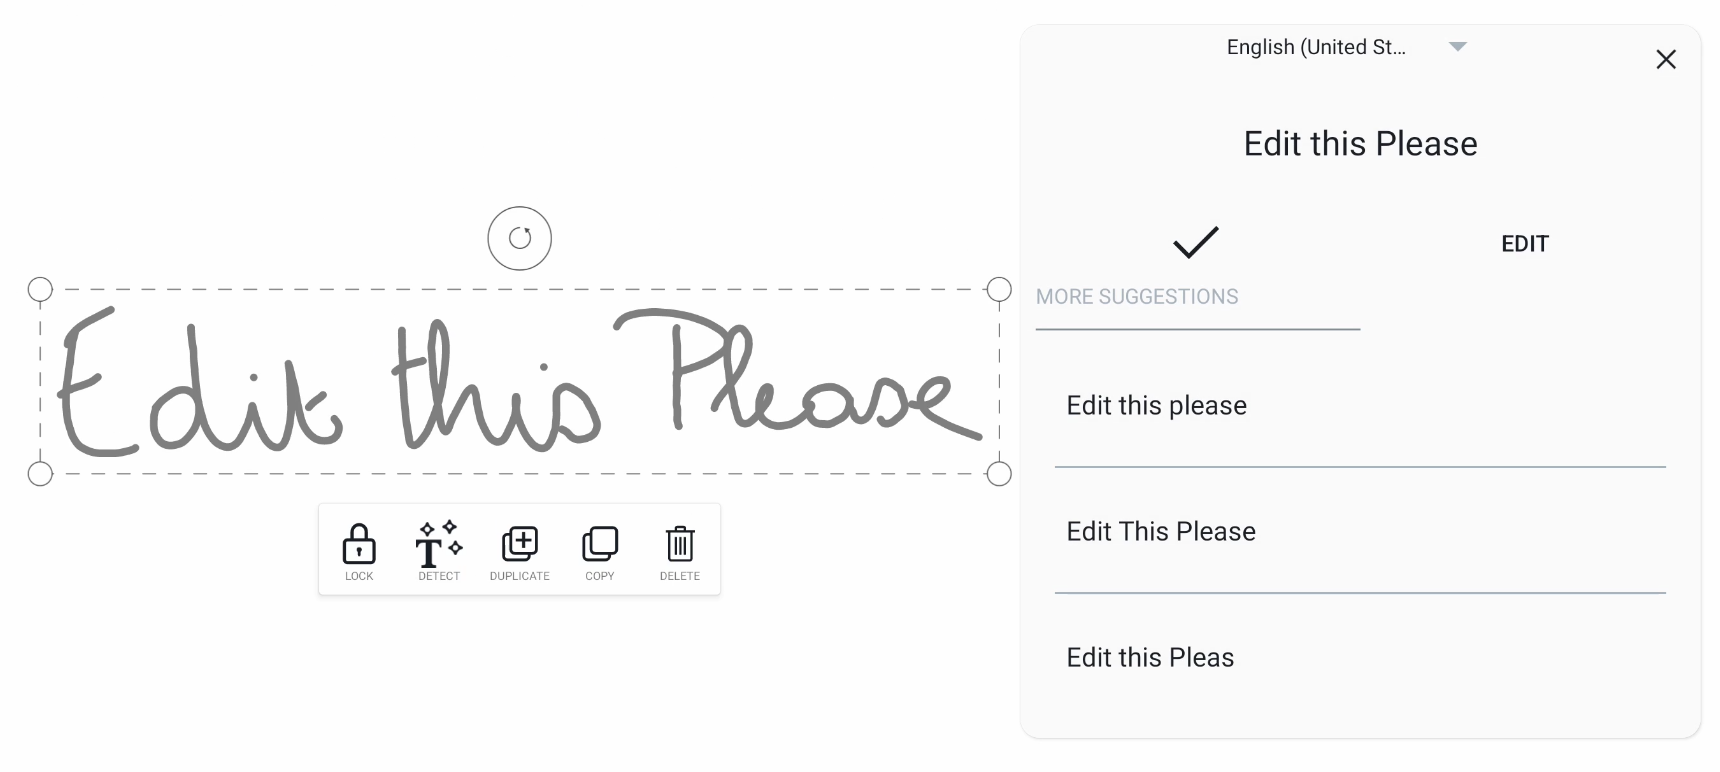
The main suggestion can be accepted or, if necessary, edited from within the suggestions menu.
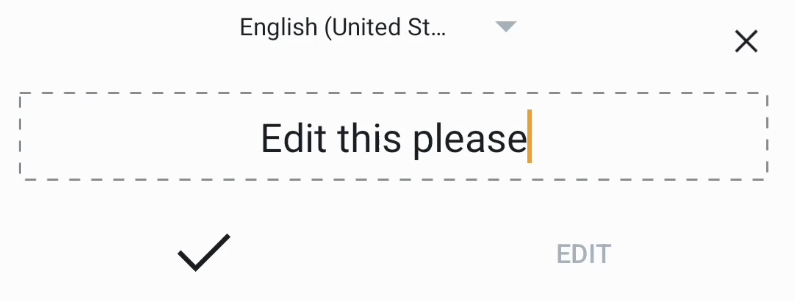
If you choose any of the alternative suggestions, it will replace the main suggestion, allowing you to still edit that suggestion before accepting it.
Note that text recognition works best on words that were written in the same sequence. If you erase a word in a sentence to write another word in its place, it might not give the desired result.
More formatting options with the rich text editor
https://youtu.be/f0HdPf19UeE?si=C7lH4pqLBYsq2WJBWhen you add, or edit a text field on the canvas, it will display a dialog with a rich text field editor.
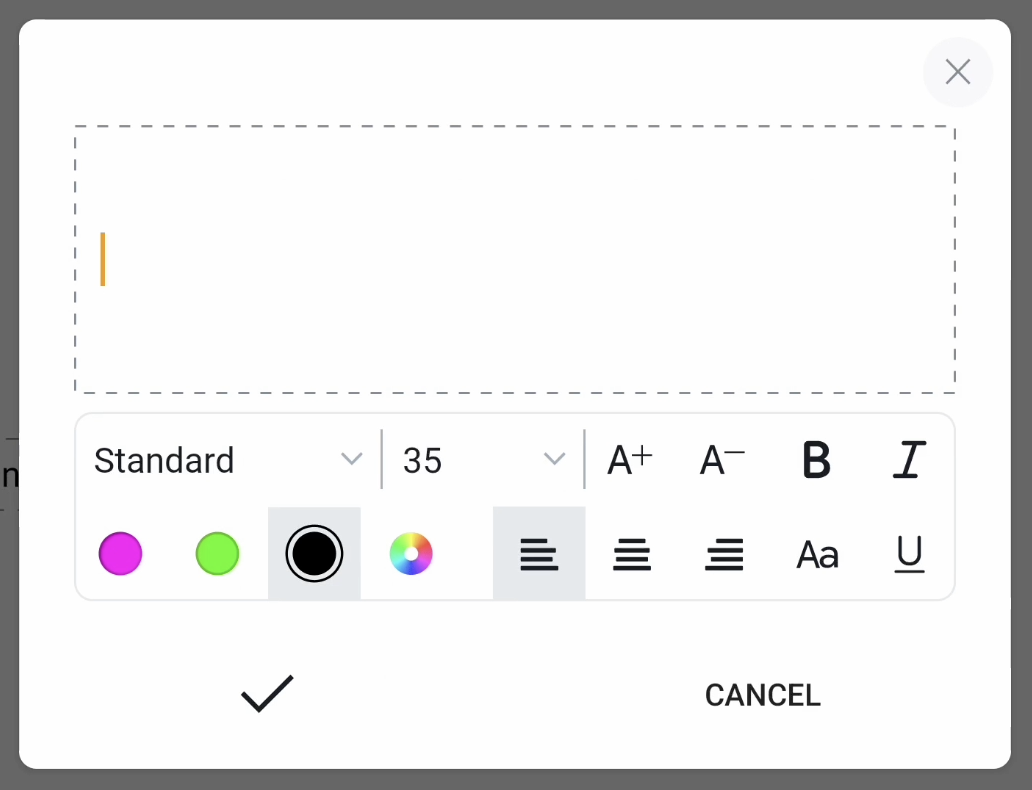
This rich text field editor allows you to:
Enter and/or edit text. You can do that by setting the cursor on a word to edit it or in between words to add/ delete words
Set the formatting of the text using one or several of these parameters:
Font style: choose any of the given font styles in the drop down field
Font size: Set a given size or use the increment ( + )/ decrement icons ( - ). Alternatively, you can also resize the text field on the canvas.
Bold
Italic
Change the color using any of the document colors or the color picker
Alignment icons (left, center and right)
Toggle between upper/ lower case or the original writing
Underline
Drag and drop icons on the canvas with our new Icon library
https://youtu.be/5n-pZkeMLdI?si=1e28ZlZXncgOGCzkThe Icon library is the newest addition to the Tool menu, allowing users to drag and drop icons on the canvas. We already added popular and extensive icon libraries that you can use right now, such as Material Icons, FontAwesome and OpenMoji, giving you immediate access to thousands of icons.
Browse the icon libraries
The first time you load the icon library, you’ll see each icon library displayed in its own folder, along with sub folders for each category. You can easily browse through the folders by selecting them. If only the parent folder is shown, there are no more sub folders or categories at this level. You’ll have to navigate back by selecting the parent folder.
Drag icons to the canvas
Select an icon from the library. Once selected, you can drag it to the canvas. It now becomes an object on the canvas that you can later select and manipulate.
You can also select multiple icons within a folder and drag them all to the canvas at once. They will all be separate objects that you can still move around as you like. Note that the icons will be saved to the document and could impact the file size.
Create your own libraries
Want to create your own libraries? Well, you can do that easily in i3WHITEBOARD by putting a folder with all your svg, png, JEPG, WEBp files, organised in sub folders, on the i3TOUCH display or copying them from a USB stick. i3WHITEBOARD will recognise the sub folders and add them to the library.
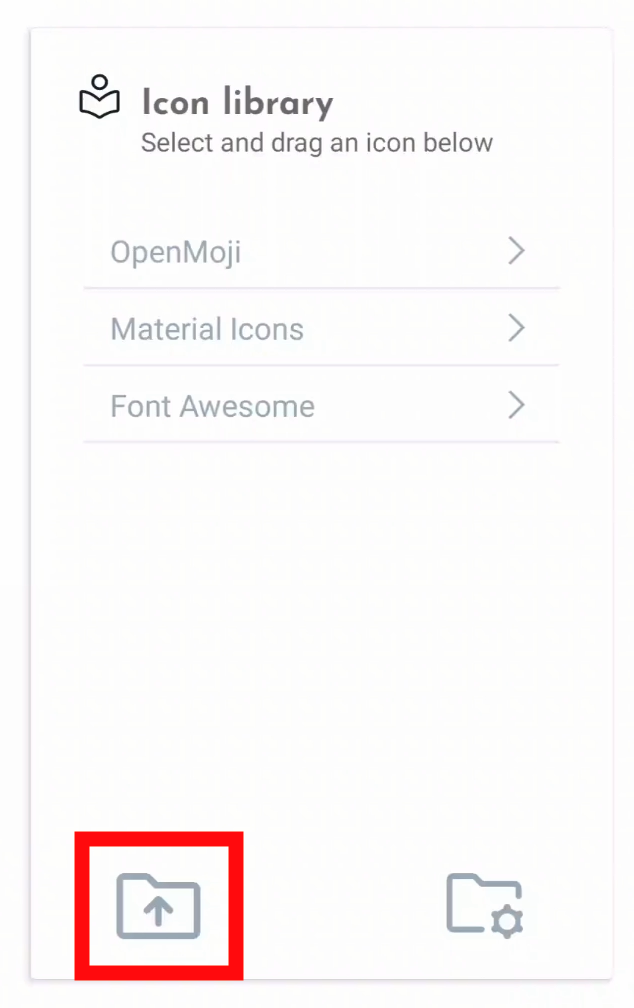
At the bottom of the Icon library, select the Upload button.
Locate the source of your icons, either on the i3TOUCH display or USB drive. Select the parent folder and all its sub folders/ items at once by selecting the circle in the top left corner. Don’t forget to add a title.
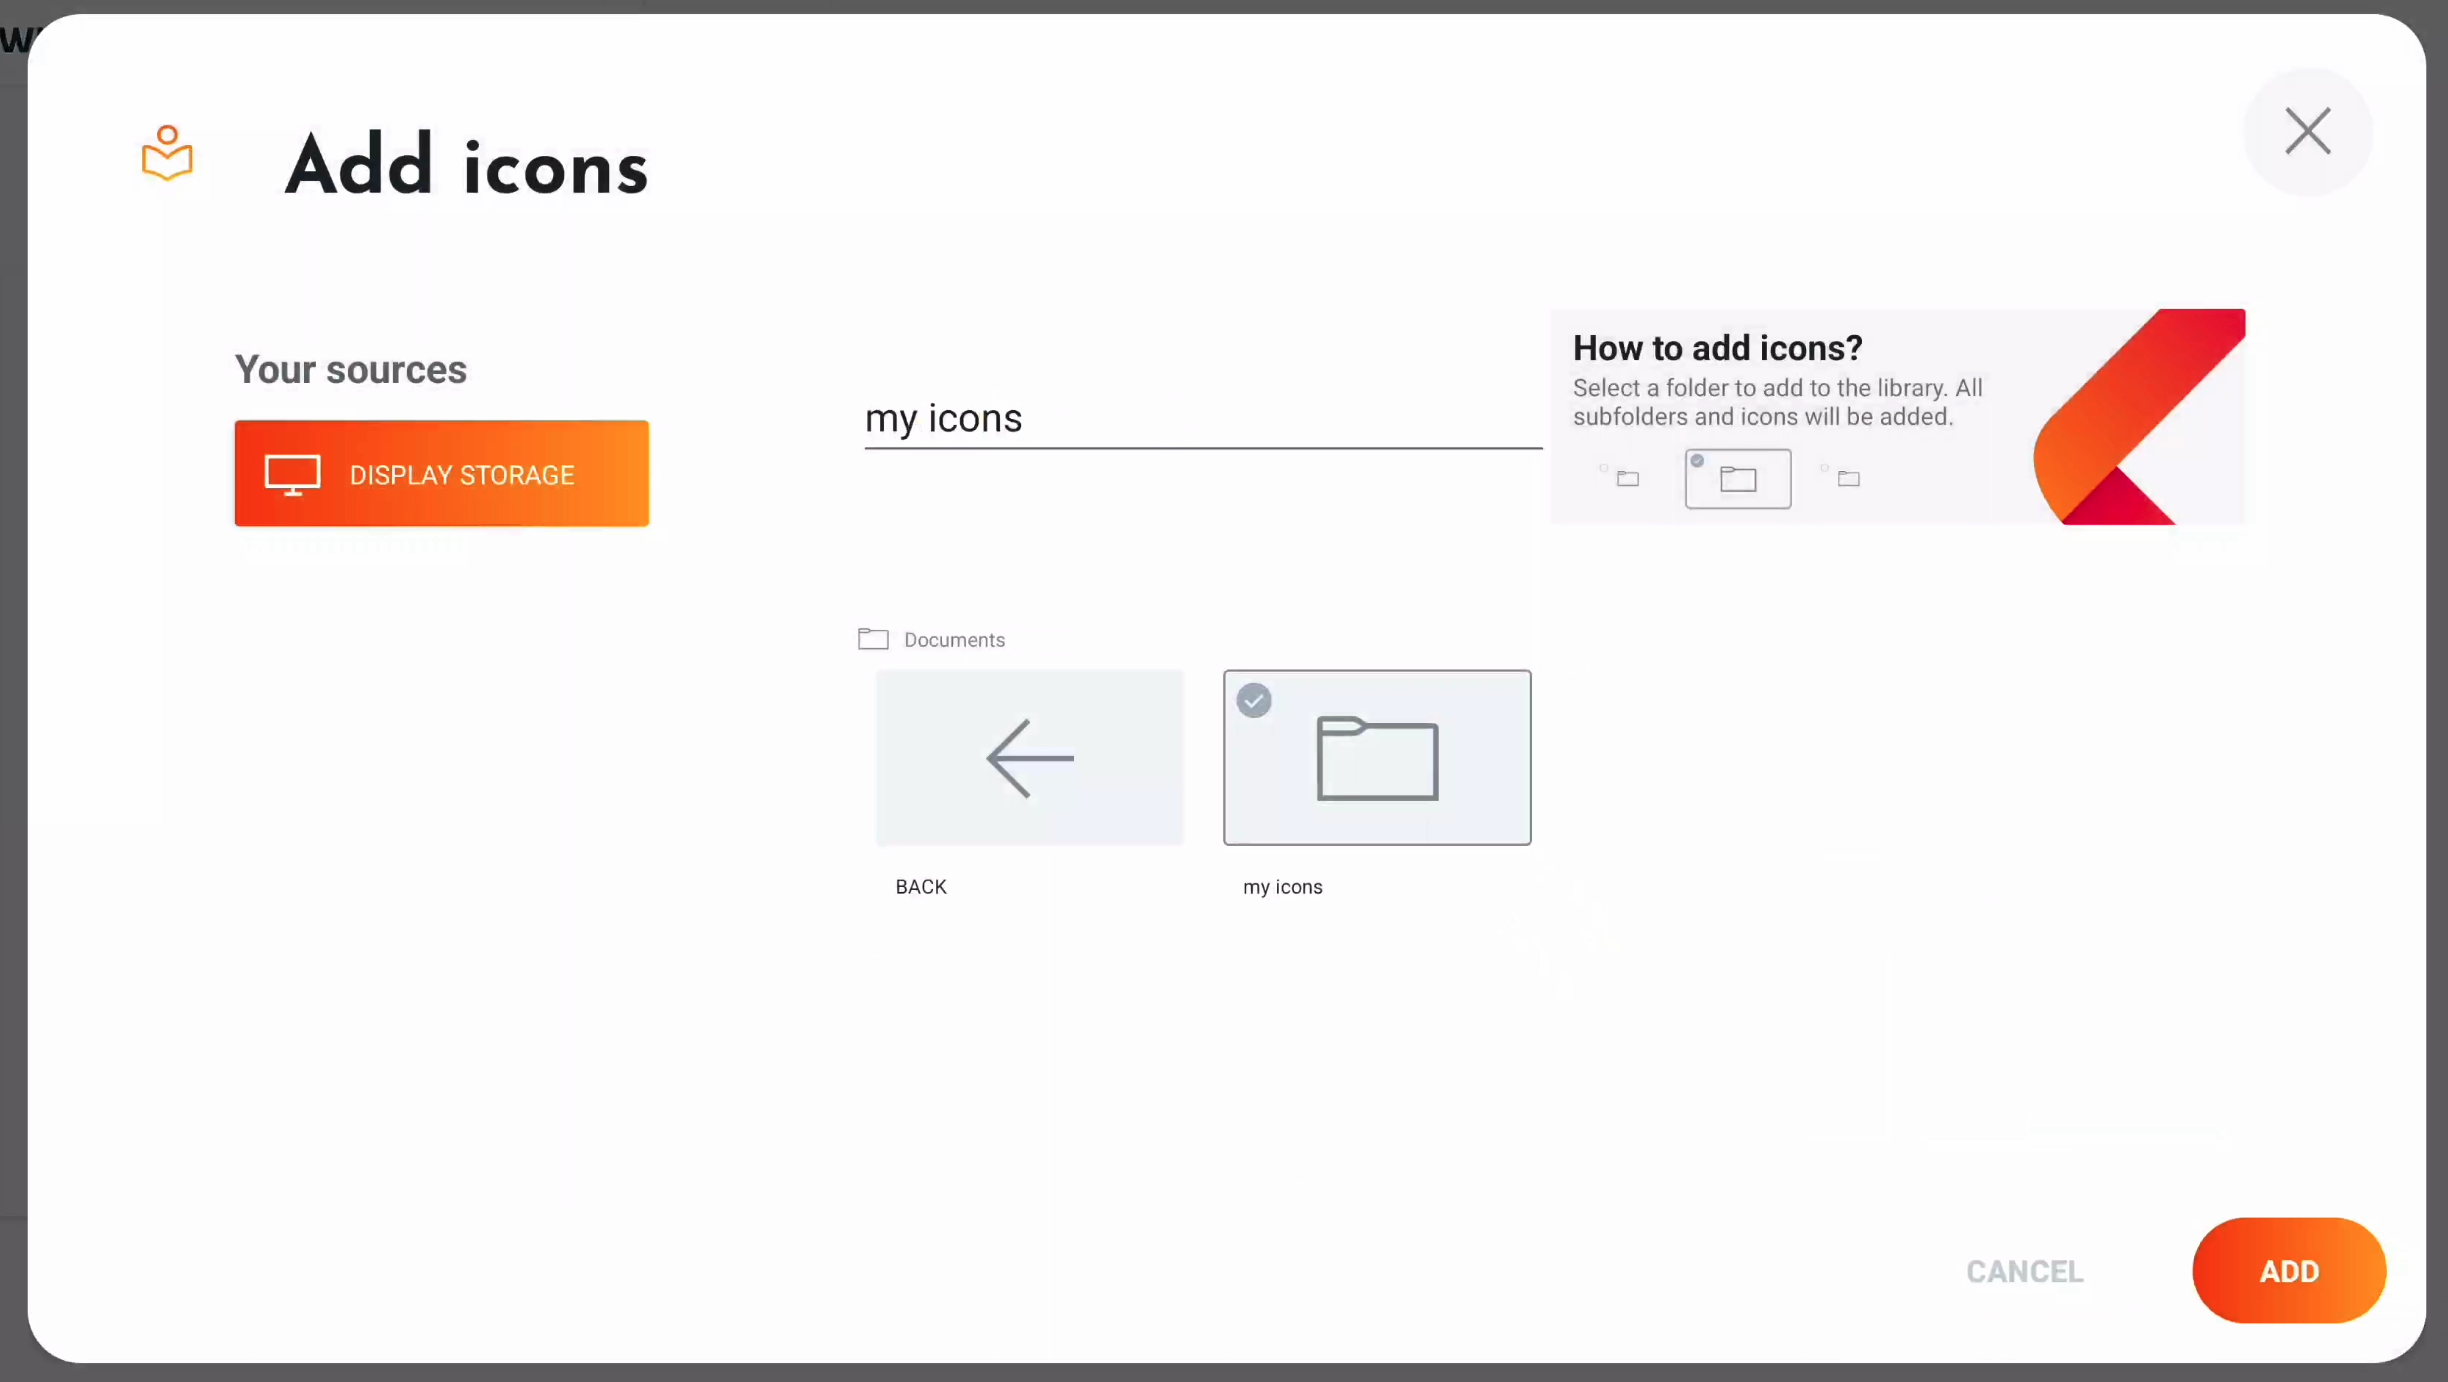
Select add and your new icon folder is available in the Icon library. If it takes time to import the icons, a loading menu might appear.
Alternatively, you can have your IT administrator upload them using our remote management system i3RDM. This way, they can add them to a remote configuration and copy the library to all i3TOUCH devices within your organisation!
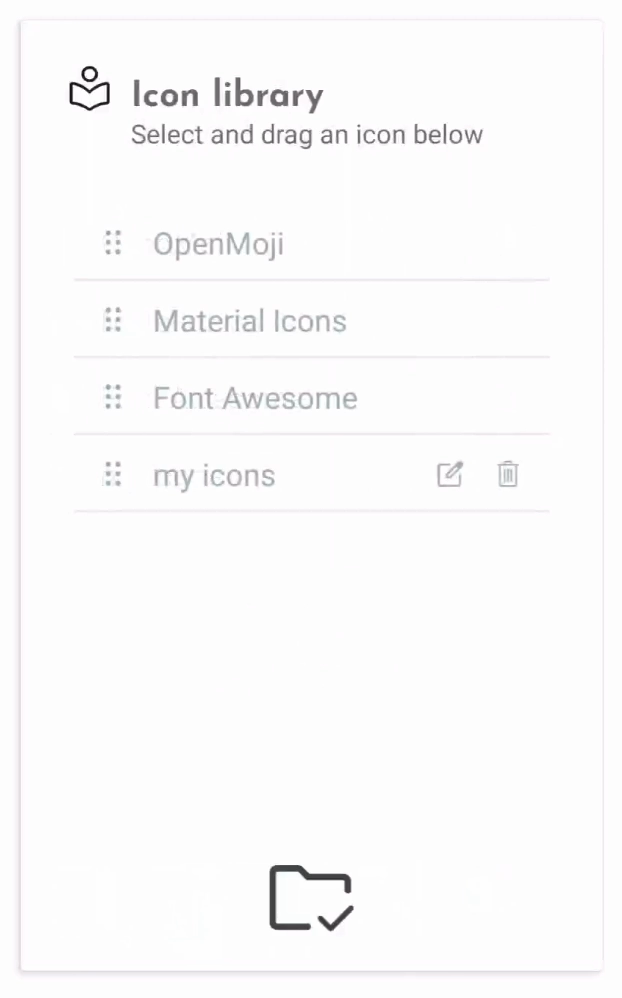
Manage your icon libraries
Select the Manage icon at the bottom right of the Icon library.
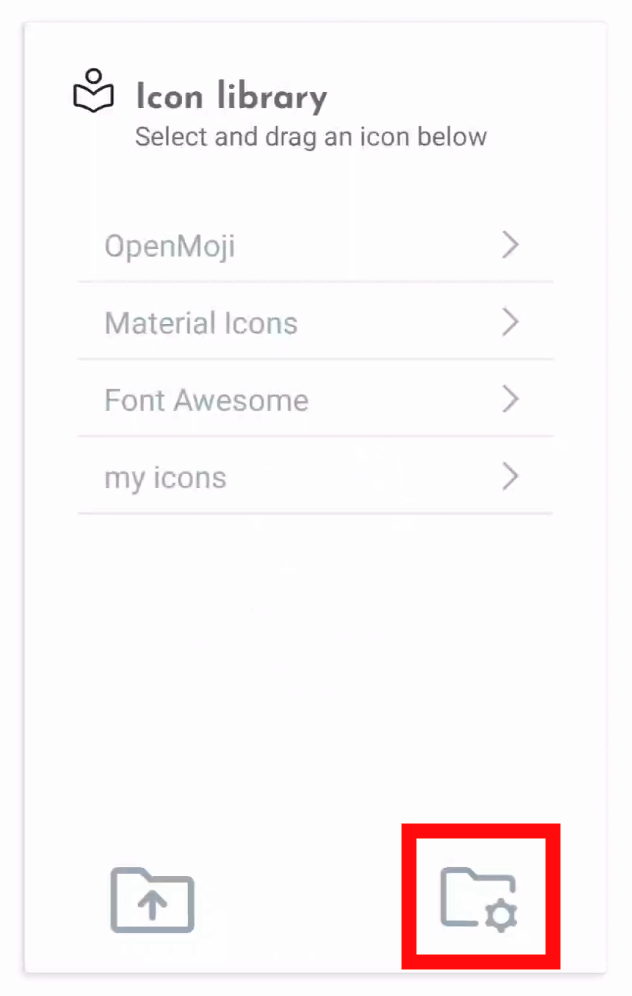
This changes the view of the libraries and adds the feature to drag the libraries around. User libraries can also be renamed and/ or removed.
Licenses
Material Icons icon library is licensed under the Apache License version 2.0.
OpenMoji icon library emojis are designed by OpenMoji – the open-source emoji and icon project. License: CC BY-SA 4.0
Font Awesome icon library is fully open source and is GPL friendly. License: SIL OFL 1.1
Subscribe to the i3Tech Update newsletter
Want to stay up to date with our newest developments? Subscribe to our quarterly tech newsletter.
