
Installation
Installation
Connecting the Projector
Connect to Computer/Notebook
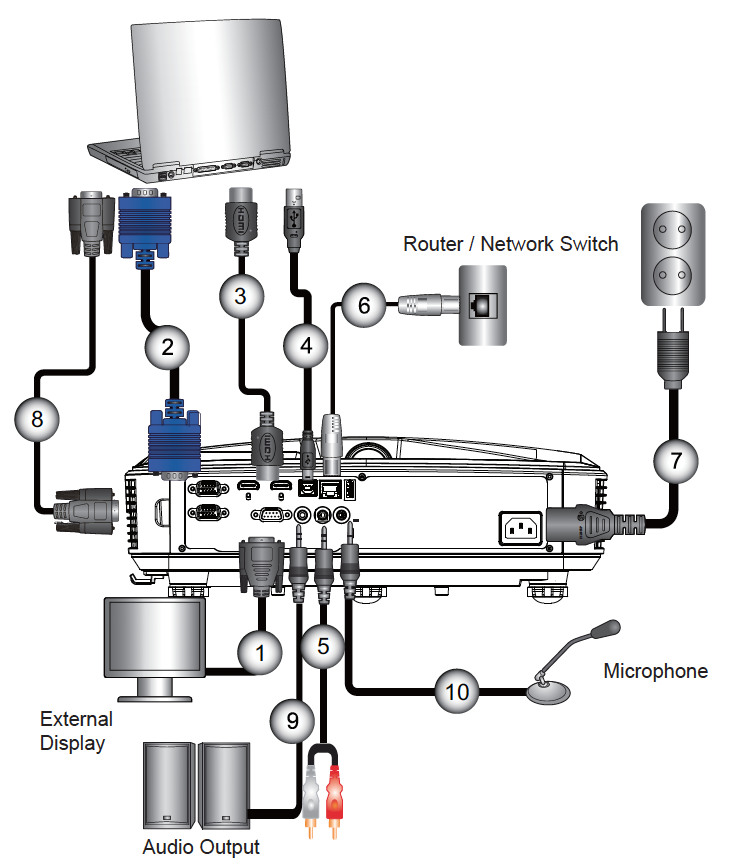
*RS232 Cable
VGA Cable
*HDMI Cable
*USB Type B to Type A
*Audio Cable/RCA
*RJ45 Cable
Power Cord
*VGA Output Cable
*Audio Output Cable
*Audio Input Cable
Due to the difference in applications for each country, some regions may have different accessories.
(*) Optional accessory
Connect to Video Sources
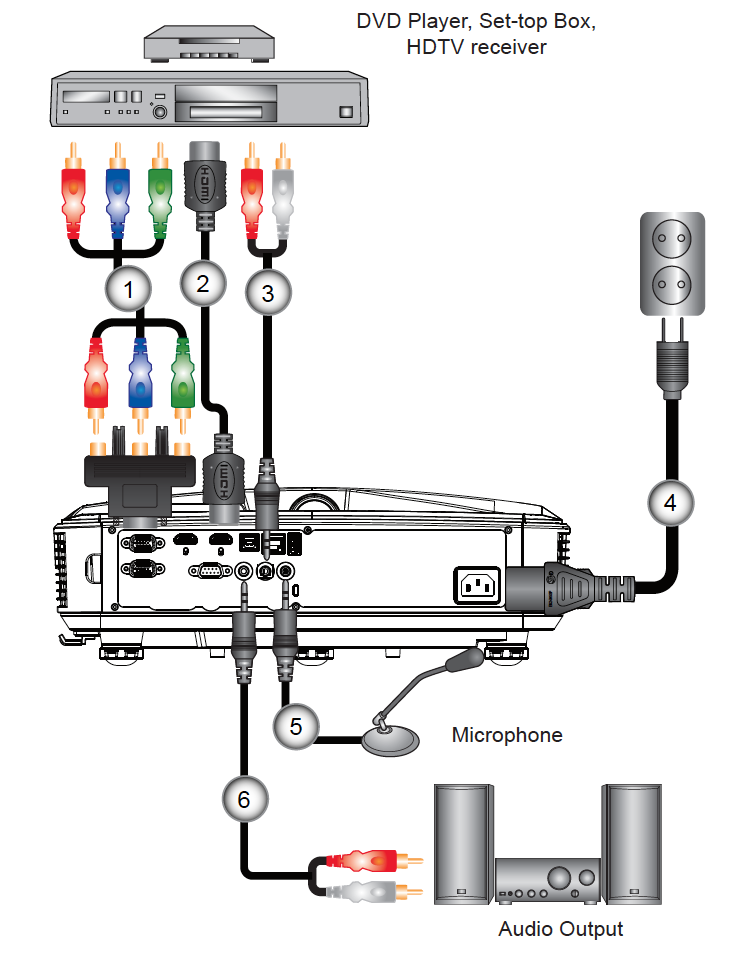
*15-Pin to 3 RCA Component/HDTV Adaptor
*HDMI Cable
*Audio Cable/RCA
Power Cord
*Composite Video Cable
*Audio Cable/RCA
Due to the difference in applications for each country, some regions may have different accessories.
(*) Optional accessory
Powering the Projector On / Off
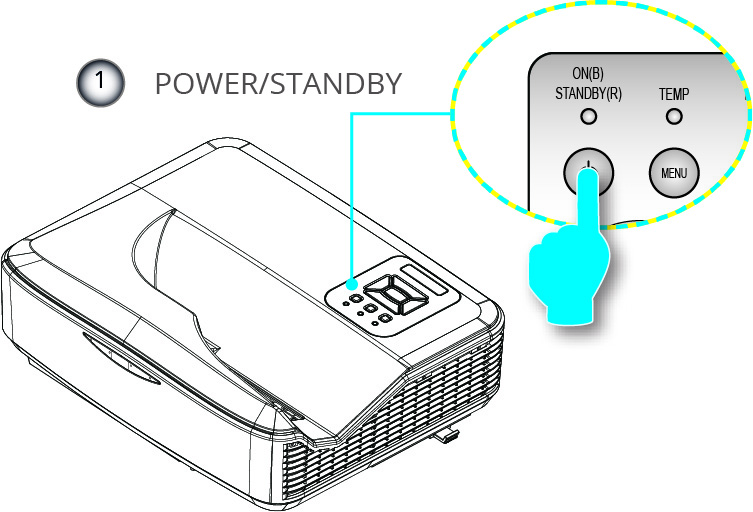
Powering On the Projector
Securely connect the power cord and signal cable. When connected, the POWER/STANDBY LED will turn Orange.
Turn on the lamp by pressing the power button either on the projector or on the remote. At this moment, the POWER/STANDBY LED will now turn Blue.
The startup screen will display in approximately 10 seconds. The first time you use the projector, you will be asked to select the preferred language and power saving mode.
Turn on and connect the source that you want to display on the screen (computer, notebook, video player, etc). The projector will detect the source automatically. If not, push menu button and go to “OPTIONS”.
Make sure that the “Source Lock” has been set to “Off”.
If you connect multiple sources at the same time, press the “INPUT” button on the control panel or direct source keys on the remote control to switch between inputs.
When the power mode is in standby mode (power consumption < 0.5W), the VGA output/ input and audio will be deactivated when the projector is in standby.
Turn on the projector first and then select the signal sources.
Powering Off the Projector
Press the power button on the remote control or on the control panel to turn off the projector. The following message will be displayed on the screen.
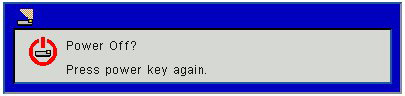
Press the power button again to confirm otherwise the message will disappear after 10 seconds. When you press the power button for the second time, the fan will start cooling the system and will shut down.
The cooling fans continue to operate for about 4 seconds for cooling cycle and the POWER/STANDBY LED will flash Orange. When the POWER/STANDBY LED lights solid Orange, the projector has entered standby mode.
If you wish to turn the projector back on, you must wait until the projector has completed the cooling cycle and has entered standby mode. Once in standby mode, simply press the power button to restart the projector.Disconnect the power cord from the electrical outlet and the projector.
Do not turn on the projector immediately following a power off procedure.
Warning Indicator
When the warning indicators (see below) come on, the projector will automatically shutdown:
“LAMP” LED indicator is lit red and if “POWER/STANDBY” indicator flashes amber.
“TEMP” LED indicator is lit red, this indicates the projector has overheated. Under normal conditions, the projector can be switched back on.
“TEMP” LED indicator flashes red and if “POWER/STANDBY” indicator flashes amber.
Unplug the power cord from the projector, wait for 30 seconds and try again. If the warning indicator light up again, please contact your nearest service center for assistance.
Contact the nearest service center if the projector displays these symptoms.
Adjusting the Projected Image
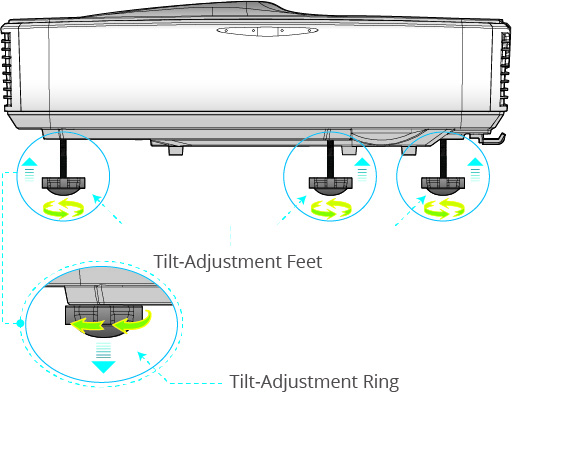
Adjusting the Projector's Height
The projector is equipped with elevator feet for adjusting the image height.
Locate the adjustable foot you wish to modify on the underside of the projector.
Rotate the adjustable ring clockwise to raise the projector or counter clockwise to lower it. Repeat with the remaining feet as needed.
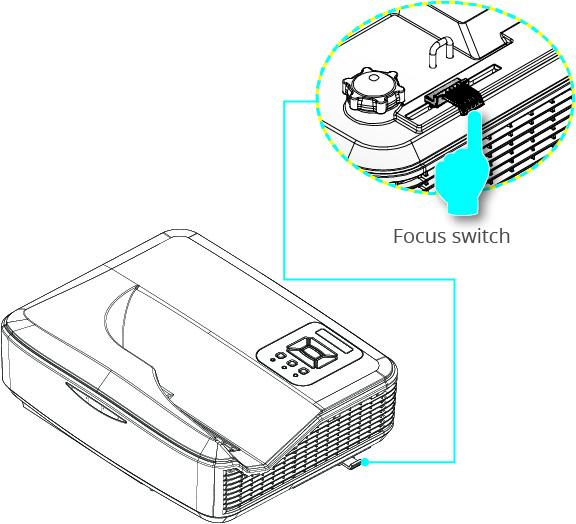
Adjusting the Projector's Focus
To focus the image, slide the focus switch to left/right until the image is clear.
WXGA series: The projector will focus at distances (lens to wall) from 1.59~2.16 feet (0.49~0.66 meters).
Adjusting Projection Image Size (Diagonal)
WXGA series: Projection Image Size from 85” to 115” (2.16 to 2.92 meters).
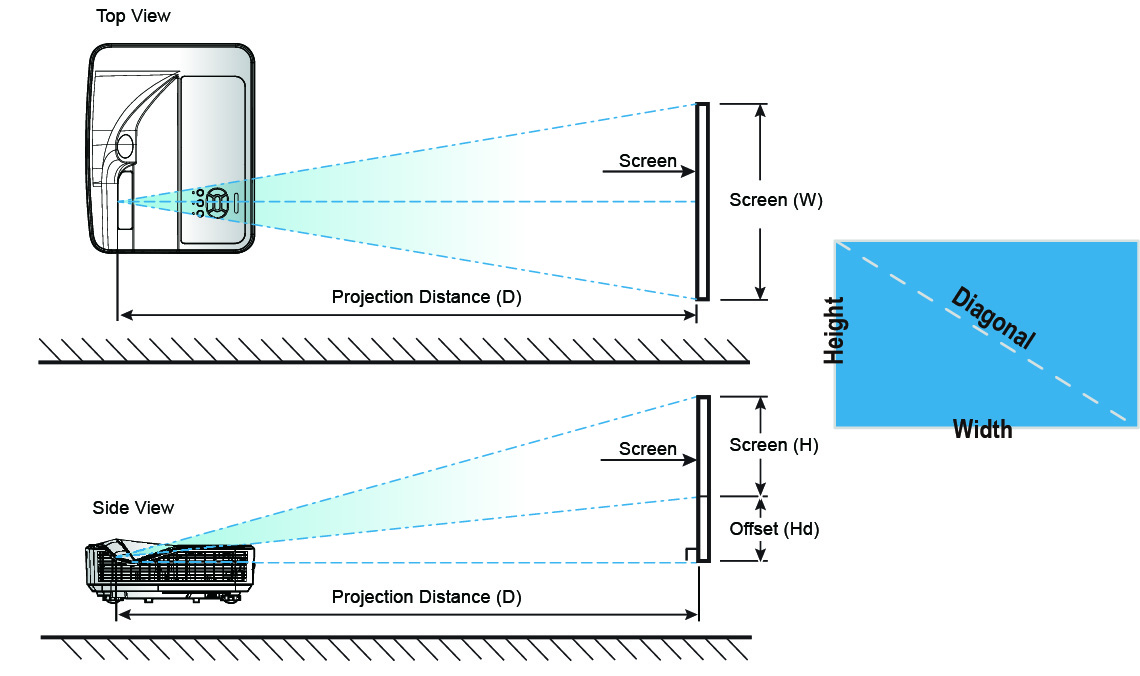
Diagonal length (inch) of 16:10 screen | Screen Size Width | Screen Size Height | Screen Size Width | Screen Size Height (inch) | Projection Distance | Projection Distance | Offset | Offset |
|---|---|---|---|---|---|---|---|---|
88 | 189.5 | 118.5 | 74.6 | 46.7 | 24.2 | 9.5 | 28.1 | 11.1 |
90 | 193.9 | 121.2 | 76.3 | 47.7 | 25.4 | 10.0 | 28.6 | 11.3 |
95 | 204.6 | 127.9 | 80.6 | 50.4 | 28.2 | 11.1 | 29.8 | 11.7 |
100 | 215.4 | 134.6 | 84.8 | 53.0 | 31.1 | 12.2 | 31.0 | 12.2 |
105 | 226.2 | 141.4 | 89.0 | 55.7 | 34.0 | 13.4 | 32.2 | 12.7 |
110 | 236.9 | 148.1 | 93.3 | 58.3 | 36.8 | 14.5 | 33.4 | 13.2 |
118 | 254.2 | 158.9 | 100.1 | 62.5 | 41.4 | 16.3 | 35.3 | 13.9 |
This table is for user’s reference only.