Configurations
Configurations are a powerful feature of i3CONNECT Cortex that allows administrators to capture certain i3CONNECT STUDIO settings and store them as a configuration or create a new configuration from scratch . That configuration can then be used to apply the same settings to one or more devices or a Device group or reset the device to a preconfigured state.
Which settings can be configured?
All the settings that are now available from the Settings app in i3CONNECT Cortex can be saved as a configuration. Simply load up the Settings app to see what’s inside, or see Using the Settings app to find out what’s possible.
Creating a new configuration
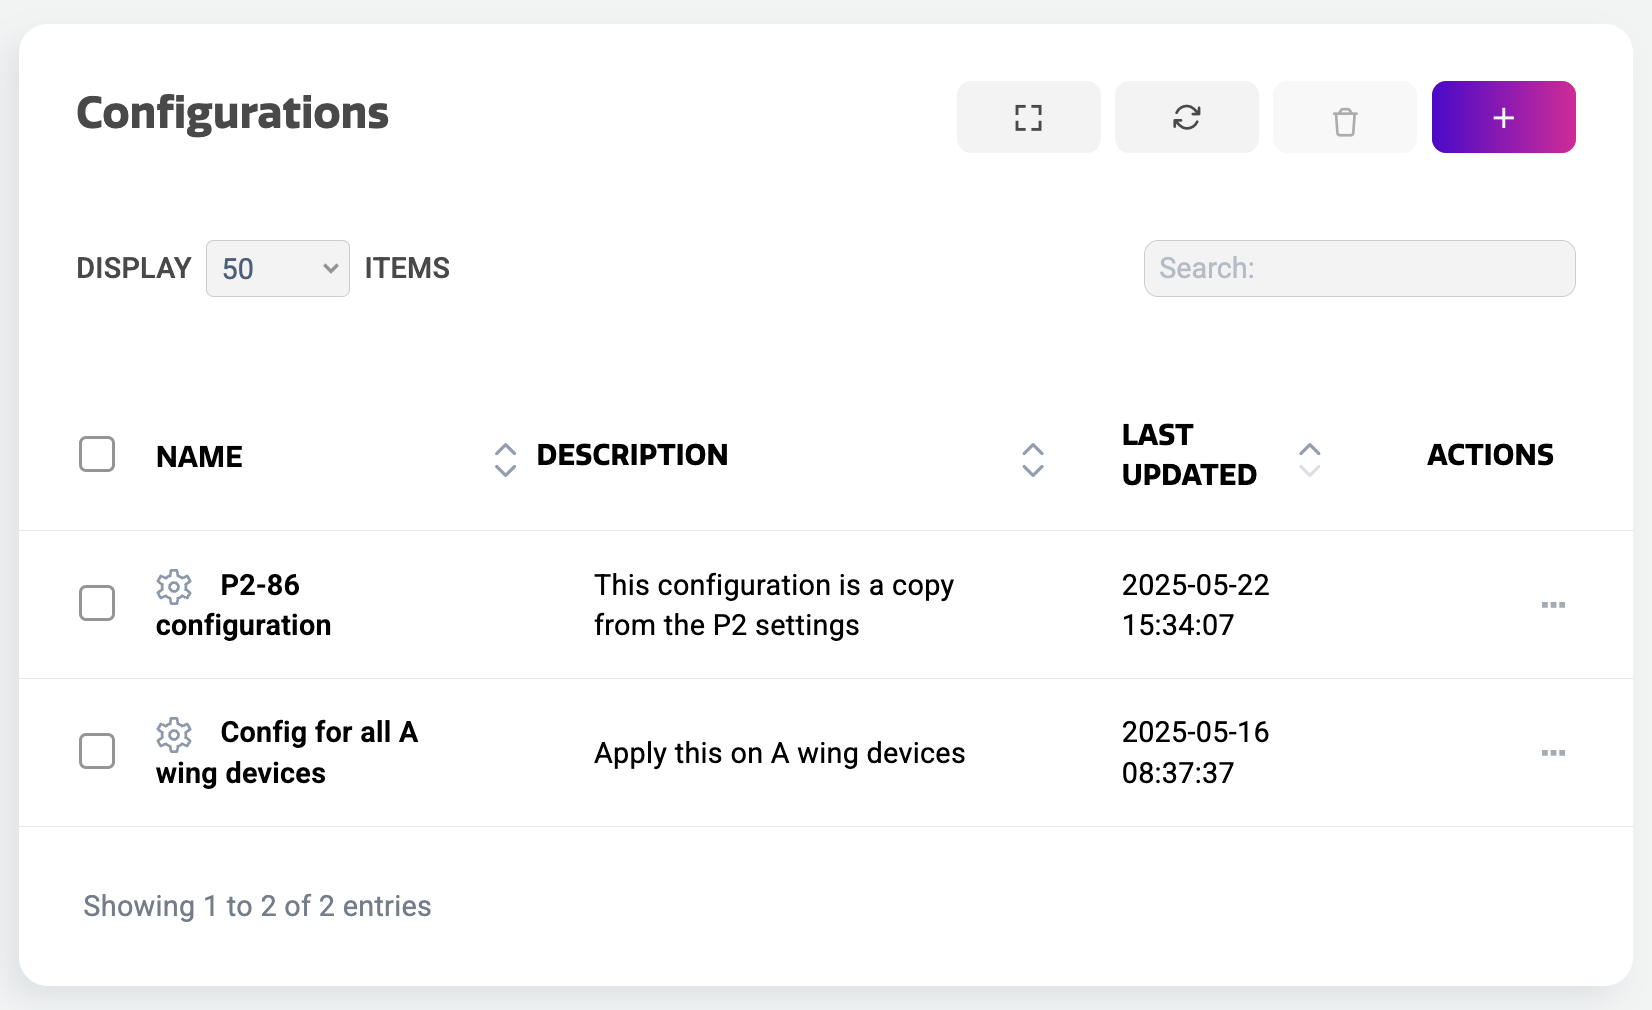
One way to create a configuration is to start with a clean slate. Select “Configurations” from the main menu. This loads the overview of configurations that you can edit or apply, but it could also be empty if you don’t have any yet.
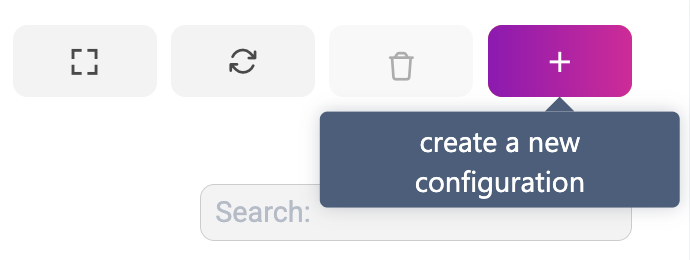
To create a new configuration, select the “+” button at the top right of the configurations overview.

It will now create a new, empty configuration. At the top you can enter a name and a description. You can also enter this information at the end if you don’t know yet what you’re going to configure.
Below that, you’ll see all the sections that you also have in the Settings app, in the same order but horizontally. Each section can be configured individually, but can also be left empty if you don’t want to configure that section.

Go to the section that you want to edit and select “Configure”.
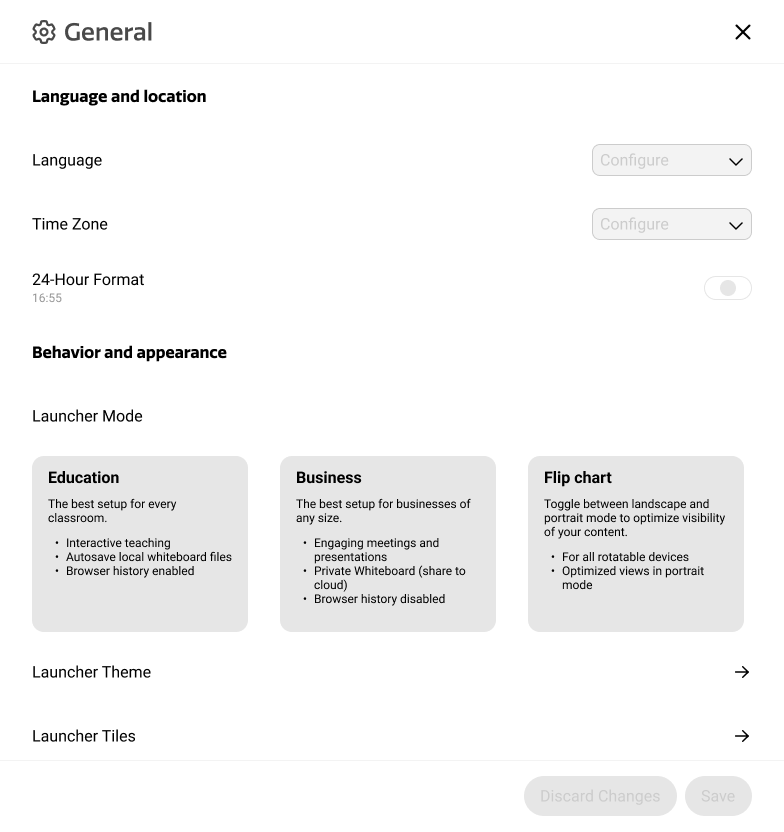
The Settings app will appear, showing the settings of that section.
The settings here appear in the “not configured” state. This means, that if you leave them this way, your i3CONNECT display will not update this setting, when the configuration is applied. Select them to change the value and it will change the value that was previously set on the display.
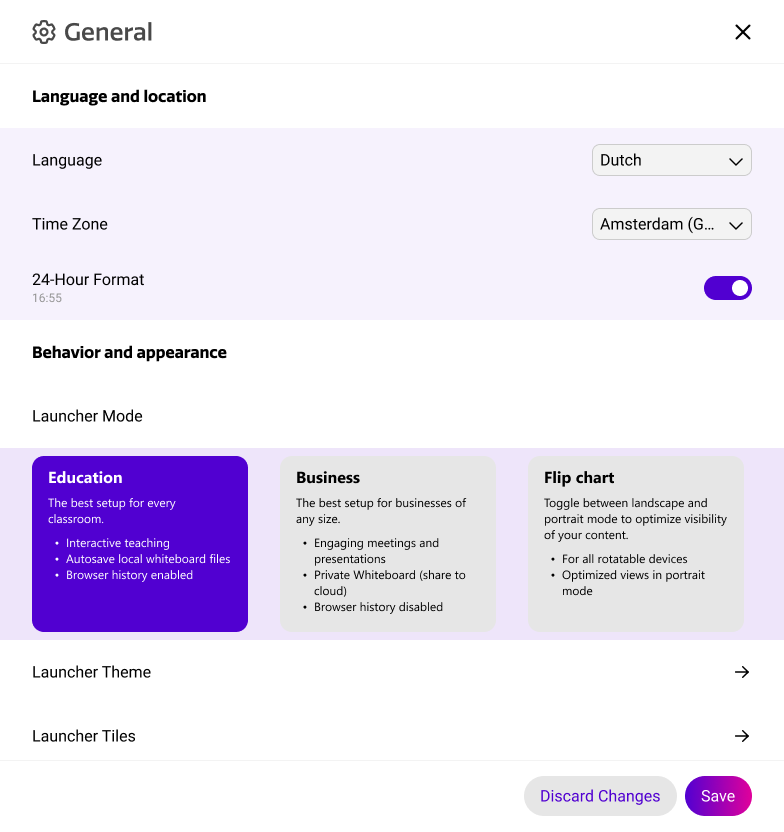
When a setting is configured, the state will display the value and the background of the setting will light up. If you discard the changes, the settings will return to the default value.

Select “Save” when you’re ready configuring the section and they will all line up nicely within the section of that configuration as pills.
The pills display the value of the configured setting. If you need to make changes, select them and the settings app will bring you to their location. Remove them if unnecessary or clear all settings in one go by selecting “Clear settings”.
Some pills show a number. That is because it is a grouped setting, with more than one setting inside. In that case, the pill will show the total of settings.
When you’re done configuring all the sections that you want to configure, make sure to select “Save configuration”. If you hadn’t set the name and/ or description already, it will ask you to do so. Once, saved, your configuration is now visible in the configurations overview.
How to capture settings to a configuration
This is a very straight forward way to creating a configuration as it will copy the settings as a preset into your new configuration, which can then be reviewed and/ or edited.
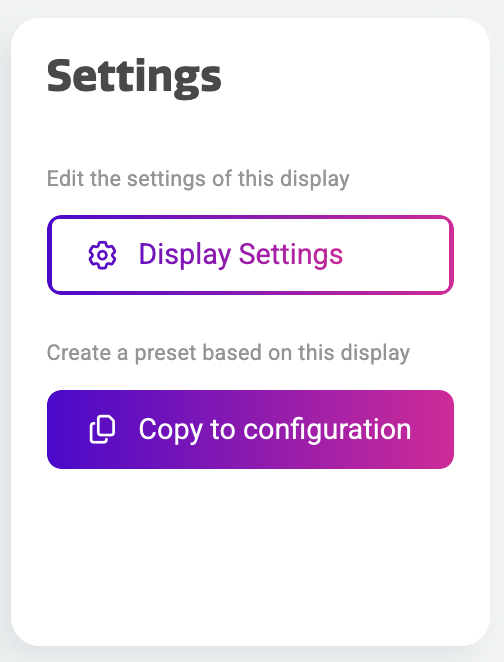
Locate the device details of the i3CONNECT display, which settings you want to copy to a configuration. When on the device details page, locate the Settings widget.
Here you have two options, either to load the Settings app or to copy it’s configured state to a new configuration. That’s what we want to do, so select “Copy to configuration” and confirm the dialog.
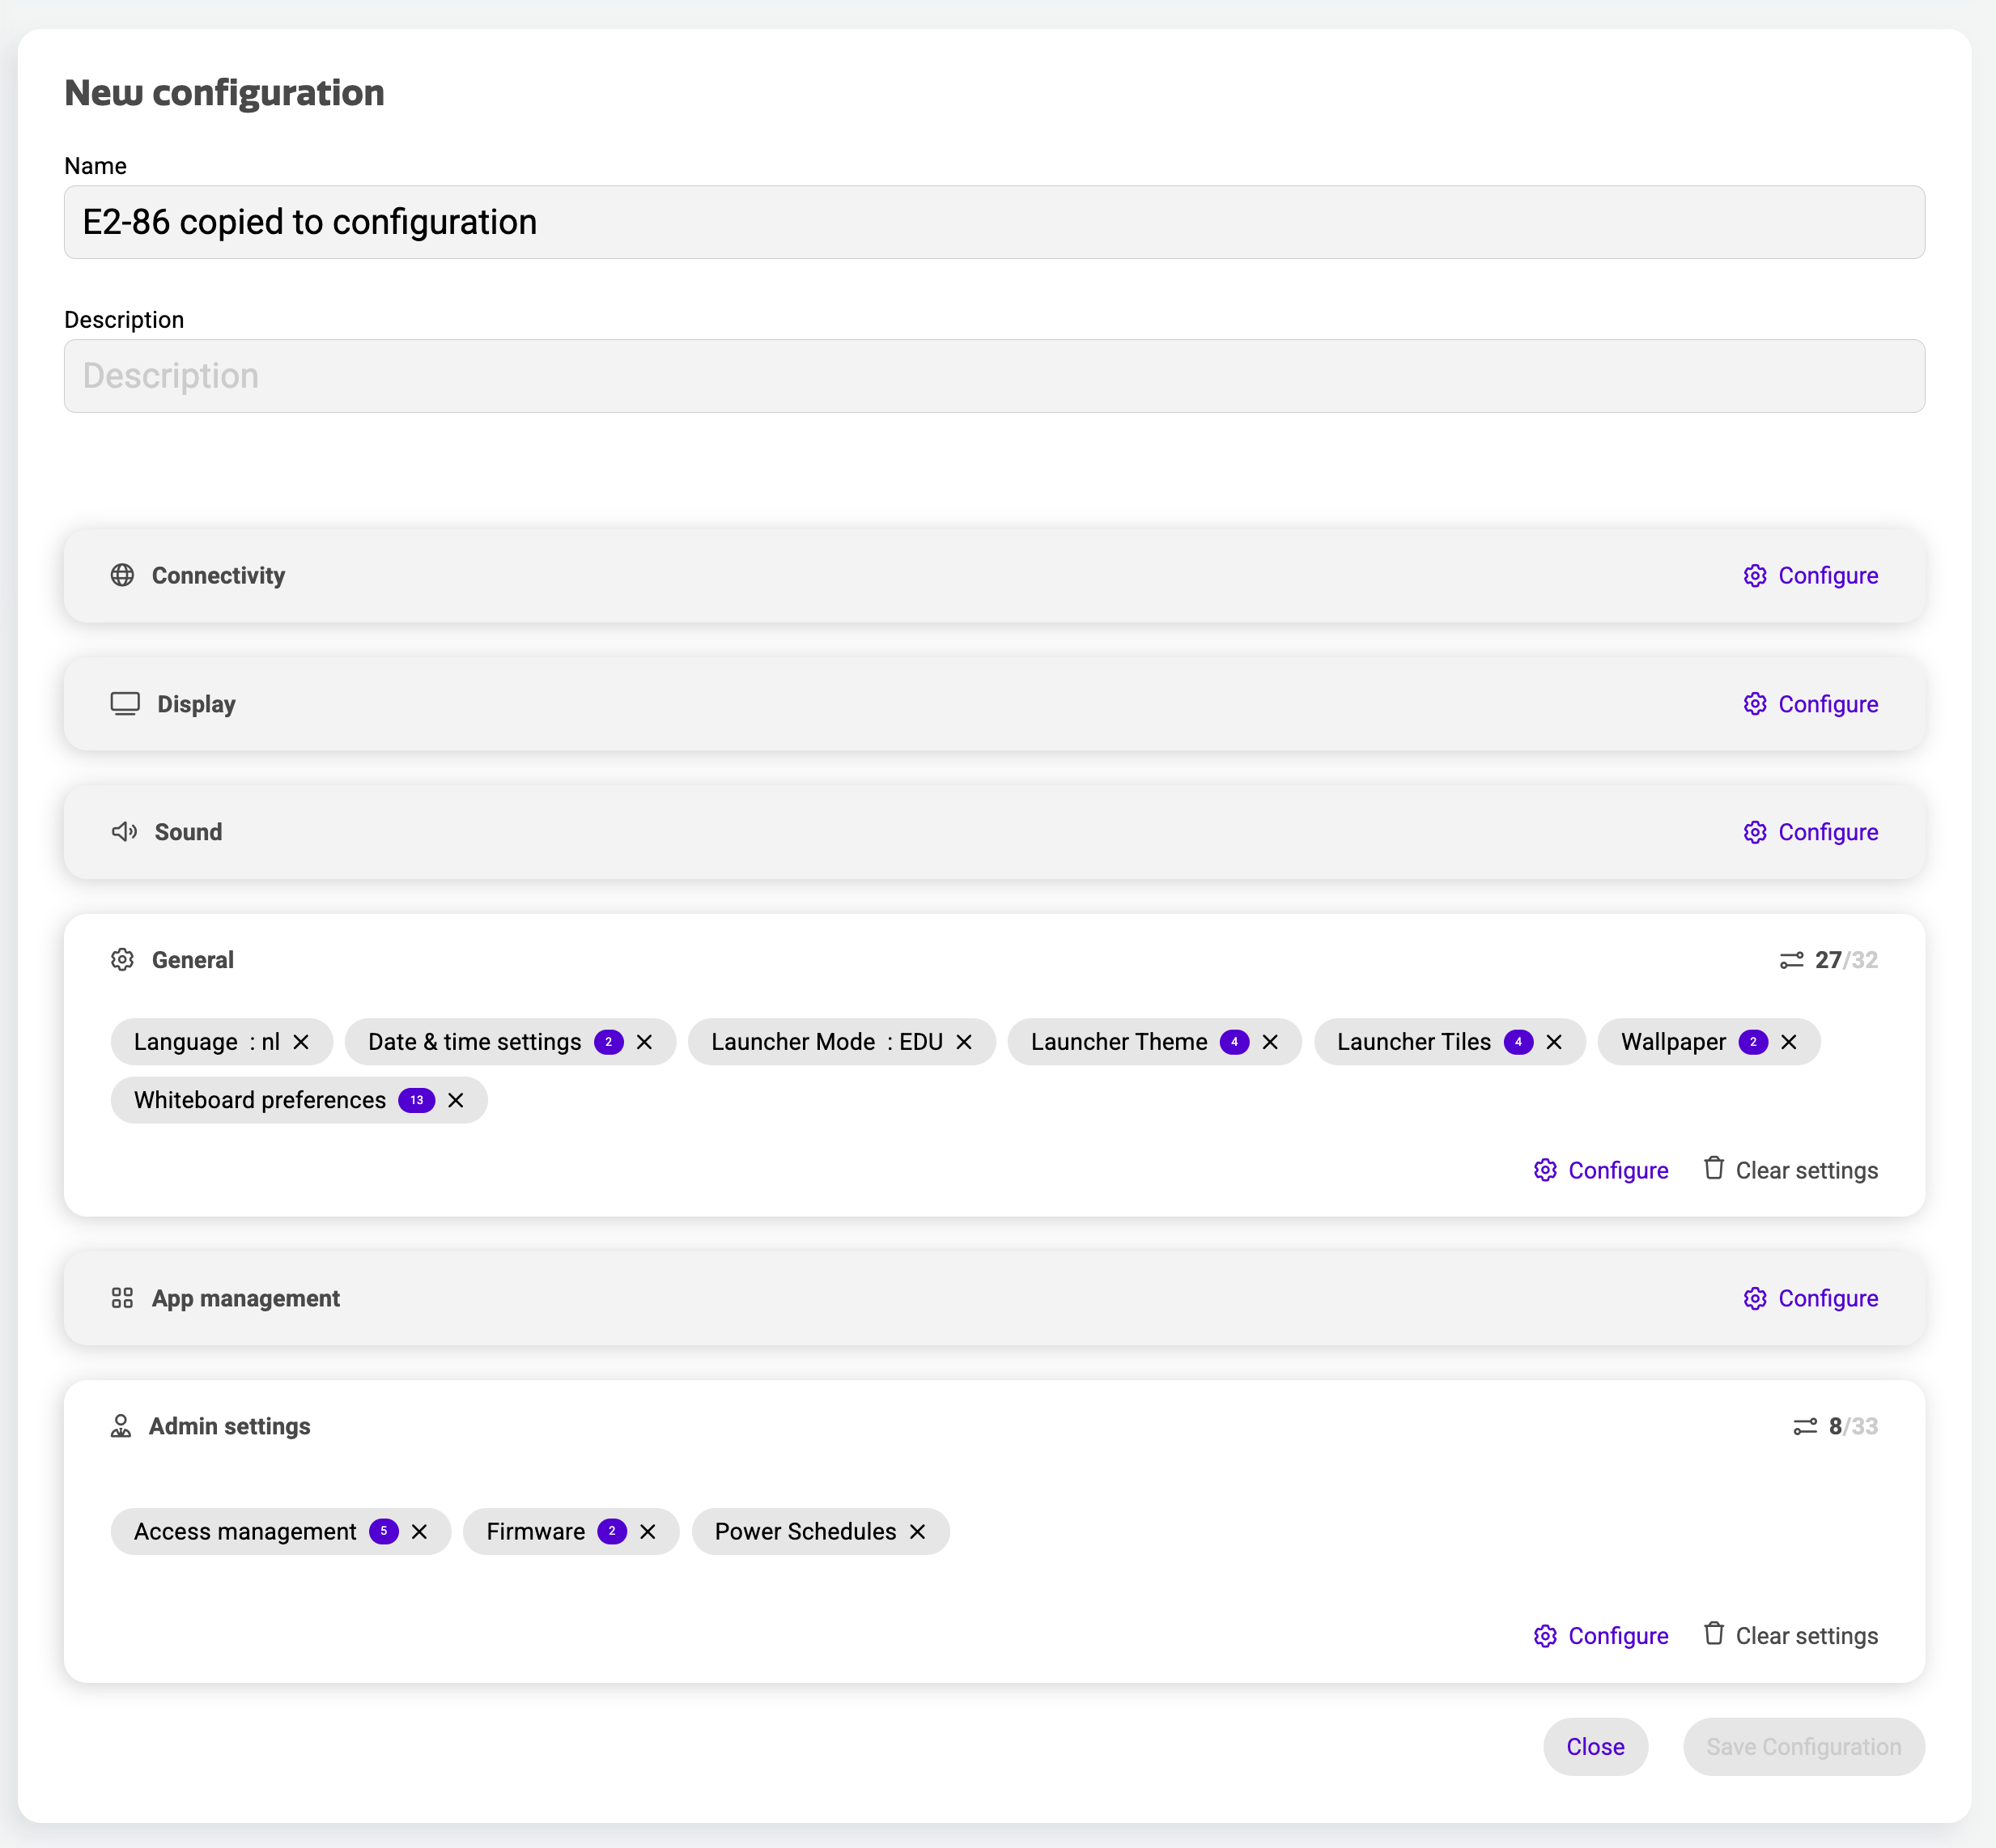
Select “View configuration” when it’s done copying. This will load the details of this new configuration. At the top you can see the name of the configuration which will depend on the name of the display that you copied the settings from. You can rename this field, and add a description.
Below, you will see the same sections that are also visible in the Settings app. Some sections will have configured settings while others might be empty, like in the image to the left. That is because the configuration will only copy the settings that are not left in its default state.

The sections that have configured settings, will show these settings as pills, which can be selected and/ or deleted from the configuration if necessary. Some pills show a number. That is because it is a grouped setting, with more than one setting inside. In that case, the pill will show the total of settings.
You can always add new settings to the configuration, whether the section is empty or not. Go to the section that you want to edit and select “Configure”.
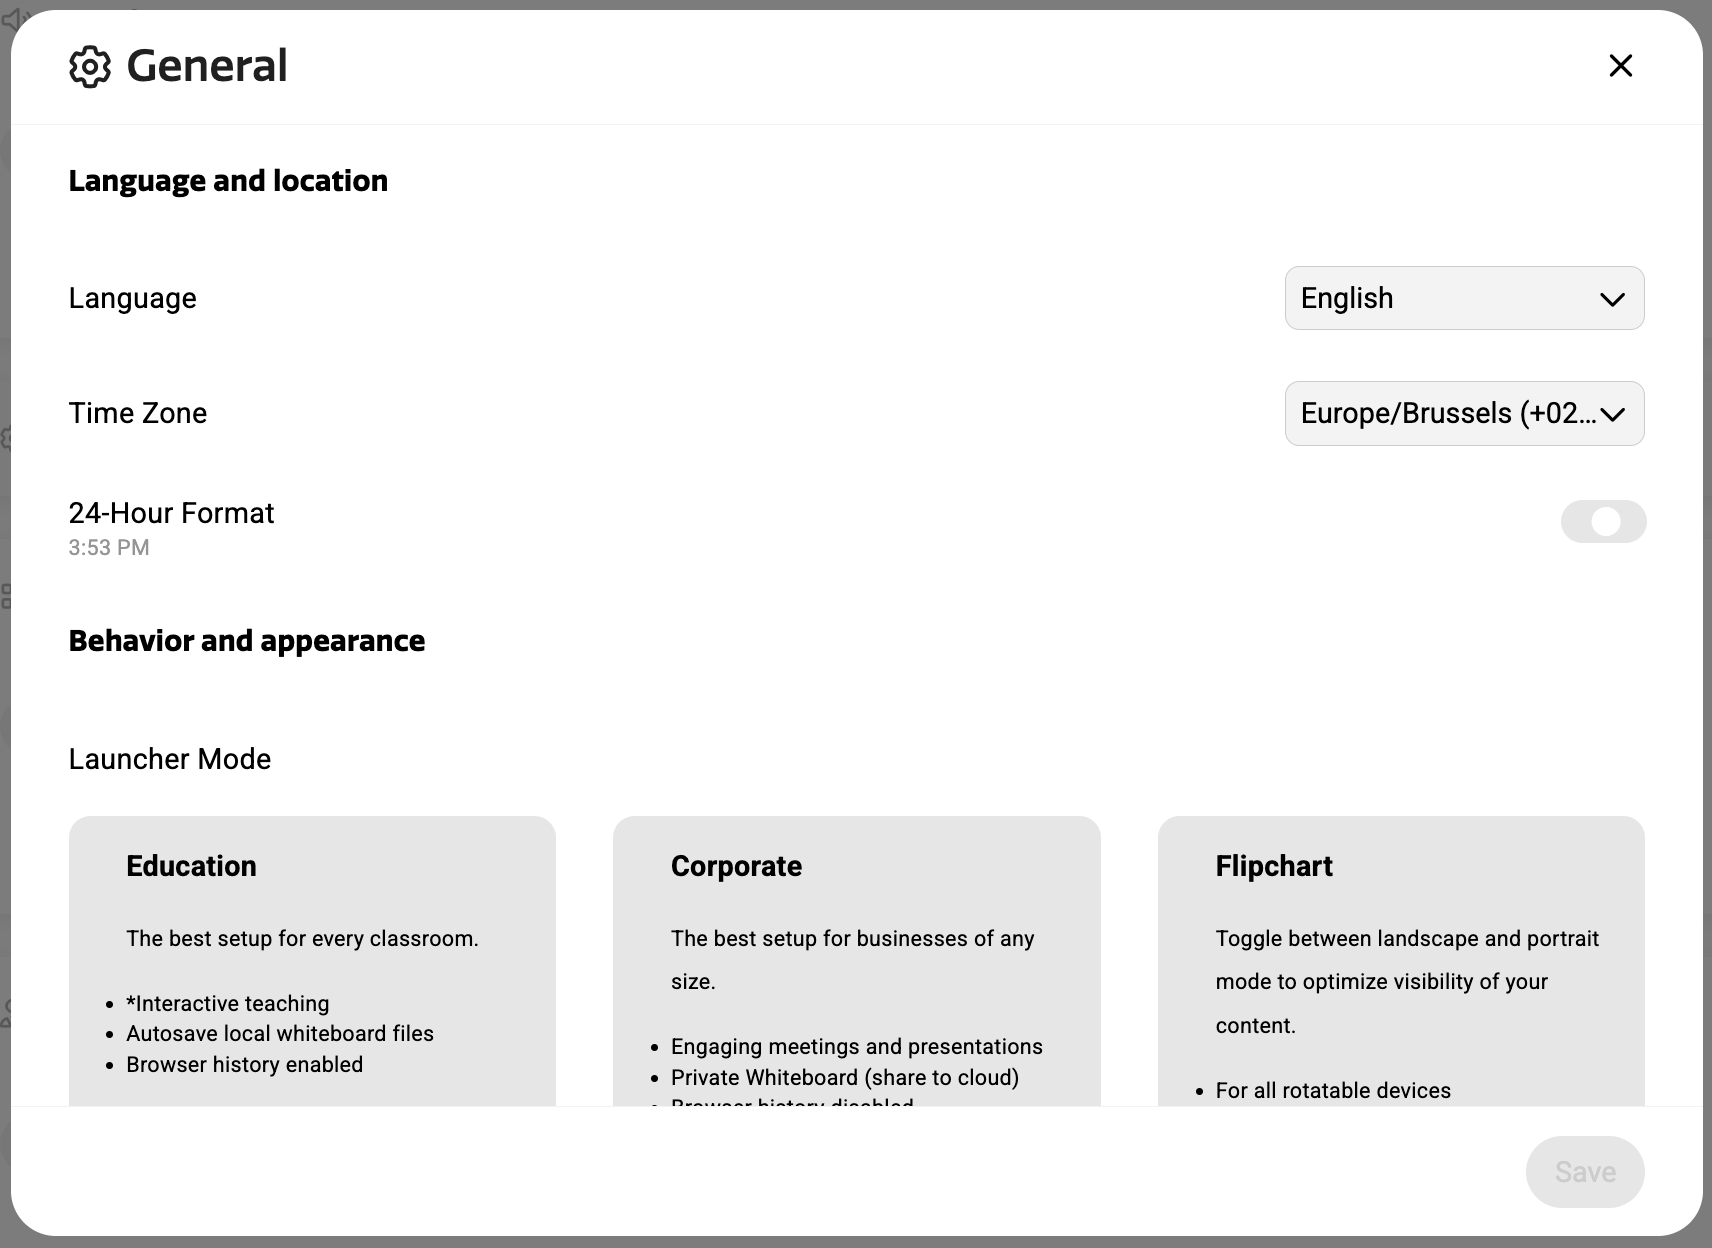
The Settings app will appear, showing the settings of that section.
While some settings may seem preconfigured, others will show a not-configured state, like the toggle to the left for instance.
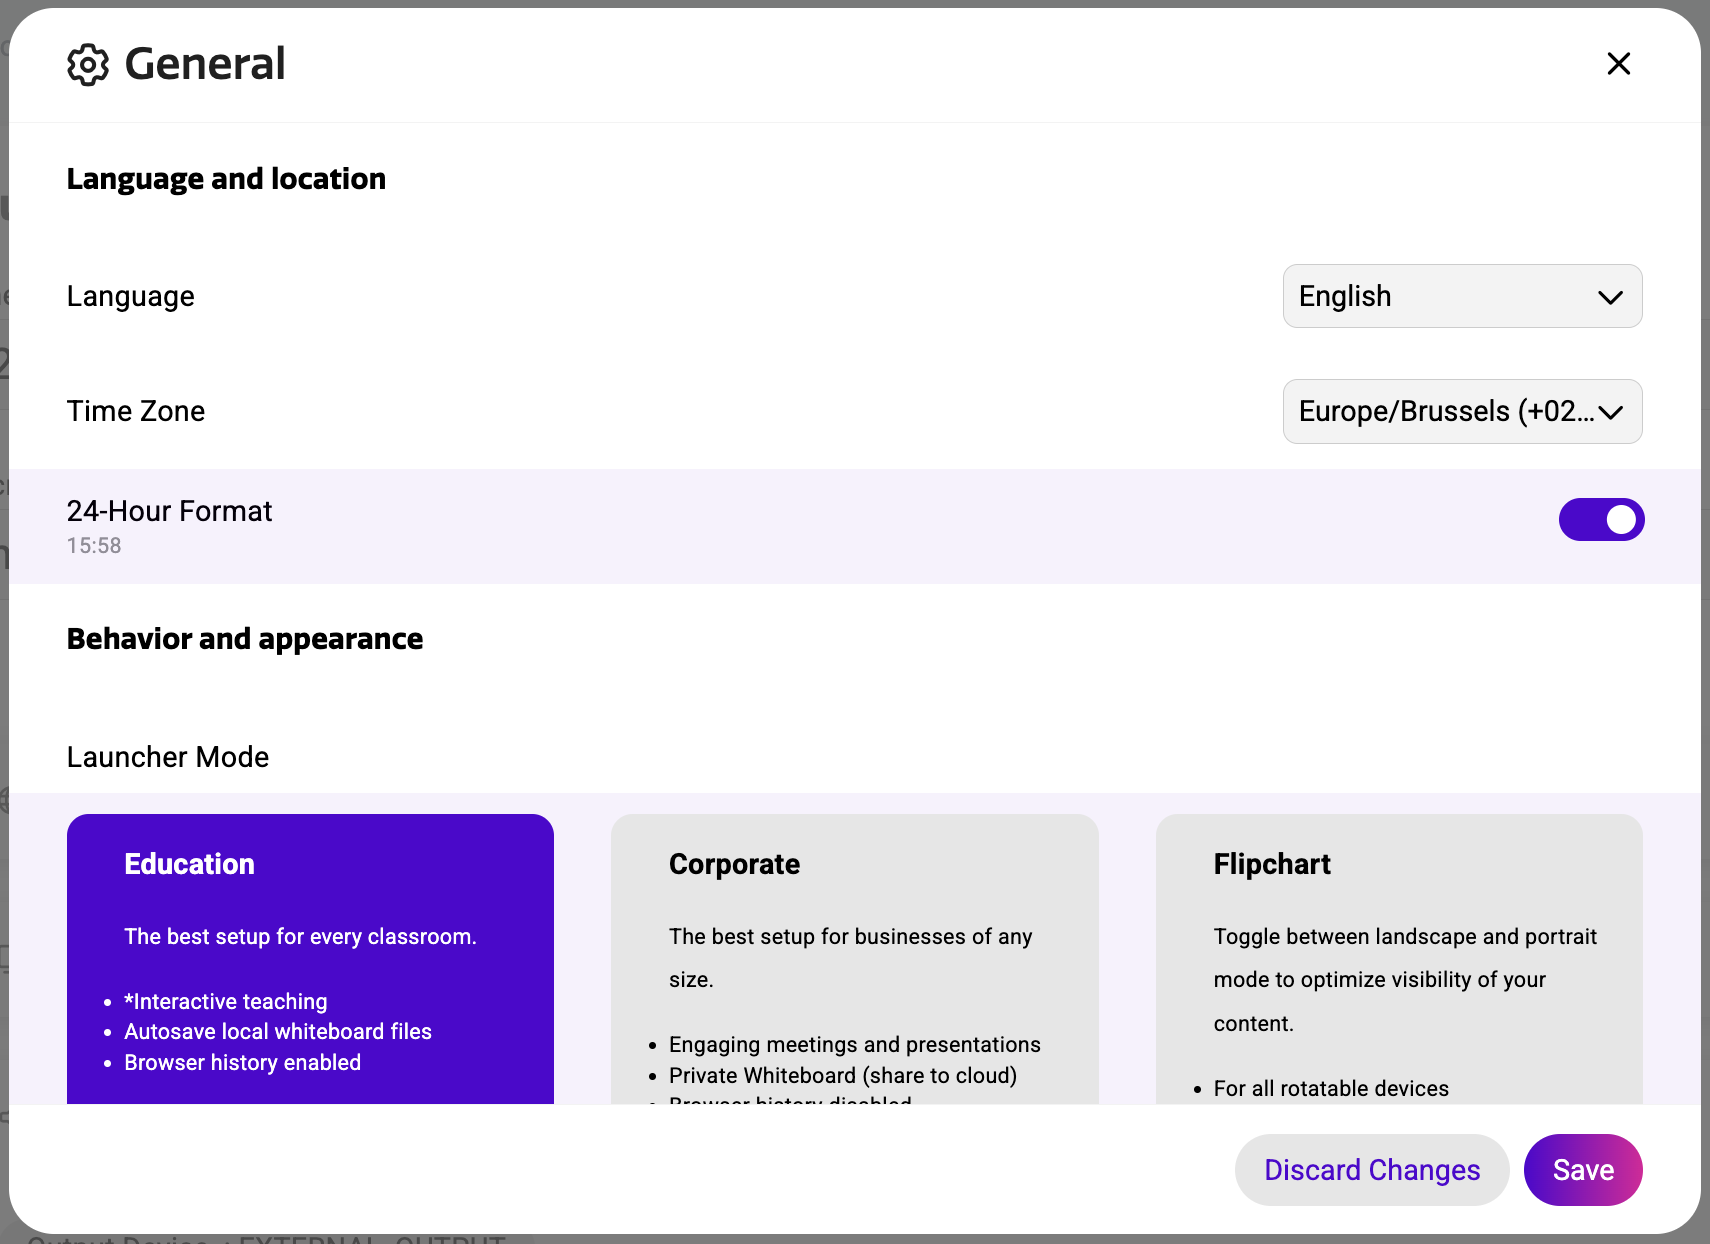
When you make changes to a settings, that setting will display a light purple color in the background, showing you that this is a recently configured setting, which need to be saved or discarded.
Select “Save” when you’re ready configuring the section and they will all line up nicely within the section of that configuration. If you need to make changes, select them and the settings app will bring you to their location. Remove them if unnecessary or clear all settings in one go by selecting “Clear settings”.
Editing an existing configuration
It is perfectly possible to open an existing configuration and make changes to the settings inside. Simply go to the configurations overview and select any of the configurations you’ve made before. No inspiration or no idea where to start? Try capturing existing device settings to a configuration from the device details page. Once saved to a configuration, you’ll see a visual overview of all the settings as configured on the device. You can now make changes, remove settings or add new settings to the configuration.
Legacy snapshots
Unfortunately, legacy snapshots can not be edited. If you still have old snapshots in your configurations list, an error icon will show you that it’s a legacy snapshots and that it’s use has been deprecated. You can still apply that snapshot to other devices.
Applying a configuration
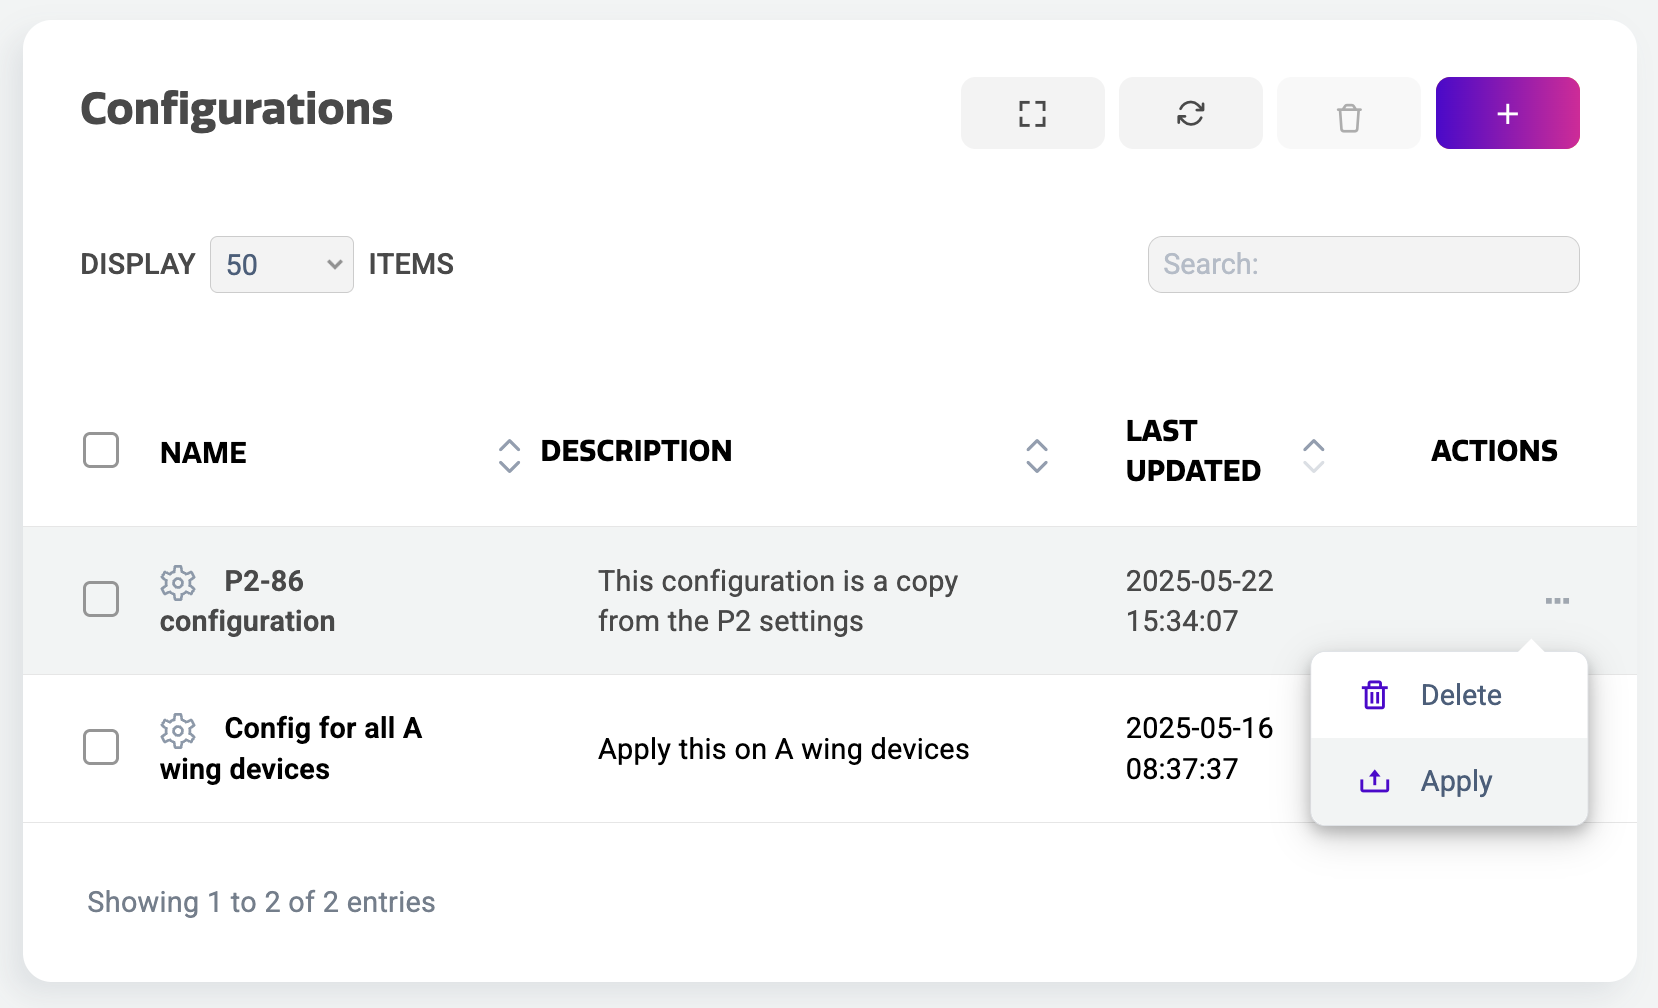
Now that you’re ready with your configuration, you can apply it on one or more i3CONNECT displays within your fleet of registered devices.
Select the configuration you want to apply from the Configurations overview and select “…” from the Actions tab. From the dropdown, select “Apply”.
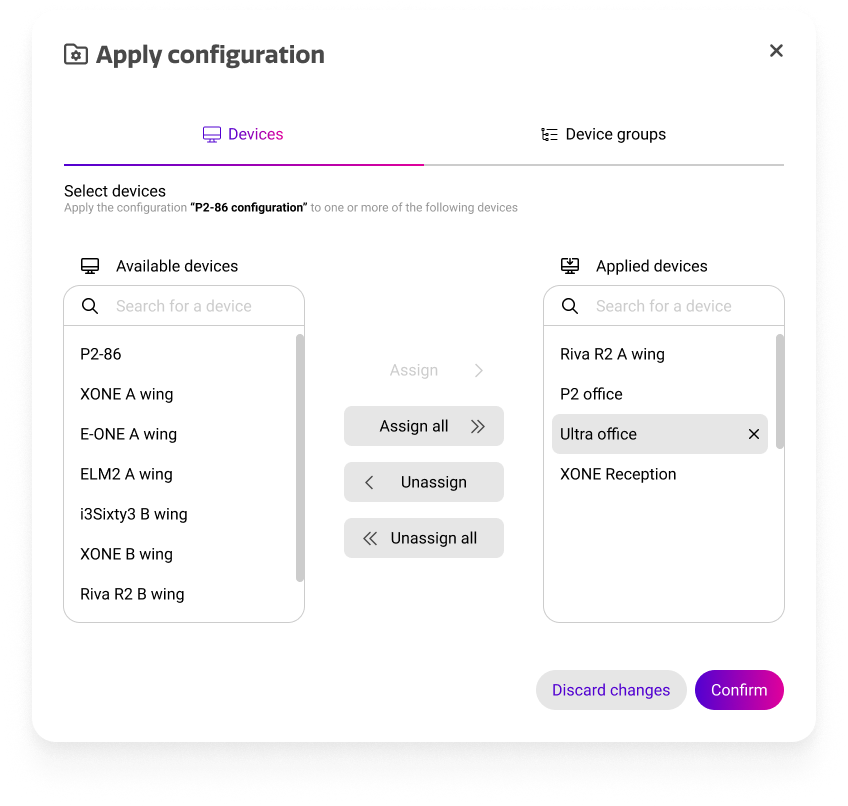
A dialog appears where you can select the devices that you want to apply the configuration to. You can combine this with device groups by selecting the Device groups tab and selecting the device groups with displays that you want to apply the configuration to.
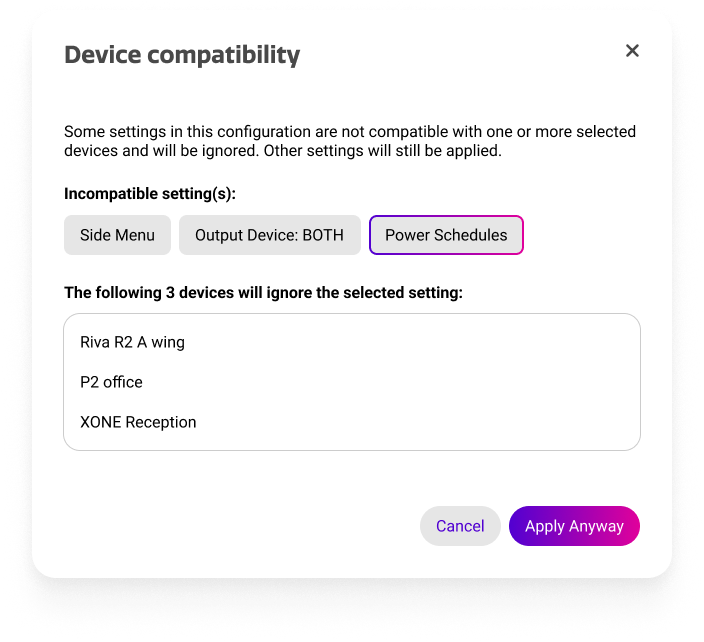
If one or more settings in your configuration is incompatible with the displays that you want to apply it to, this dialog will appear when you select “Confirm” and inform you of the devices that will ignore that specific setting if you select “Apply anyway”.
Tracking an applied configuration
To know what happened to a configuration after applying it, you can have a detailed overview in the Actions History where you can see the status of each action sent to a device or group of devices. See Action History for more information.