What are OTA firmware updates
OTA update stands for over-the-air update and allows to wirelessly update the firmware of your i3CONNECT display(s). All i3CONNECT displays have this feature built in, and it can be controlled on the device itself. It is possible to control the firmware updates remotely in i3CONNECT Cortex as well, both for full and optional firmware updates.
There are 3 types of firmware updates:
-
Full: this is a regular firmware update and can contain new or improved features and important bugfixes. When automatic updates are enabled on the device, this firmware update will automatically be installed when they become available.
-
Optional: this update mostly contains bugfixes or small improvements. These updates require user interaction and will not be installed automatically.
-
Mandatory: this update will contain important changes that are required to be able to install any future updates, it cannot be skipped. When automatic updates are enabled on the device, this firmware update will automatically be installed when they become available.
How to toggle automatic firmware updates
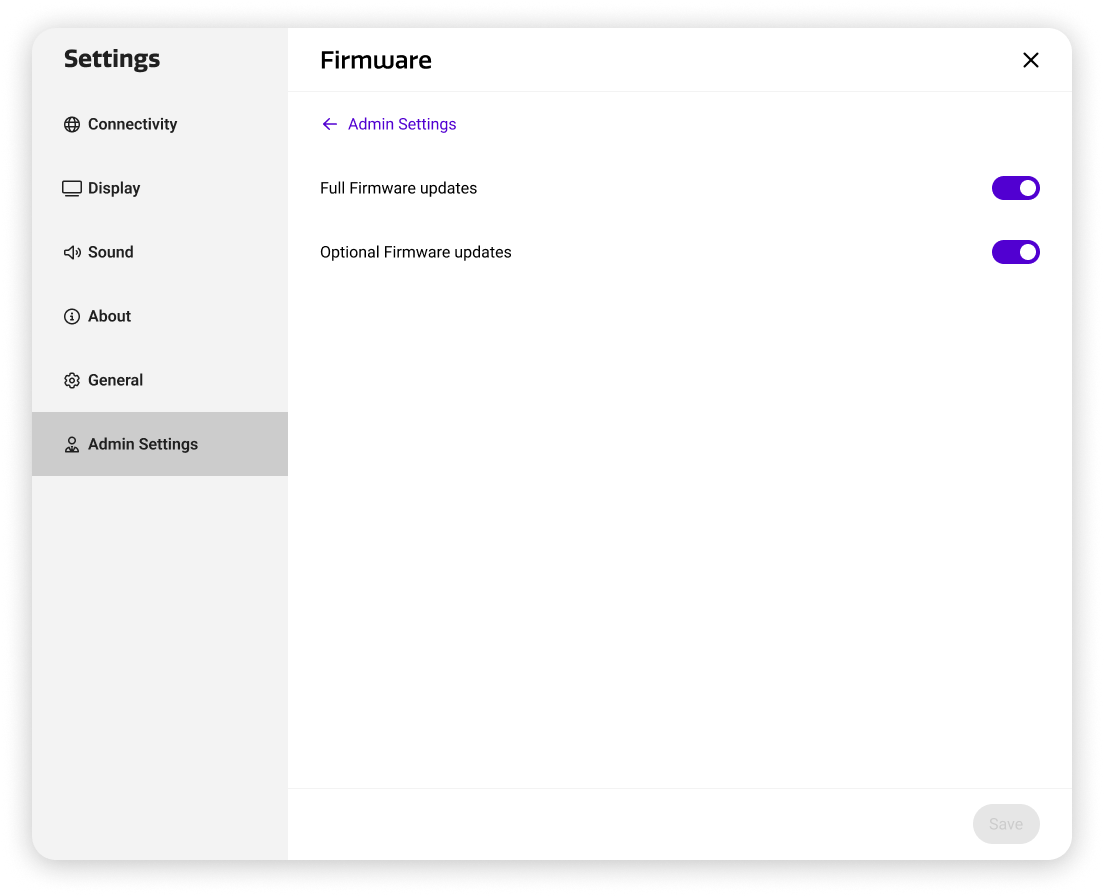
Automatic full and optional firmware updates can be toggled on and off. When this setting is disabled, the device will no longer automatically download and update new firmware updates. This can be done in the Settings app, under Admin settings.
Manage firmware updates from the firmware overview page
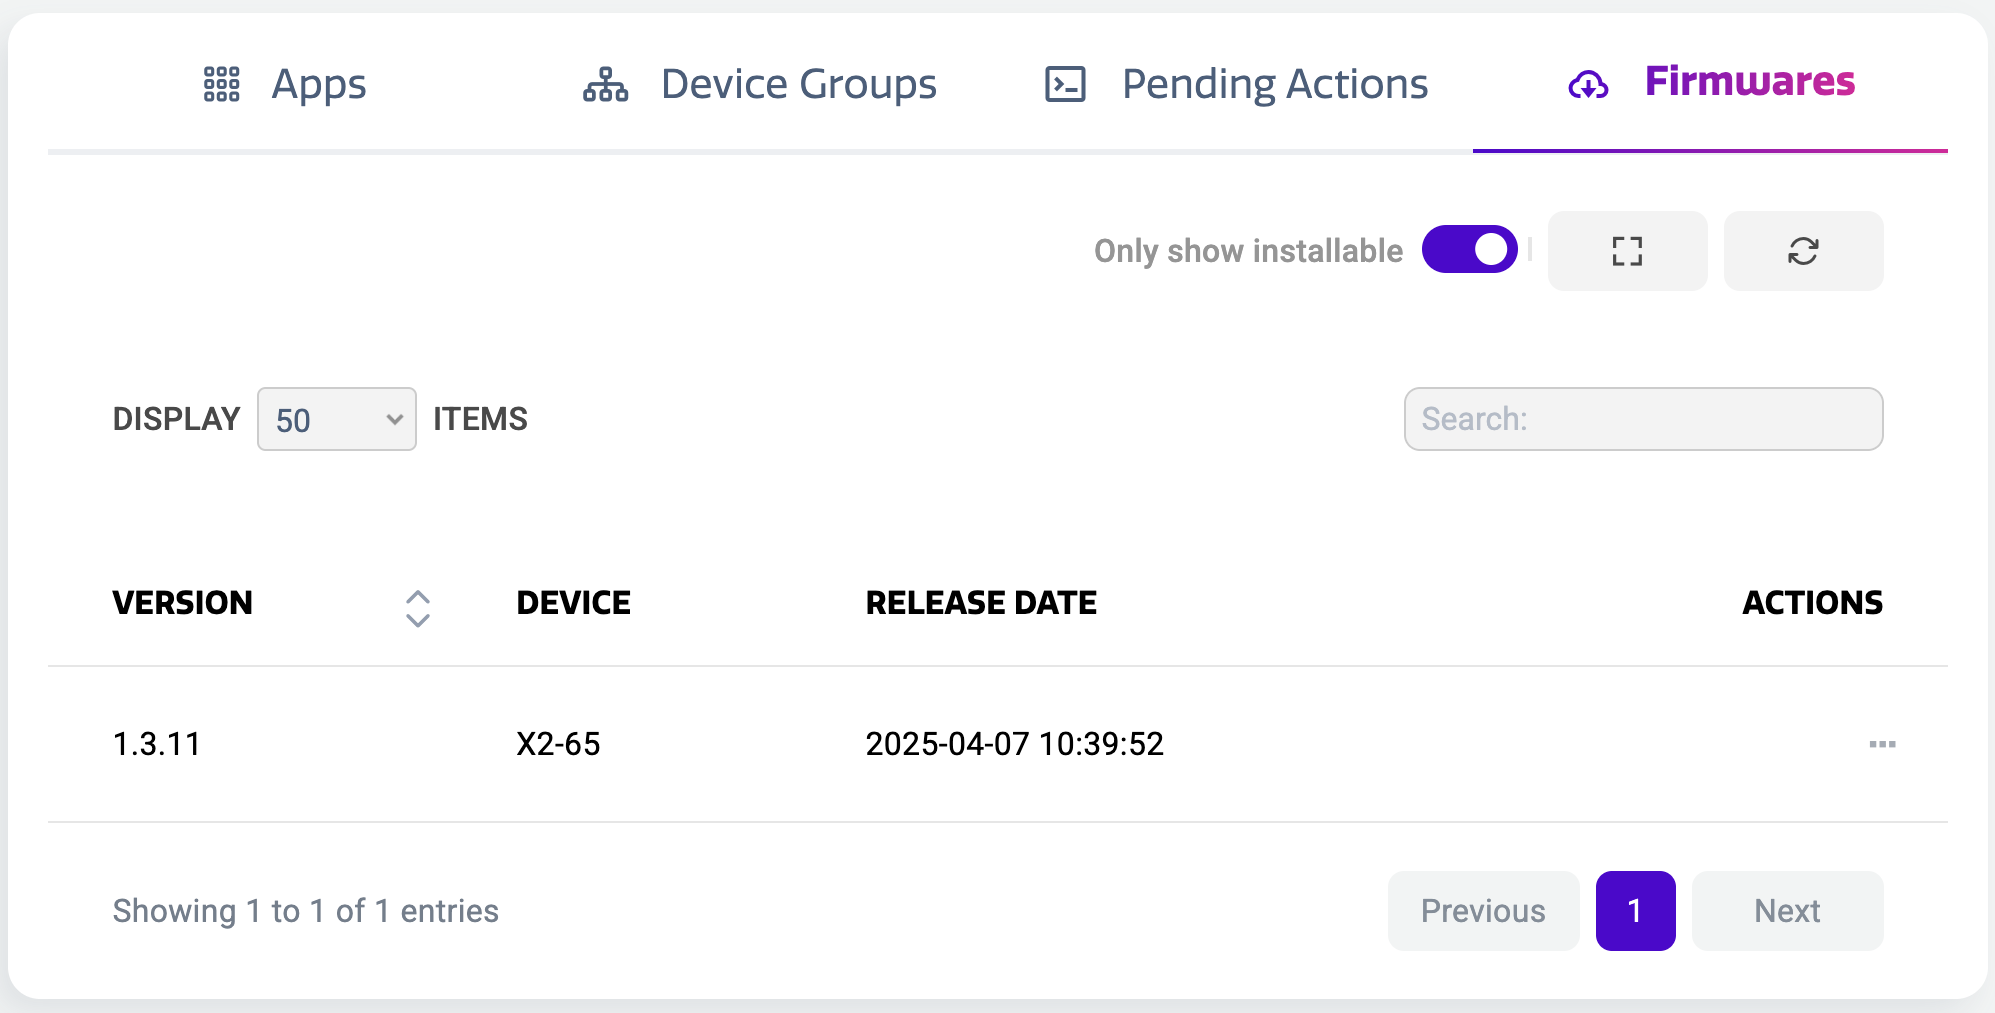
Firmware updates overview
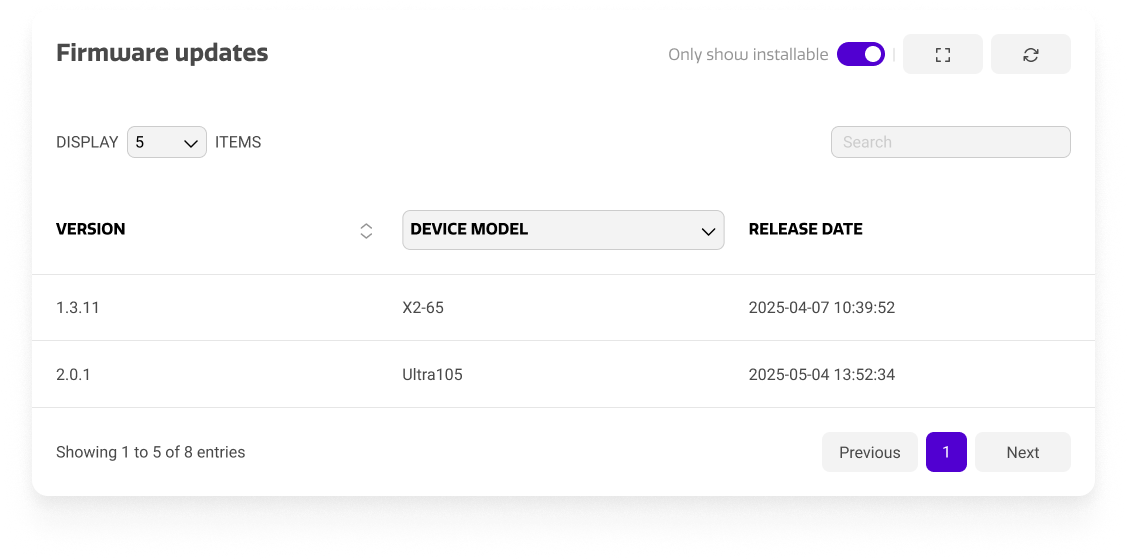
In the main menu select “Firmware Updates”
This will open the firmware overview screen. It will list all available firmware update that are relevant for any of the registered devices in i3CONNECT Cortex.
This list provides the version, the device model it is available for and the release date.
Firmware detail screen
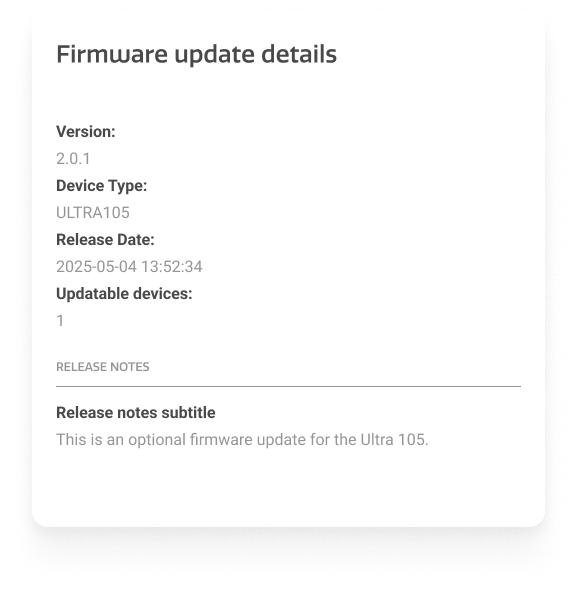
The firmware detail screen will provide more information on the selected firmware. Besides the information that was already available on the list screen, it will also show the number of registered devices that can be updated and the release notes.
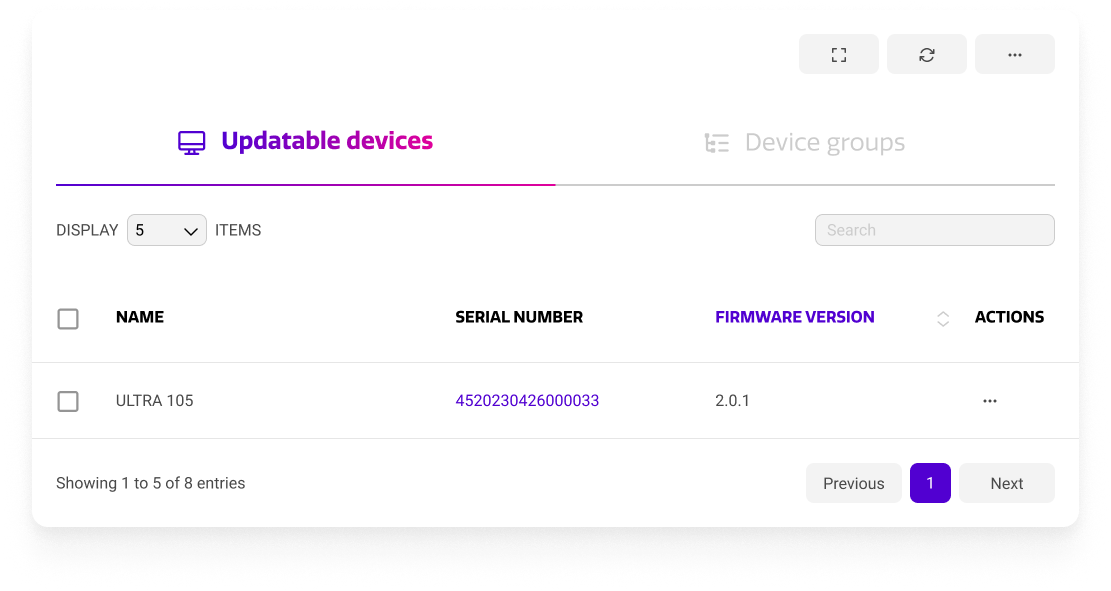
The right part of the detail screen will show the devices that can be updated or device groups containing any device that is updatable with the selected firmware
Manage firmware updates from the device detail page
The Firmwares tab in the Table overview of the device details page will show a list of firmware updates that are available for the selected device.
Select “Install” from the Actions menu to install the firmware update.
Install a firmware update

From the device or group overview, select one or more items and click the install button.
Click the confirm button in the dialog and the update will be installed to the selected devices or compatible devices in any of the selected groups. If the selection contains any devices that are currently offline, the command to install the firmware update will be dispatched the next time those devices connect to the RMD server.
Schedule a firmware update
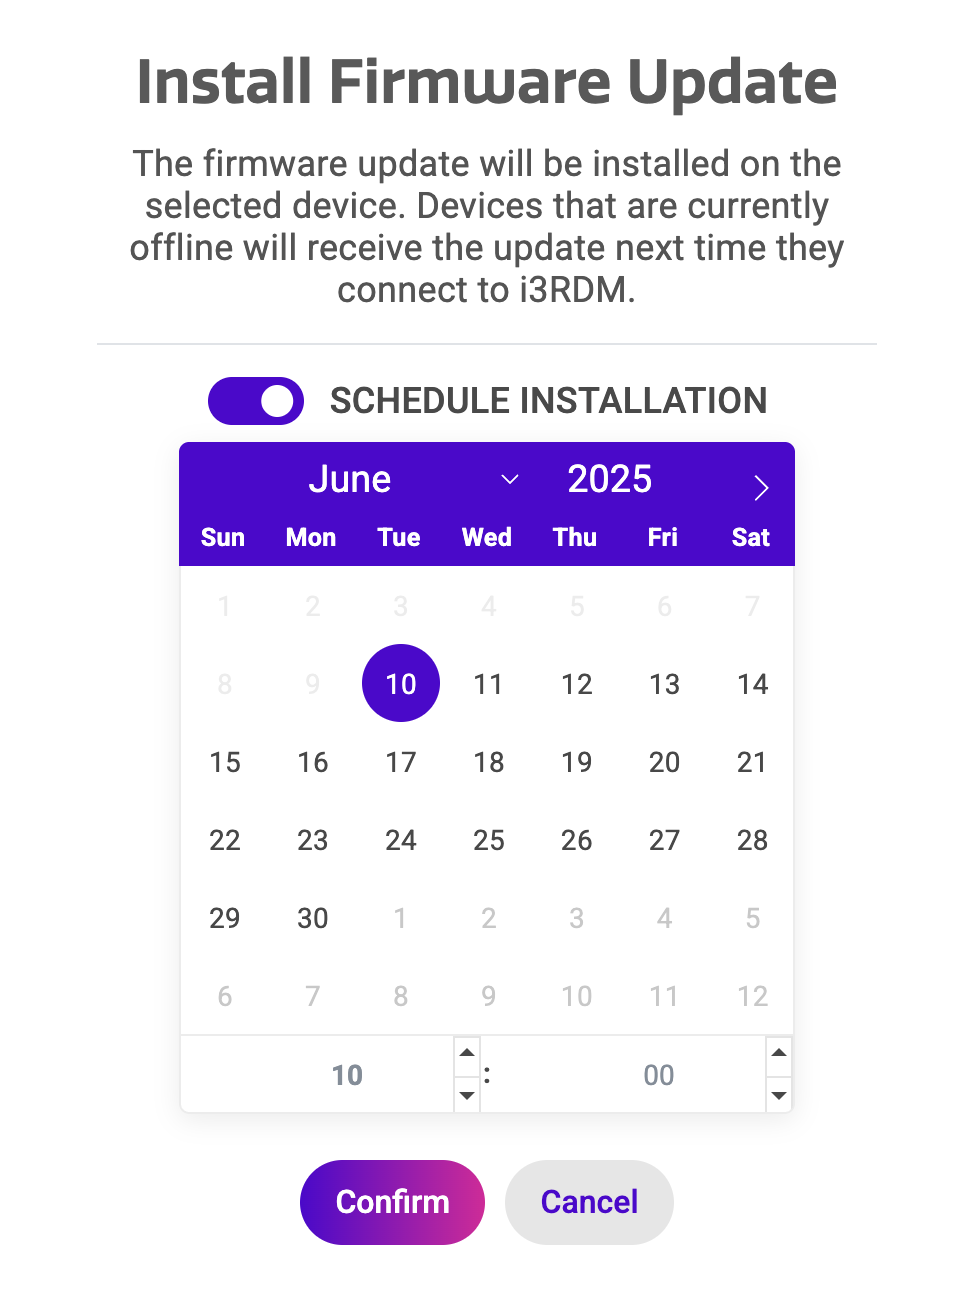
Besides sending the command directly, it is also possible to schedule the update to be installed at a specific time.
Selecting the “Schedule installation” toggle will open up the calendar control which allows to select a date and time.
After clicking the confirm button the update will be scheduled. It is then also listed in the Pending actions overview in your device details.
-
Only the last issued firmware update command will be retained in the pending actions. It is not possible to schedule multiple firmware updates or have more then one offline pending firmware update command.
-
If a device is not connected to the Cortex server at the time the scheduled command is dispatched, the command will be marked as “offline” and will automatically be sent to the device the next time it connects to the Cortex server.
Notifications
Whenever a new firmware becomes available for any of your registered devices, notifications are sent out. There are 3 different notification channels:
-
Via the notification icon in the top status bar:
-
As a browser notification. The application will ask for permission to show the notifications. Otherwise, it can be activated in your Account settings, section Browser notifications.
-
An email notification. This can also be controlled from your Account settings, section E-mail notifications.