Managing and restricting access to your i3CONNECT display
As our i3CONNECT displays are designed to be available to a wide range of users, often in open spaces, we made sure that i3CONNECT Studio could offer plenty of options for system administrators to manage and limit access to the display. Here we list the many ways you can secure your i3CONNECT display and your systems.
How to restrict access to the Admin Menu
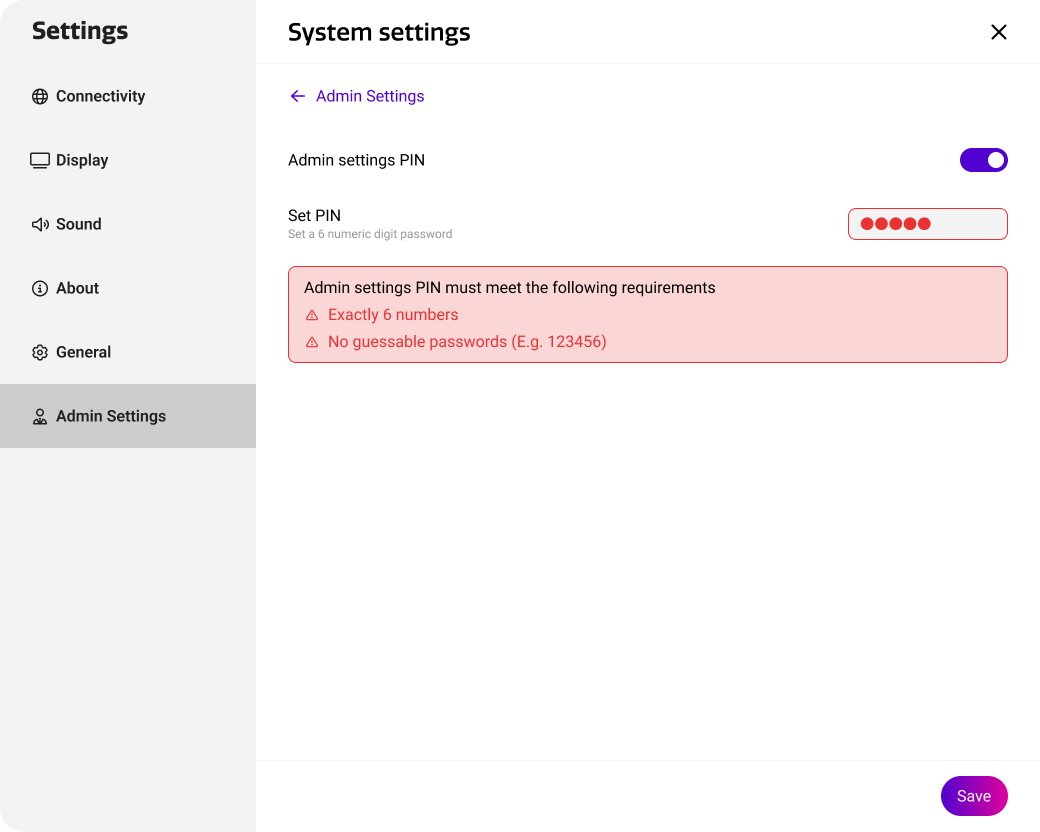
For security reasons, the Admin settings section in i3CONNECT Studio can be secured with a 6-digit PIN lock. This way, users will need to enter that PIN lock code to be able to access all sensitive settings in the Admin menu. To enable this in Cortex, open the Settings app. under Admin settings, select System settings and enable Admin settings PIN. Choose a 6-digit PIN and save.
How to restrict access to the Settings app
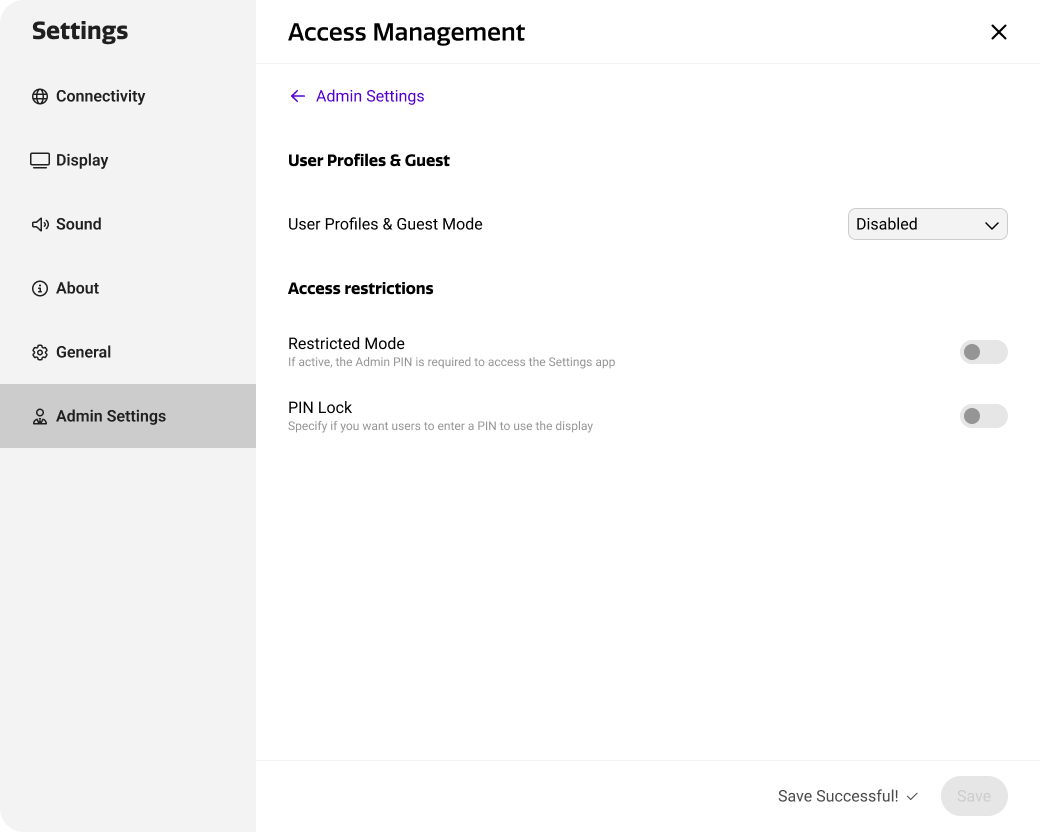
Access to the Settings app can be disabled altogether. Note that this way, users won’t be able to configure general settings like wallpaper or device language.
Under Admin settings, select Access management and enable Restricted Mode. This will require users to enter the Admin settings PIN to open the Settings app.
Require users to enter a PIN lock to use the i3CONNECT display
If your i3CONNECT display is in an environment with a lot of people, and you want only a few to be able to use them, you might want to configure it with a PIN lock.
Under Admin settings, select Access management and enable PIN Lock. Display users will now be required to enter a given PIN lock code whenever they want to use the display.
How to disable Google apps on an EDLA device
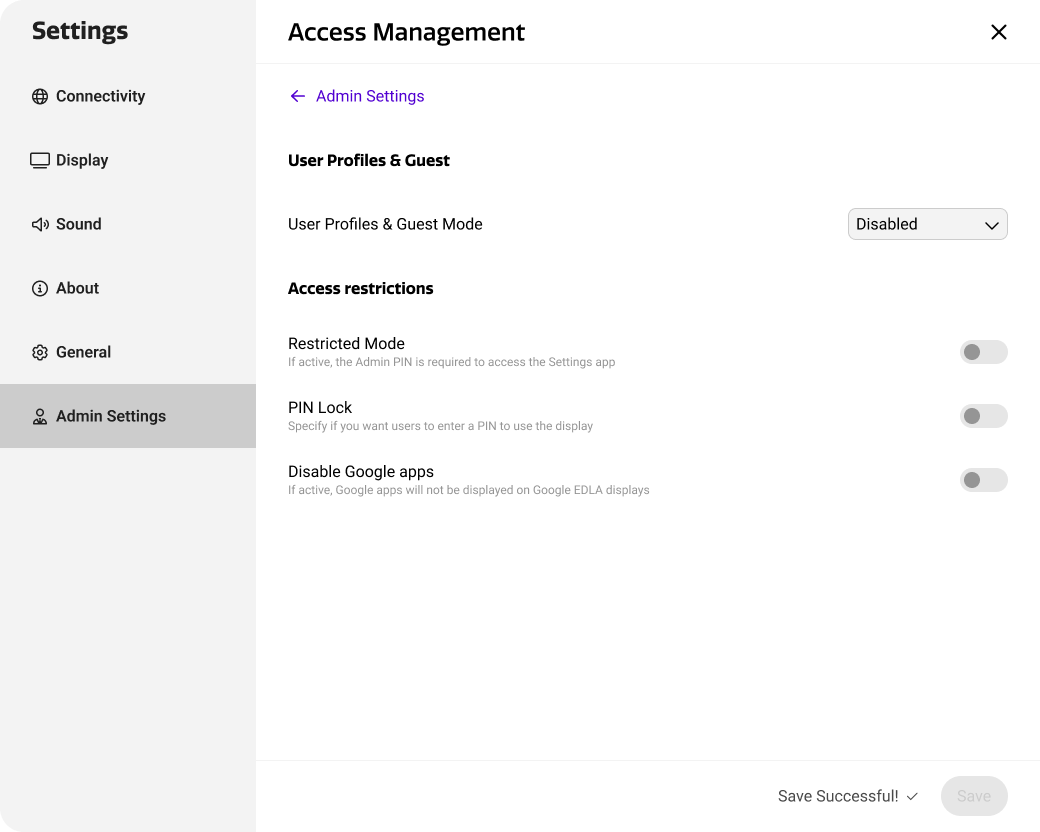
If your i3CONNECT display is an EDLA certified display, it’ll come with a lot of Google apps. To disable them, go to Admin Settings, Access Management and toggle Disable Google apps.
How to restrict access to Quick actions or input sources in the Side menu
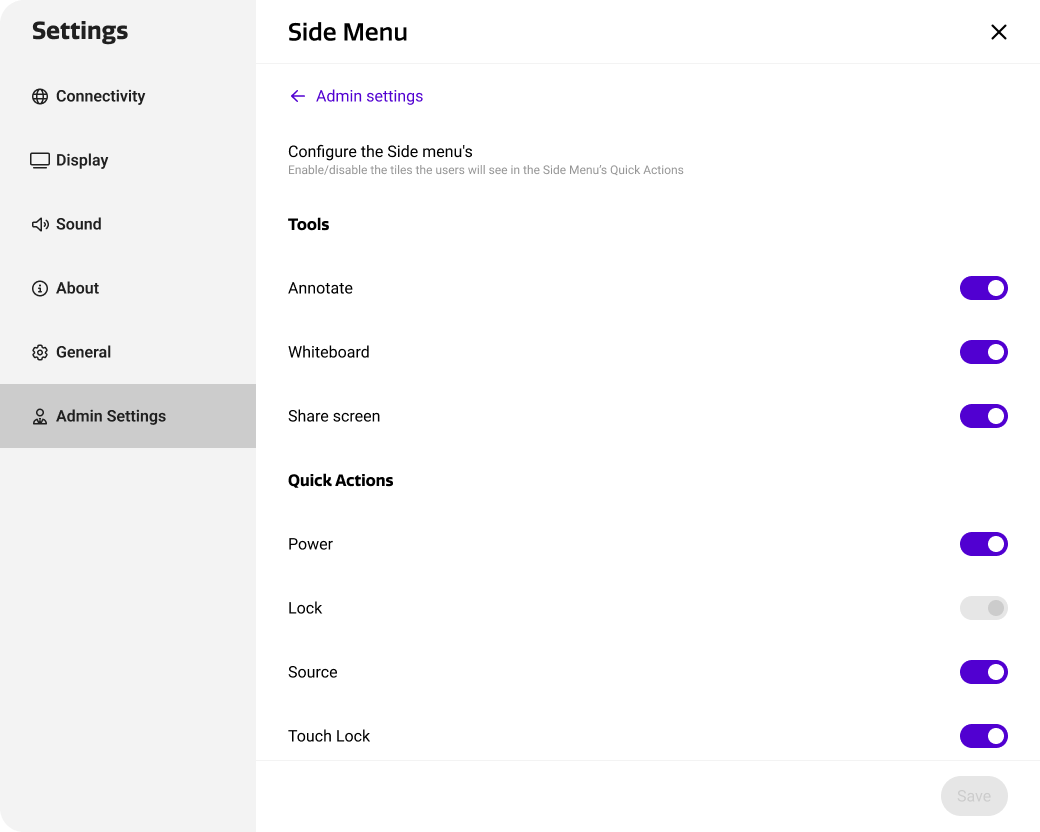
Under Admin settings, select Side Menu. This gives you an overview of the tiles that will be available in the Side menus in i3CONNECT Studio. Disable the tiles that you don’t want Display users to be able to use and they won’t be visible in the side menus.
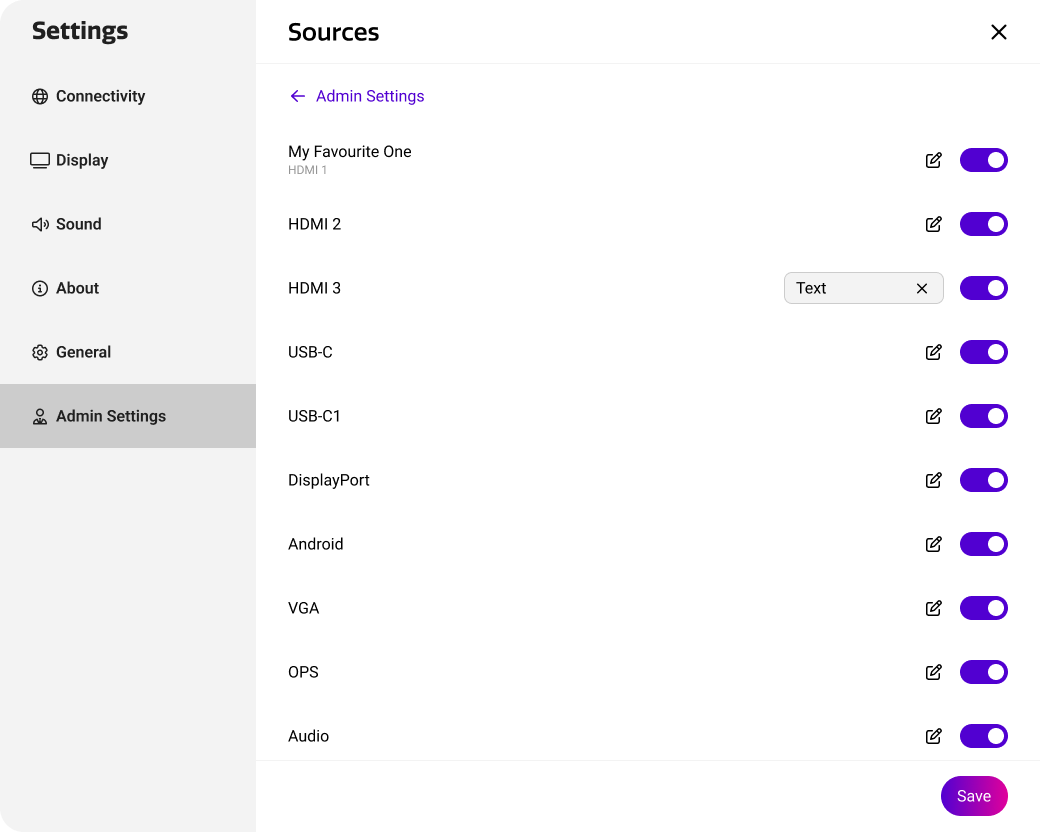
The same restrictions can be applied for input sources. Under Admin settings, select Sources. Disable the input sources that you don’t want users to be able to use.
How to configure your i3CONNECT display to use Guest sessions
Guest sessions can be ideal for guests within an organisation, or people who like the ease-of-use to log in with a single click, knowing that all the session data will be removed once they log out.
This Guest session can be fully configured from within i3CONNECT Cortex.
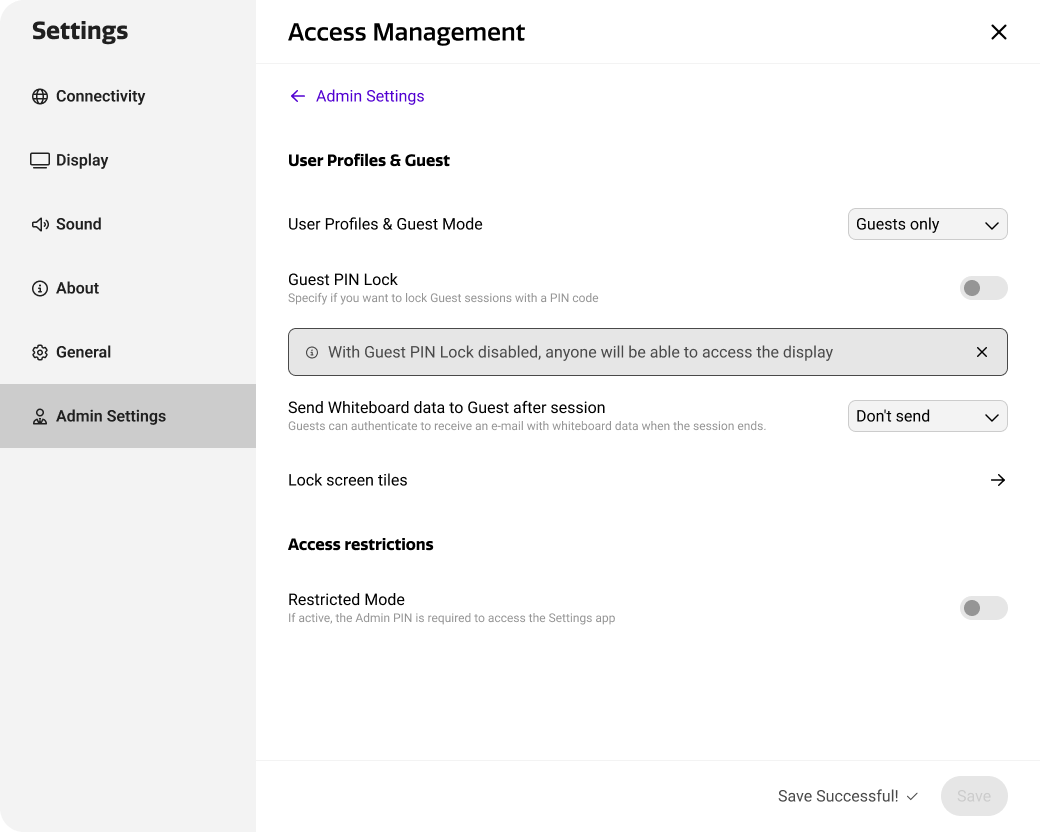

In the Admin Settings, select Access Management. under the subsection, locate “User profiles & Guest”. This dropdown has three options:
-
Disabled: this is the default setting and is ideal for open displays that need to be accessible to a lot of people.
-
Guests only: this setting requires all users of the display to start a Guest session. Only one session can be created at a time, and each session (along with its data) will be removed when the session ends.
-
User Profiles: this setting adds the User Profile option next to the Guest session. See the next section for User Profiles.
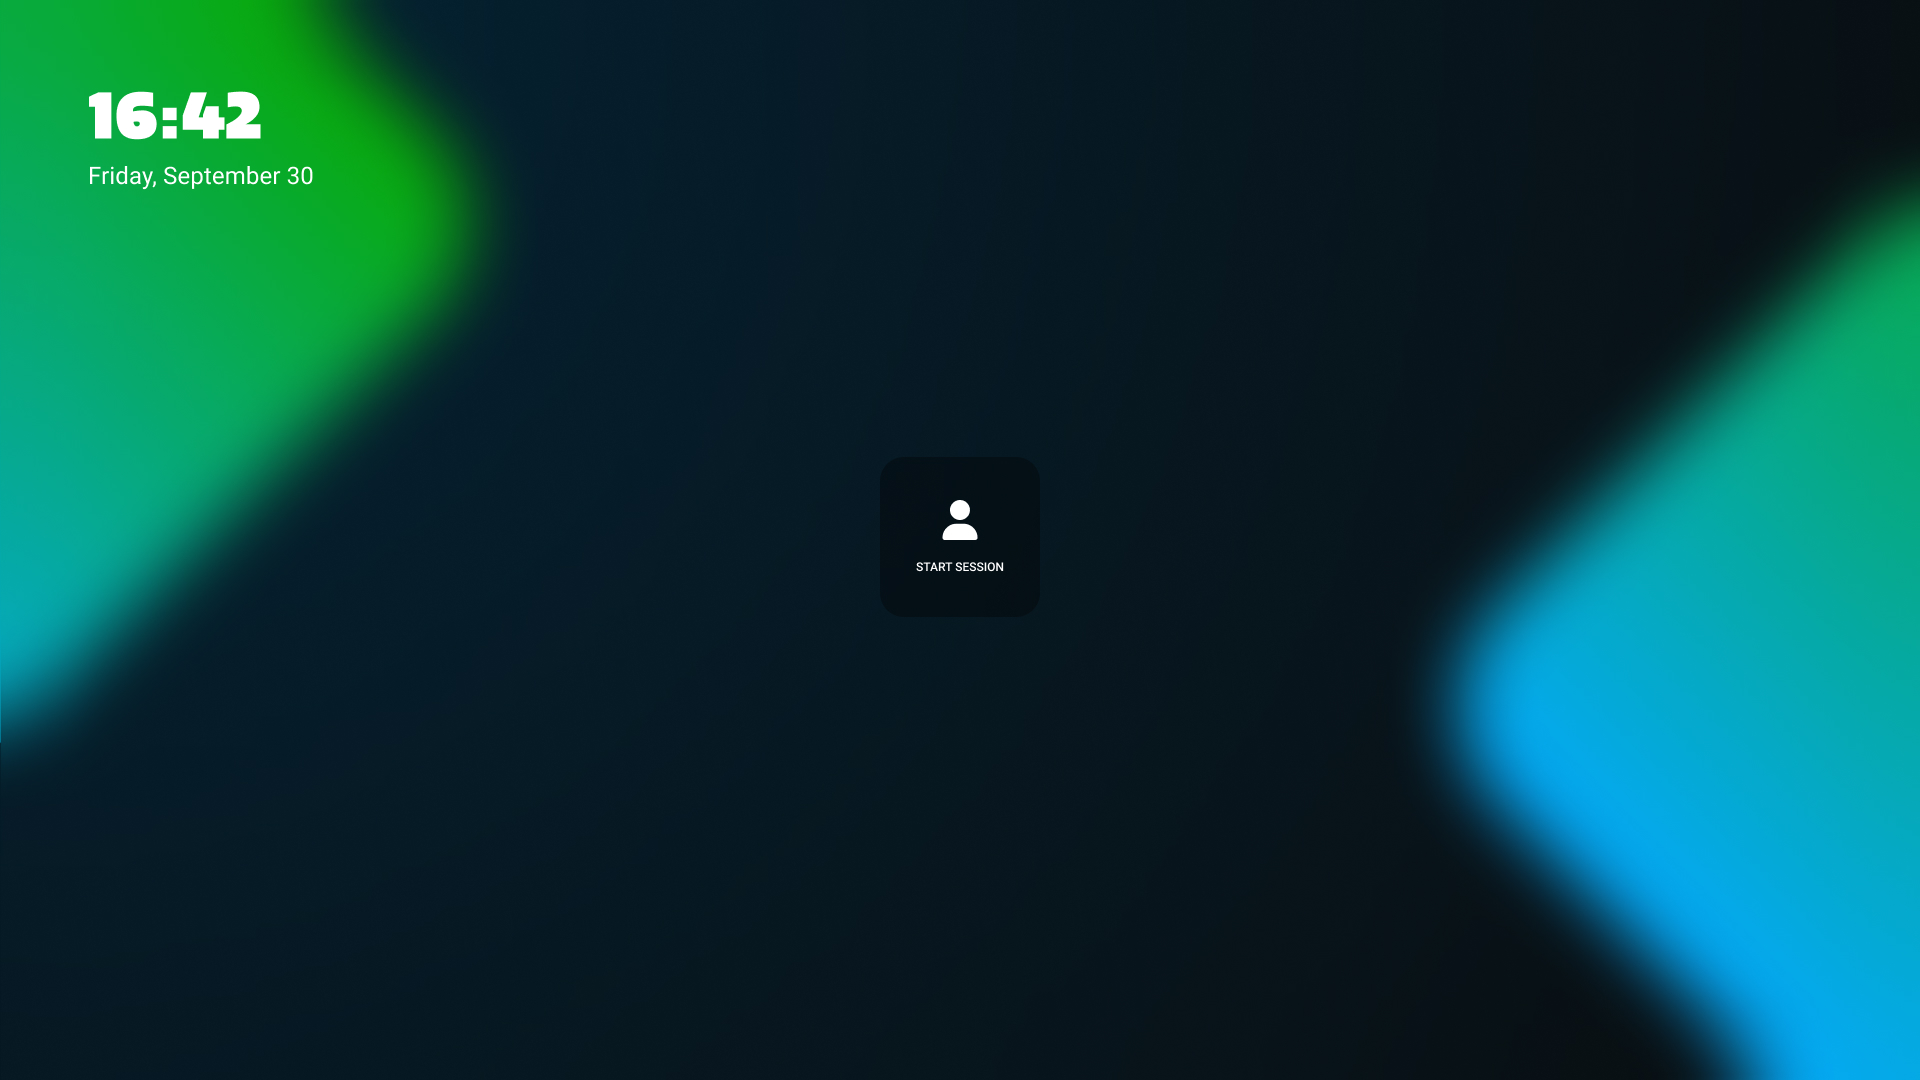
Guests only Mode
Set User Profiles & Guest Mode to Guests only and the Launcher Home Page on your i3CONNECT display will display a single tile, allowing only Guest sessions. When a user selects this tile, they will be explained that all session data will be removed when they sign out. A guest session will automatically end when inactivity is detected.
Guest PIN Lock
Enable Guest PIN Lock and guests will be required to enter that 4-digit PIN lock code to be able to start a session.


Send whiteboard data at end of session
By default, all data from the guest session will be removed when the session ends, either by the user or when inactivity occurs. Administrators can, however, choose to allow whiteboard data gathered in the session, to be sent to the user. Choose between cloud authentication (SSO with Google and Microsoft authentication as options), e-mail address authentication or allow both and let the user choose.
When a display user starts a guest session, they will see a dialog, asking them if they’d like to receive the whiteboard data. If they do, they will be asked to authenticate using one of the options selected.
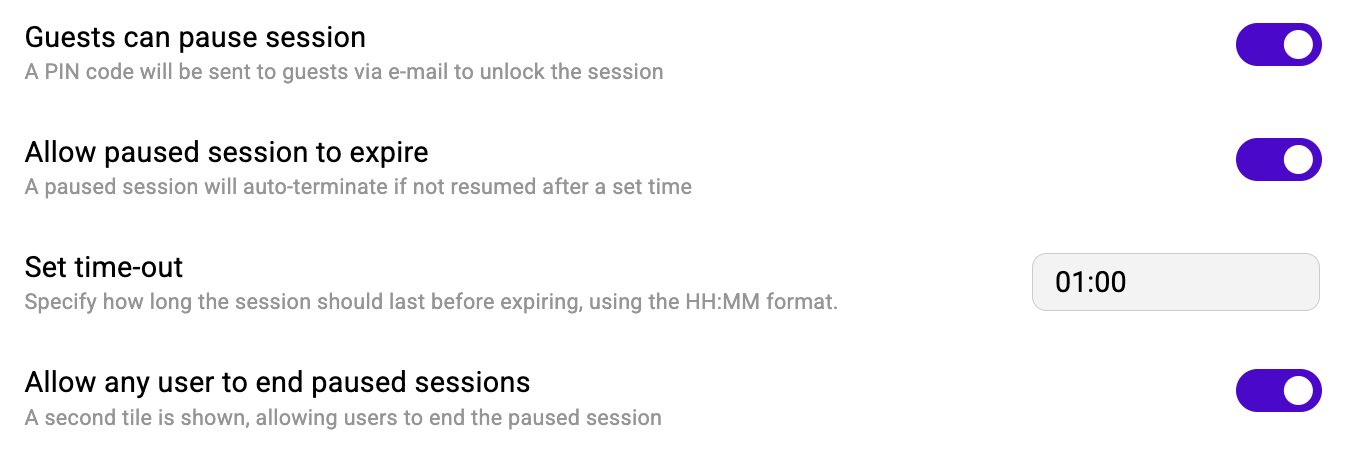
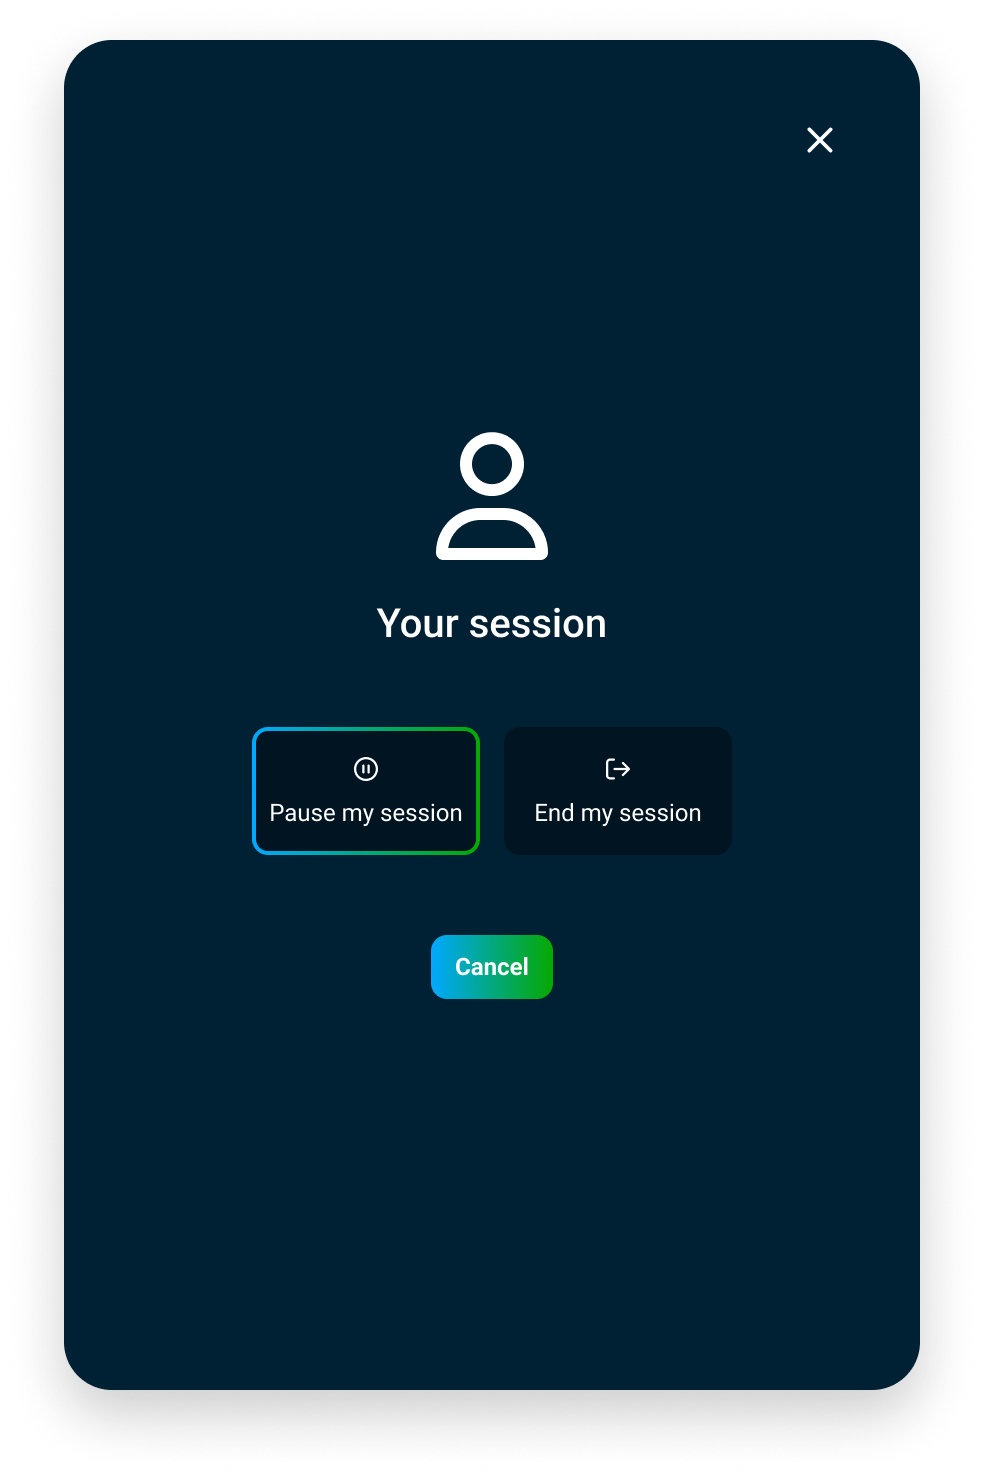
Pause and end a guest session
Ending a guest session means that all the data will be removed from the display. Enable “Guests can pause session” and they will be given the choice to either end or pause their session. If they pause the session, the display will be locked and can only be unlocked with a unique PIN lock.
This option is only available if cloud or e-mail authentication is enabled above, because if this setting is enabled, an e-mail will be sent to that display user with a unique PIN lock code to unlock the paused session.
The paused session can be set to automatically expire, after a given time-out period.
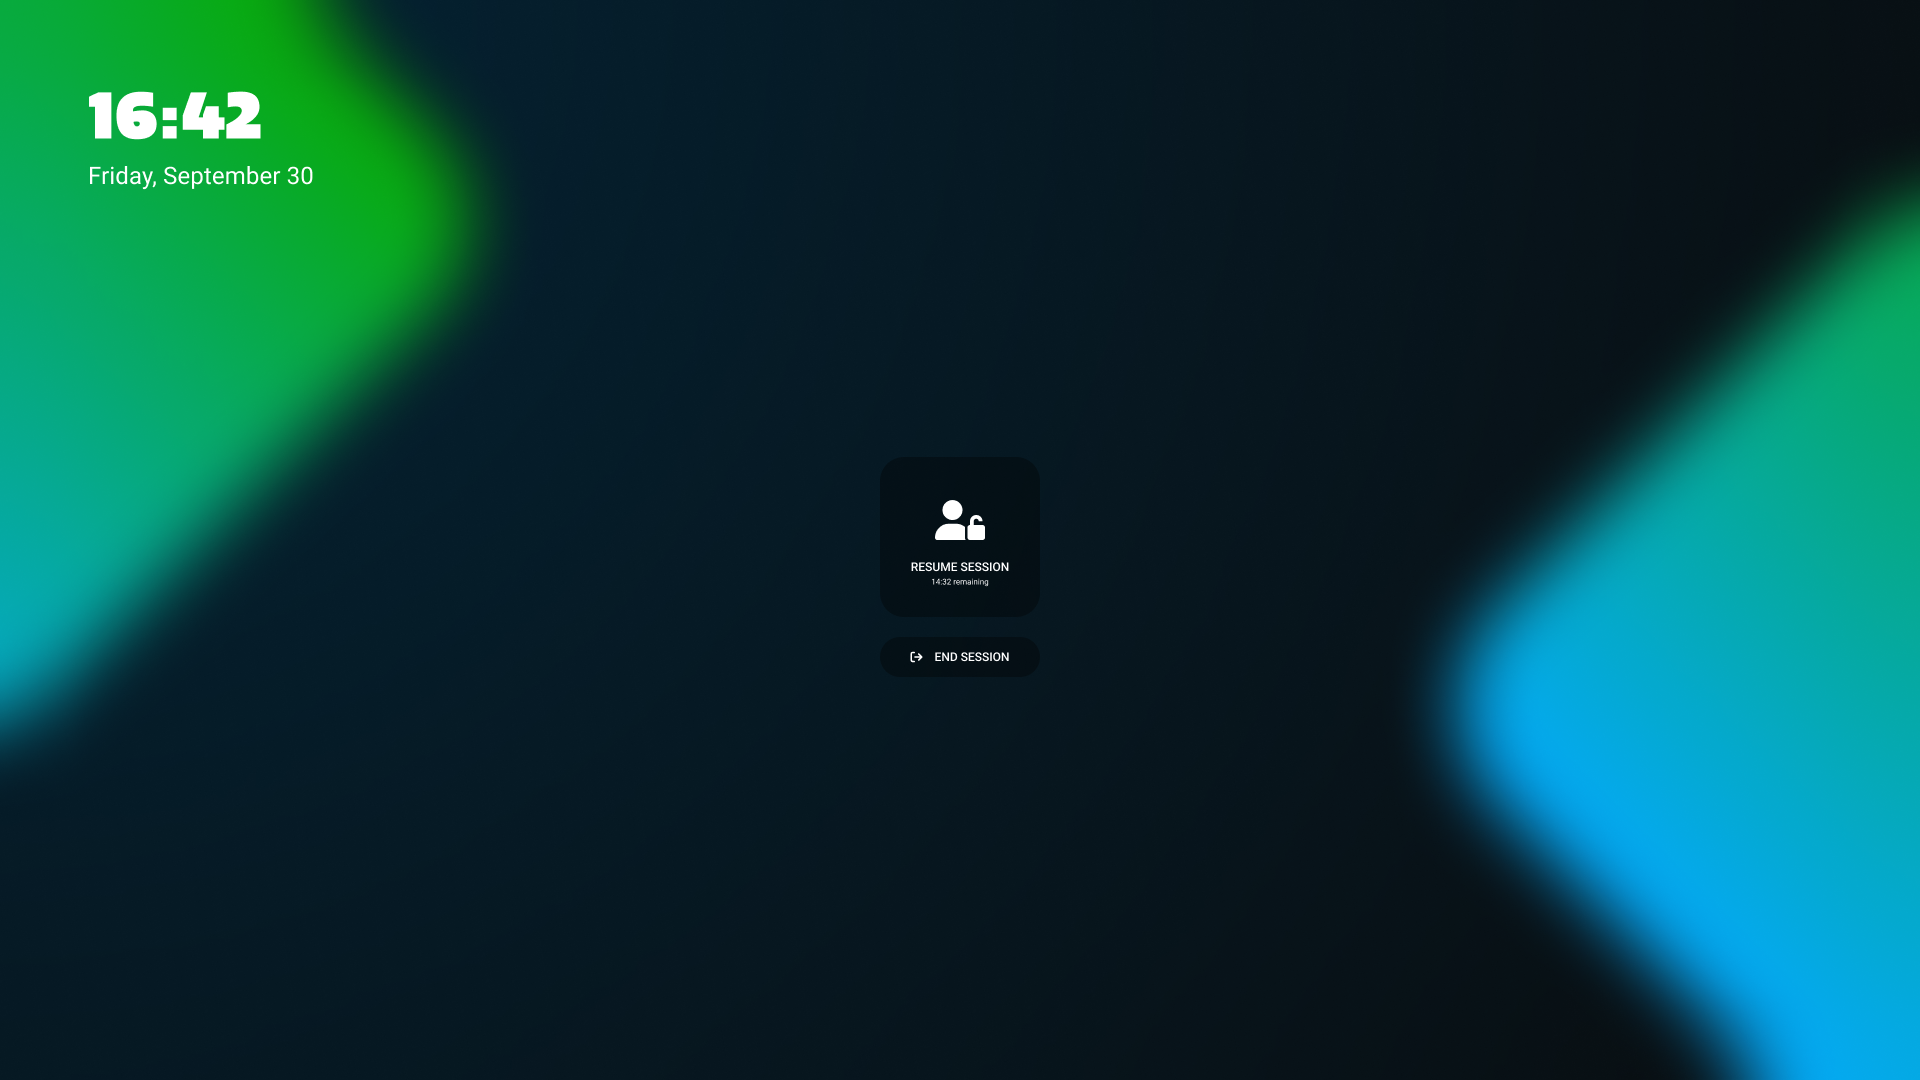
Ending a paused session
You can configure paused sessions to end automatically after a defined time and/ or allow other display users who want to use the display to end the paused session on the display. This adds a button to the launcher screen, allowing display users to end a paused session. The session will end and, if configured, send the whiteboard data to the user that initiated the previous session. The display will then allow for a new guest session to be initiated.
How to configure your i3CONNECT display to use User Profiles
Along with the powerful Guest session, you can also enable User Profiles. User Profiles is perfect for returning users that want to keep their whiteboard data in the cloud so they can access them easily every time they sign on. Even though users can also connect Whiteboard to the cloud in open Studio environments, User Profiles provides the user with more security, as their profile data will only be available to them, on any device they sign on to.

In the Admin Settings, select Access Management. Locate “User profiles & Guest access” and select “User Profiles”.
The launcher screen will change and display two tiles “User Profile” and “Guest session”. The Guest session is the same as explained above.
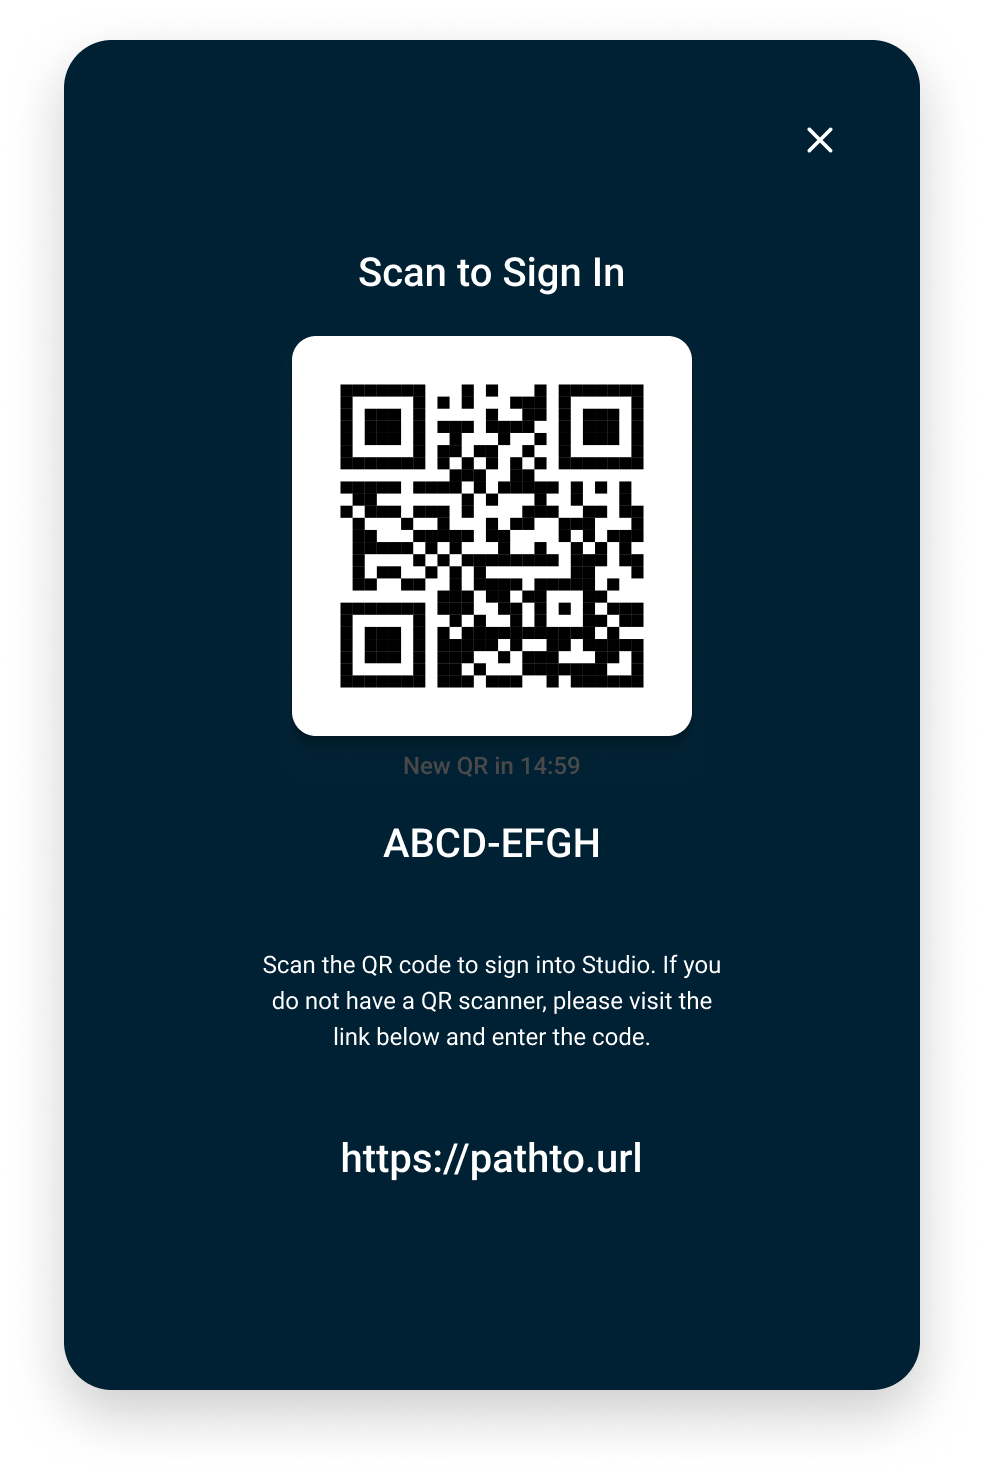
User profiles will allow a registered display user to sign on using SSO cloud authentication, either by scanning a QR code with a mobile phone or entering the URL below in a browser. The user will be asked how they wish to authenticate, allowing a Microsoft or a Google account.
They have a limited time to do so. If the authentication window expires, they can request a new one.
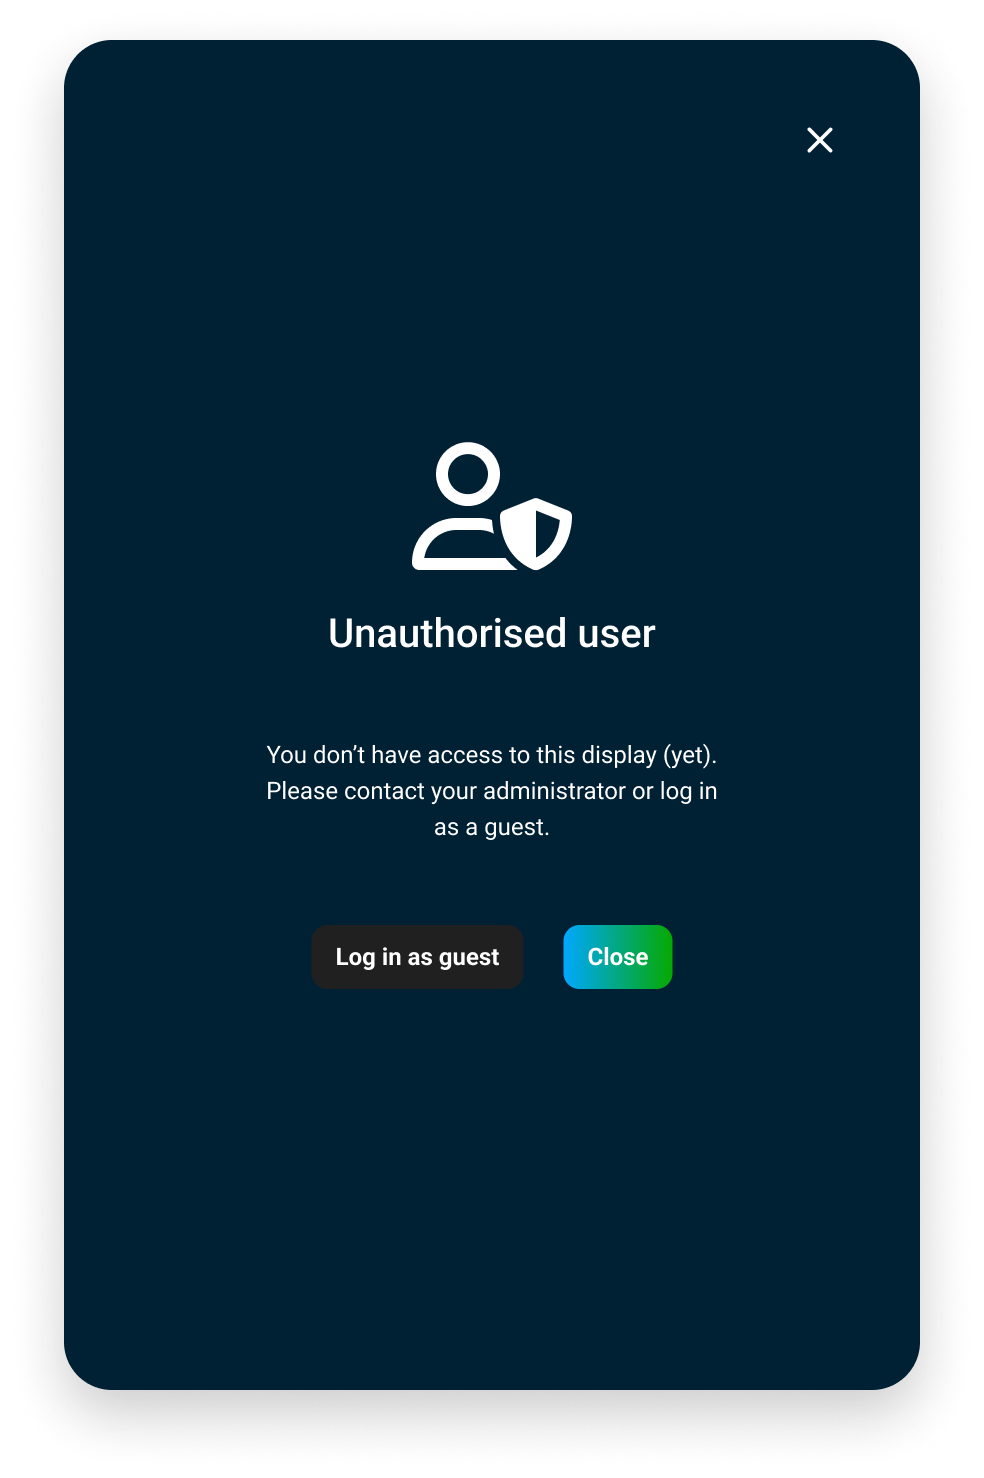
The display user needs to be a registered Display user to be able to sign on as a User Profile. Display users can be added to individual or a group of i3CONNECT displays in “Display Users” or in the overview table of the device details .
Adding and managing Display users can be done in “Display users”. See Managing Display Users for more information.
How to combine sessions and/ or User profiles with predefined input sources
Configure your i3CONNECT display to allow users to bypass the user access and, just like on an open display, immediately switch to a connected external source. Up to three sources can individually be defined in i3CONNECT Cortex by an administrator.
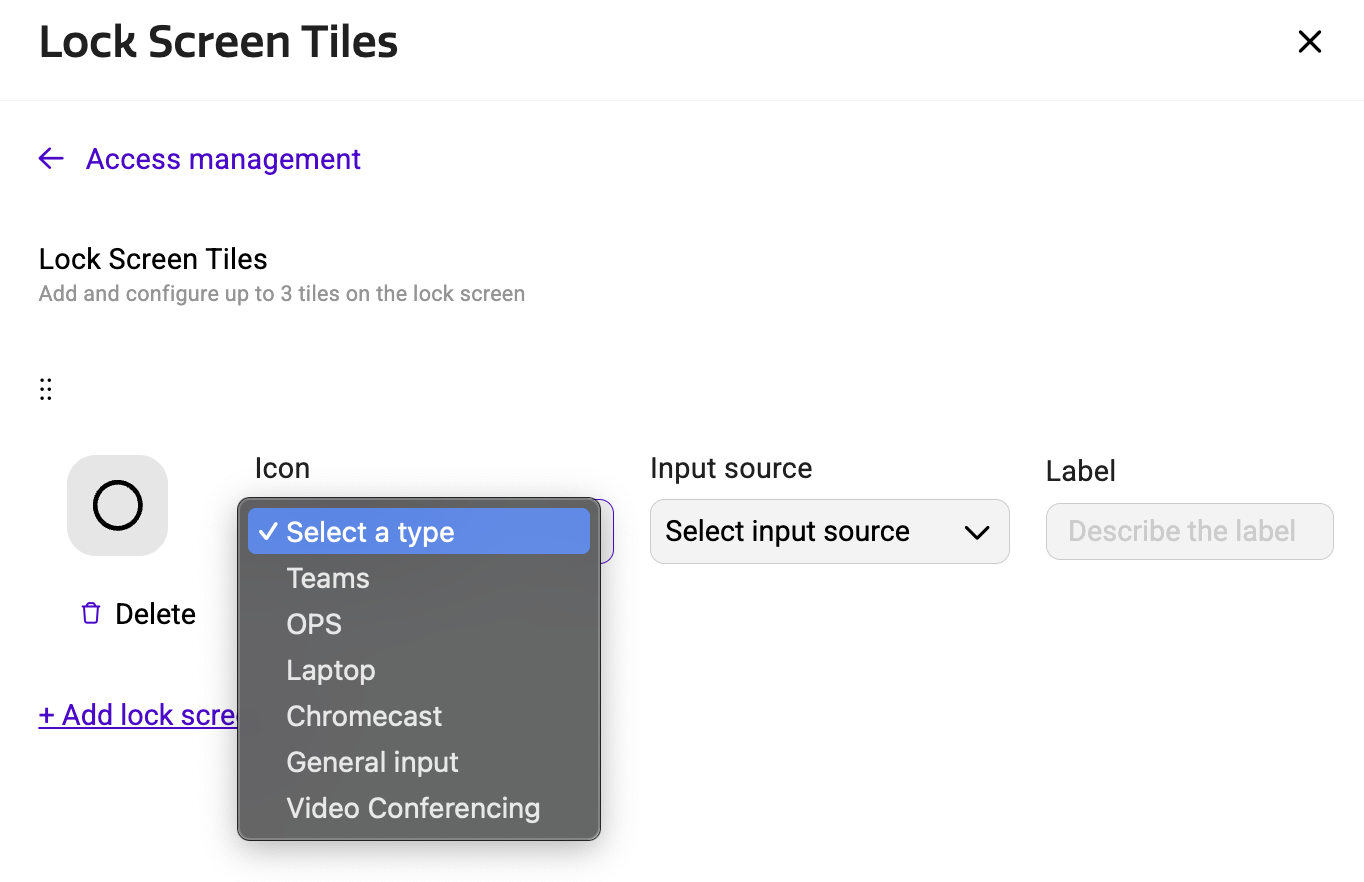
In the Admin Settings, select Access Management. Locate the subsection “Lock Screen Tiles” and open it.
Select “+ Add lock screen tile” and a few options appear, depending on the available connected input sources on the i3CONNECT display. You can add up to three input sources.
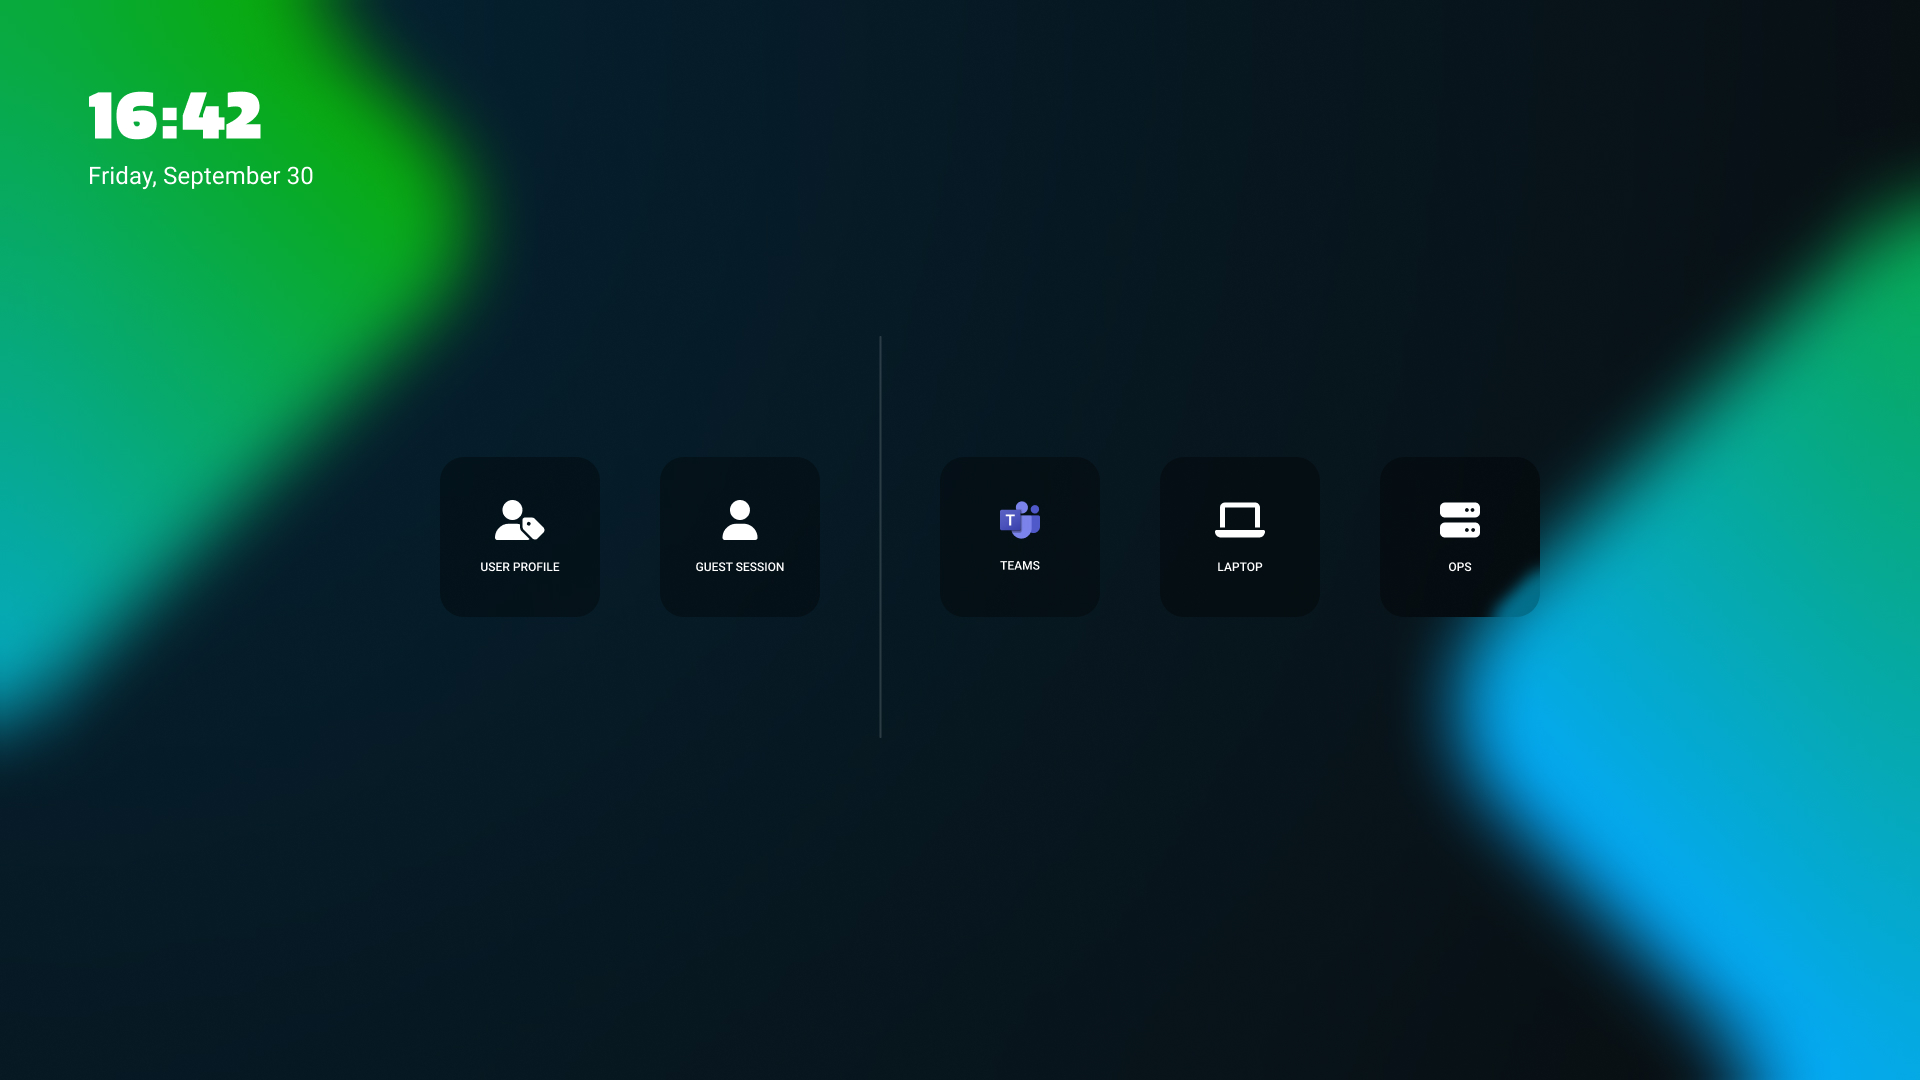
Your launcher screen might appear similar to this. To the left, the connection methods appear. If only Guest access is allowed, the User Profile access will not be displayed.
To the right, the input sources will be displayed. Users that connect it, will be brought immediately to that input source.
If an input source is offline or not available, the tile can not be selected and will be greyed out to visually show the user that the source is not available.
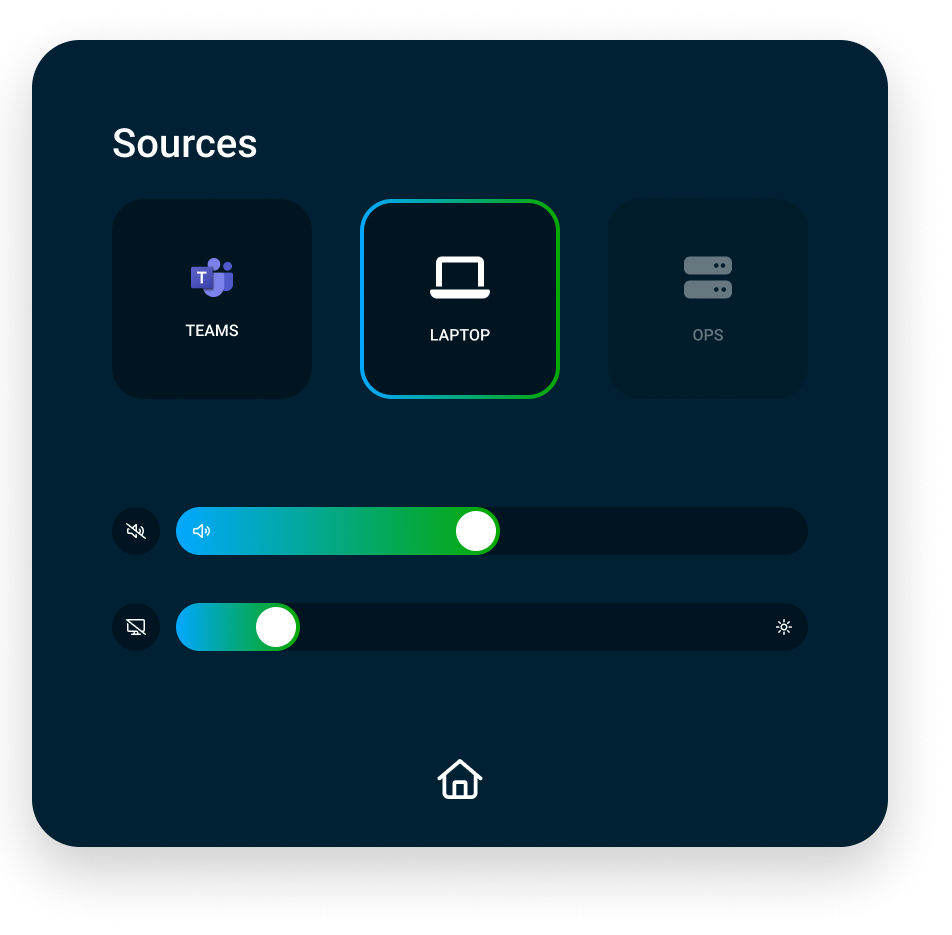
The Side menu will now only display the available input sources, allowing users to quickly switch between input sources. To go back to the Launcher screen, select the Home button.